


TF Beechcraft Bonanza F33A Build
 03-27-2020, 04:10 PM
#1001


I wasn't sure due to the lighting and shadows. Believe it or not, the Jug was covered in silver Ultracote in individual panels sanded in different directions for the effect then Klass Kote paint for all the markings,stripes and weathering.
This why I leave the scale stuff to you guys (experts) and the easy pattern birds for me.
This why I leave the scale stuff to you guys (experts) and the easy pattern birds for me.

 03-28-2020, 01:12 PM
#1003

That's the kind of detail that a real life pilot can appreciate!
Strobes can be very annoying at night without those things although they're pretty useless in a cloud where the light just bounces back at you. When that happens you can turn the strobes off since you and all other aircraft need to be on IFR anyway in such conditions.
Strobes can be very annoying at night without those things although they're pretty useless in a cloud where the light just bounces back at you. When that happens you can turn the strobes off since you and all other aircraft need to be on IFR anyway in such conditions.
Last edited by airsteve172; 03-28-2020 at 01:18 PM.

The following users liked this post:
TeseractLabs (03-30-2020)

 03-29-2020, 09:40 AM
#1006
Thread Starter
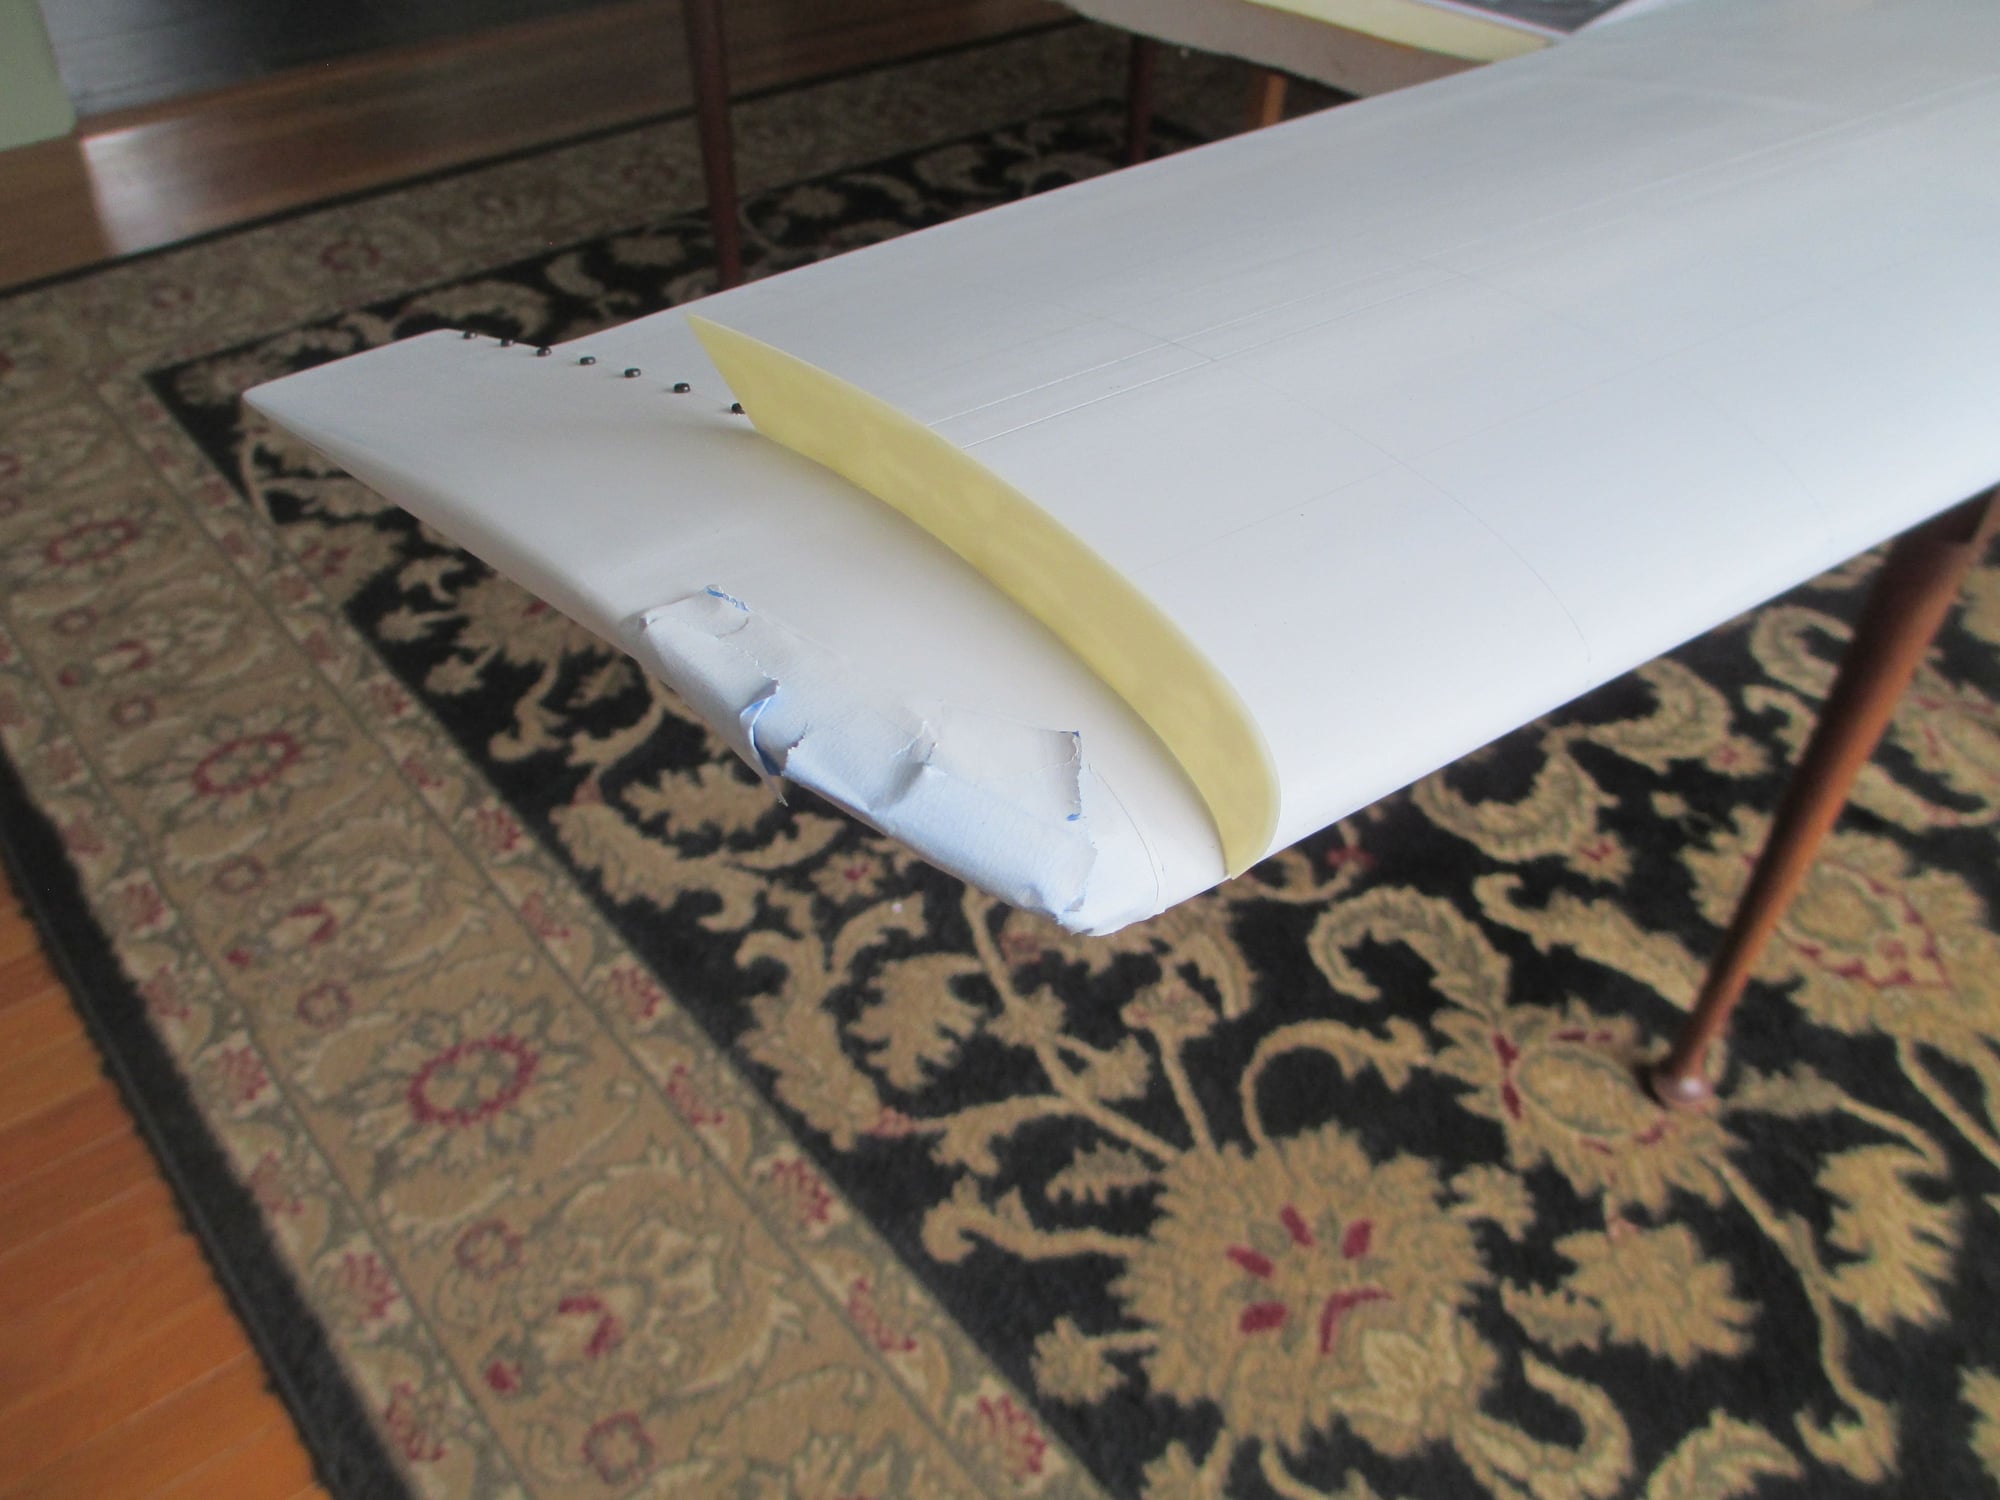
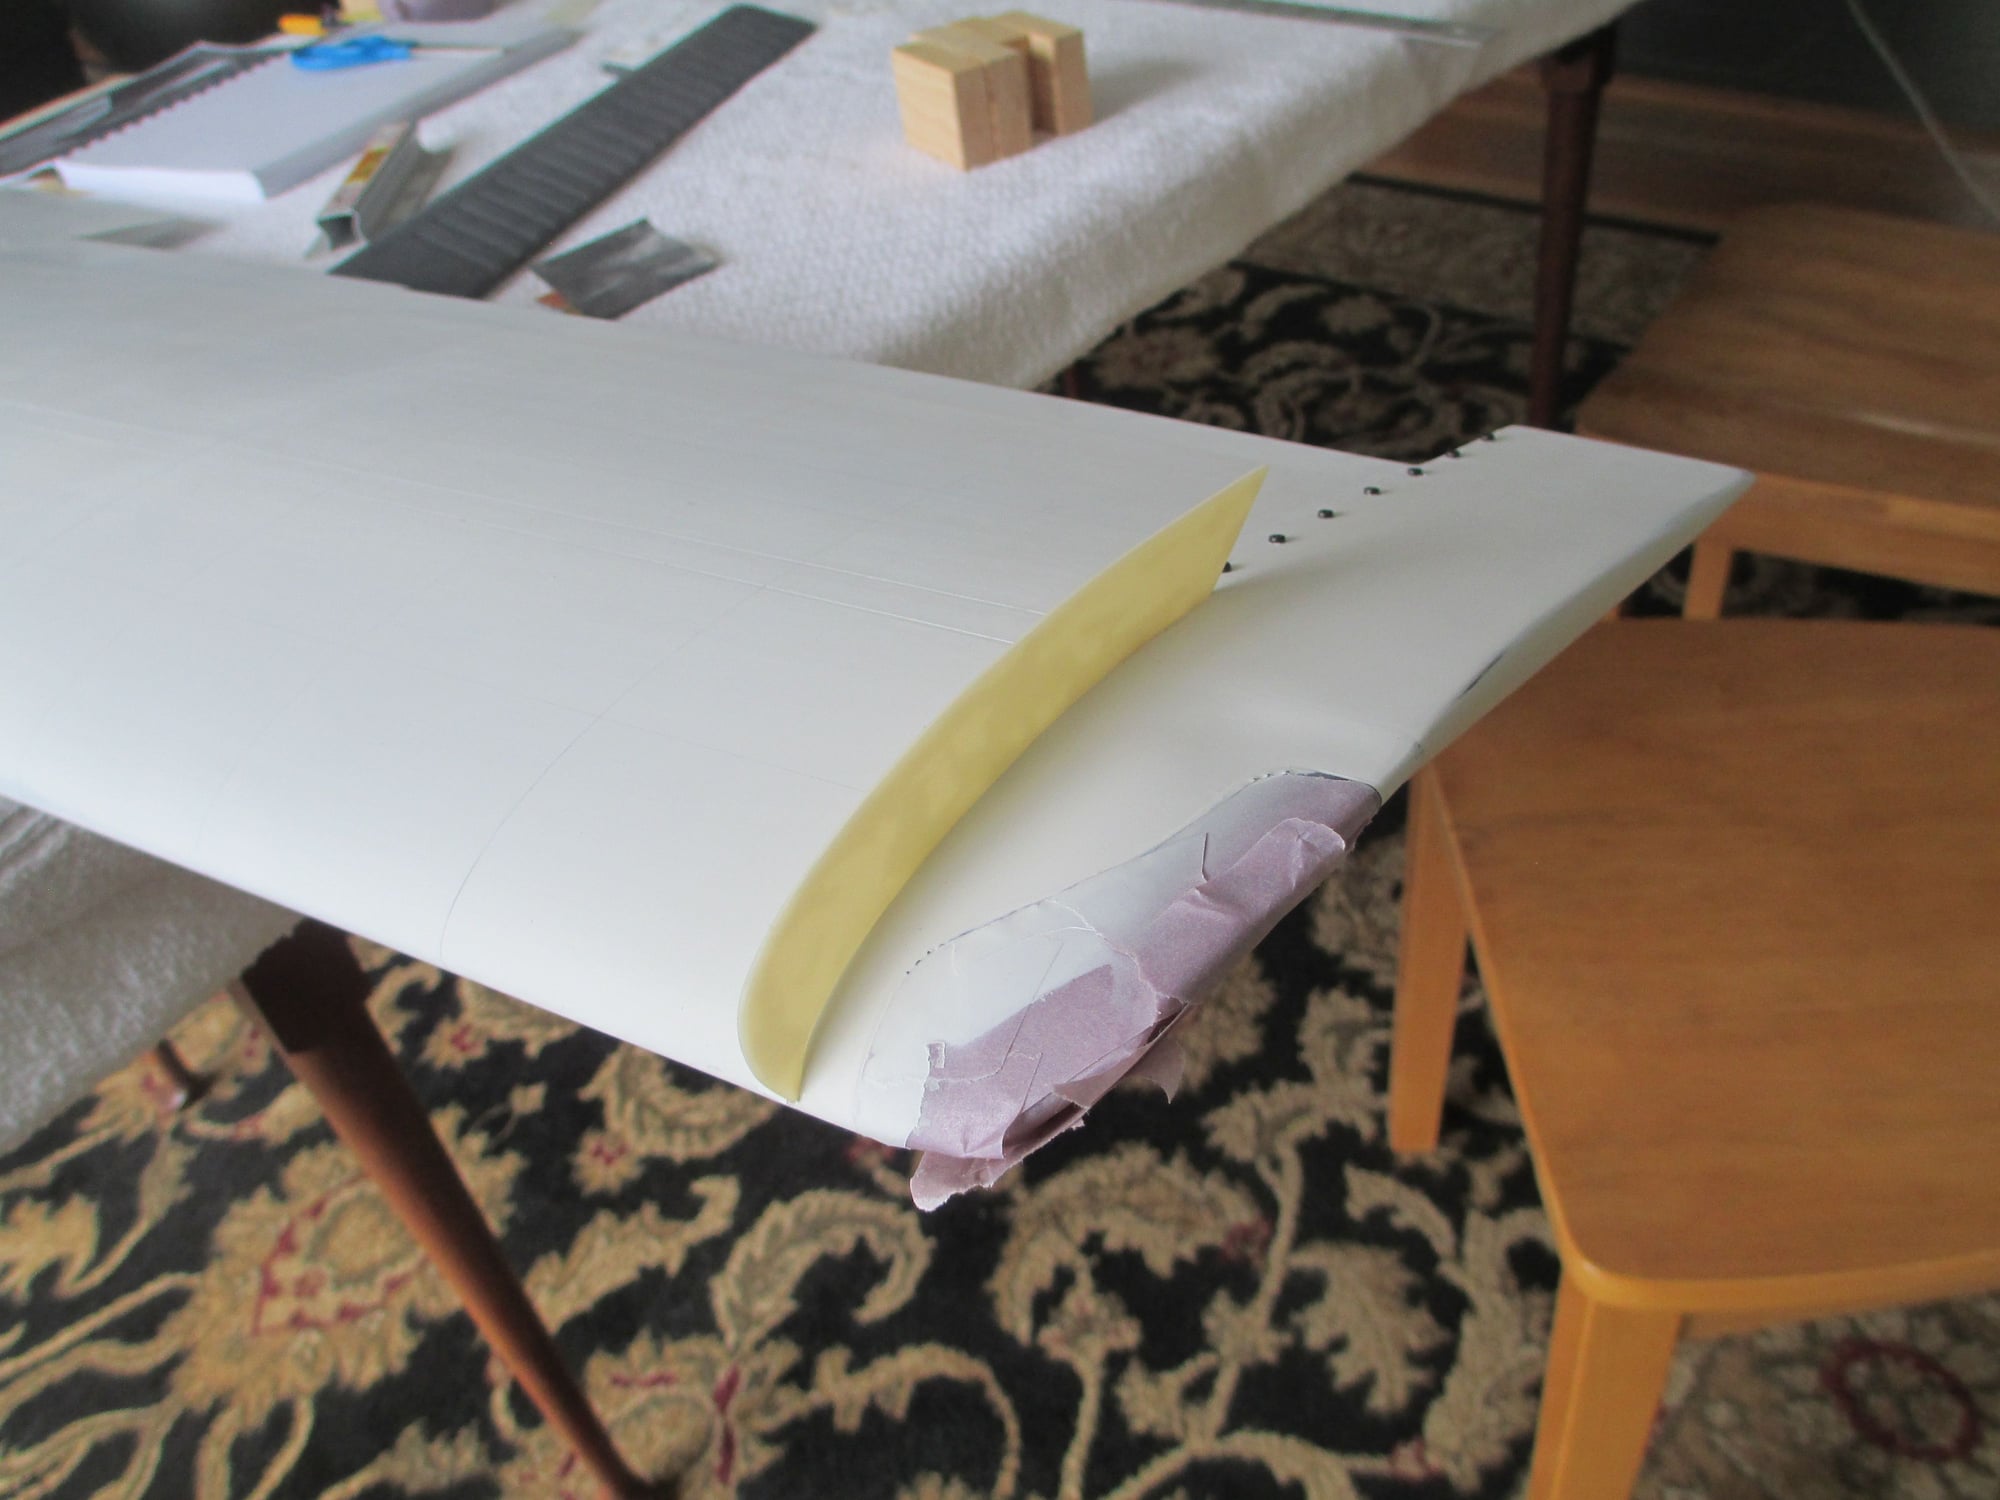
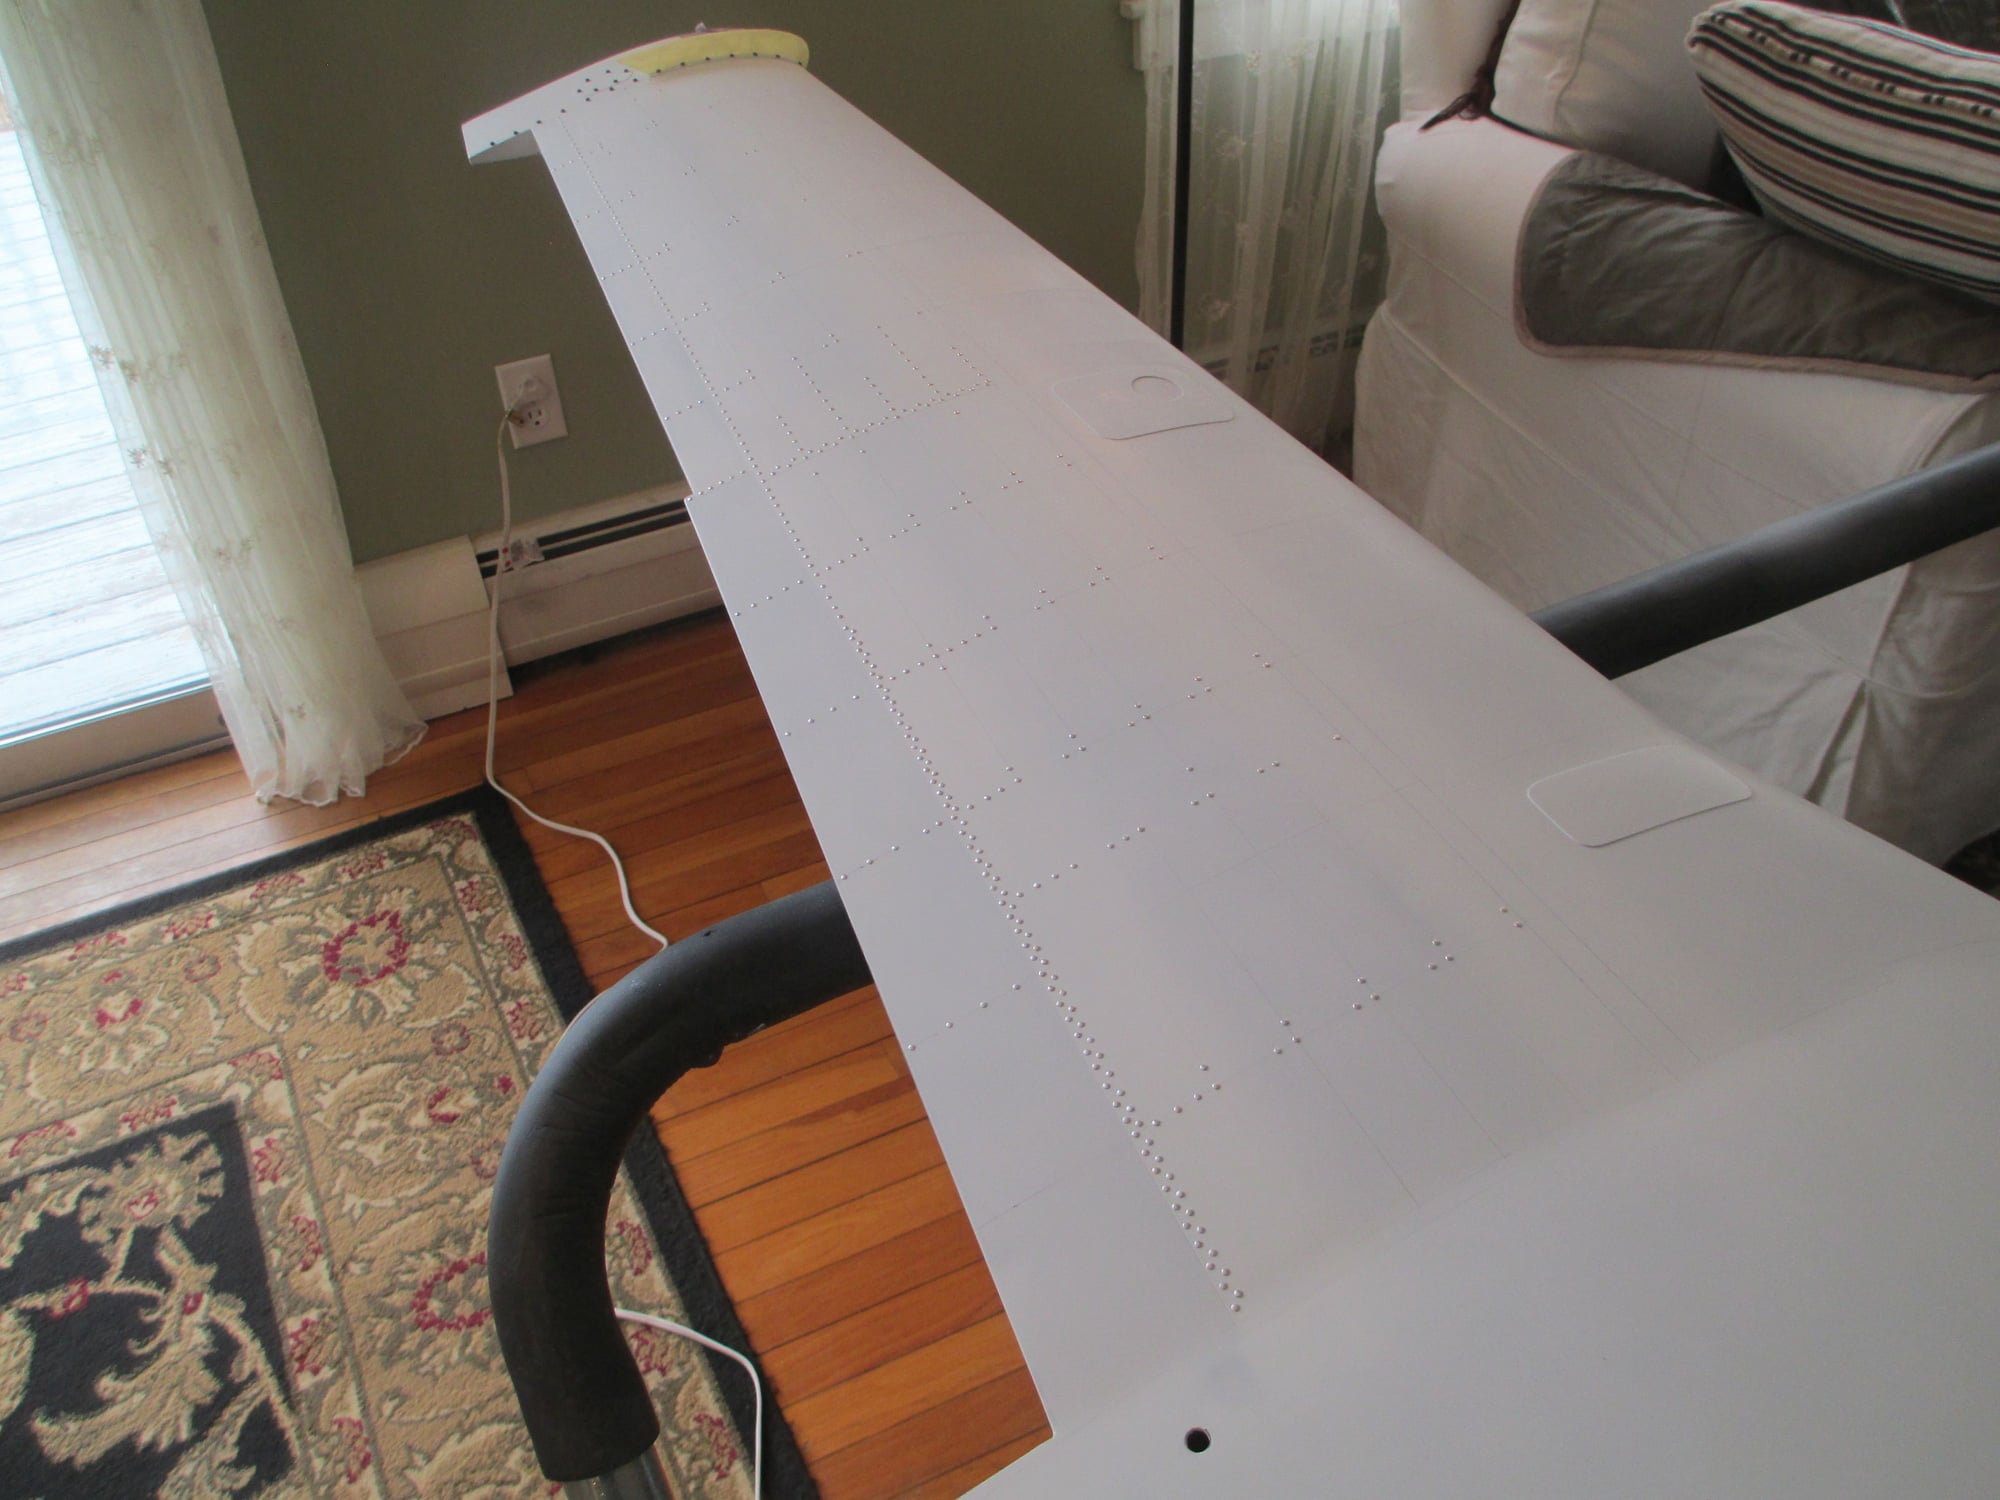
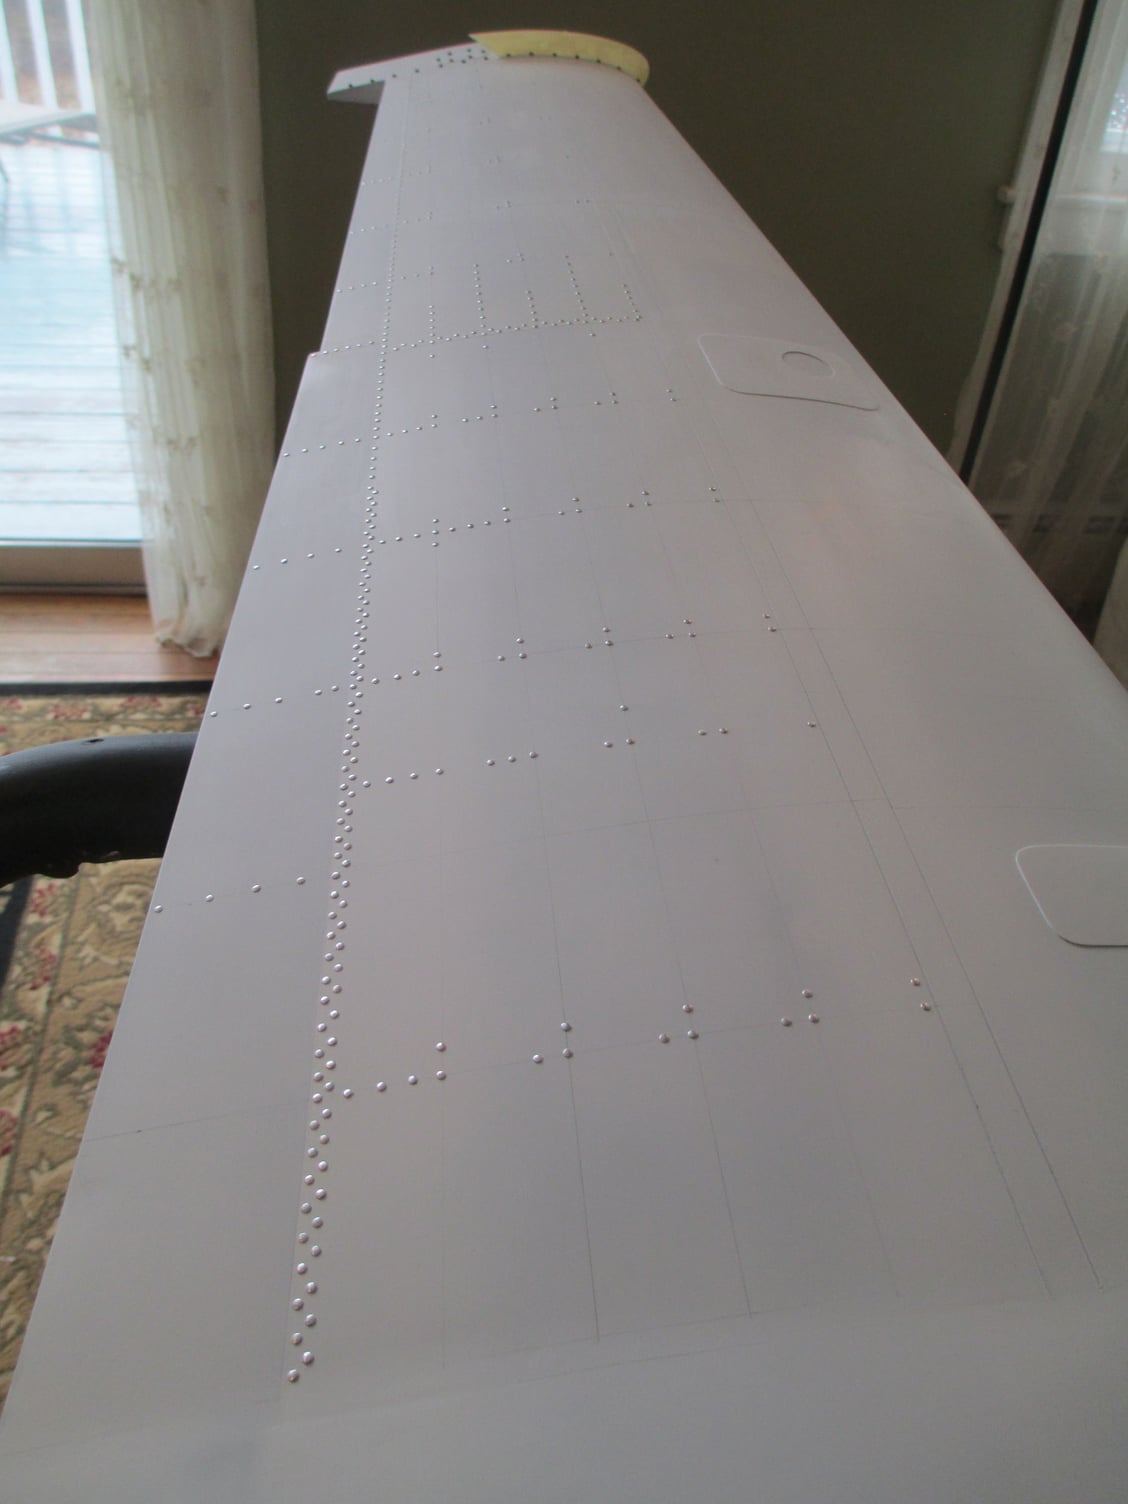
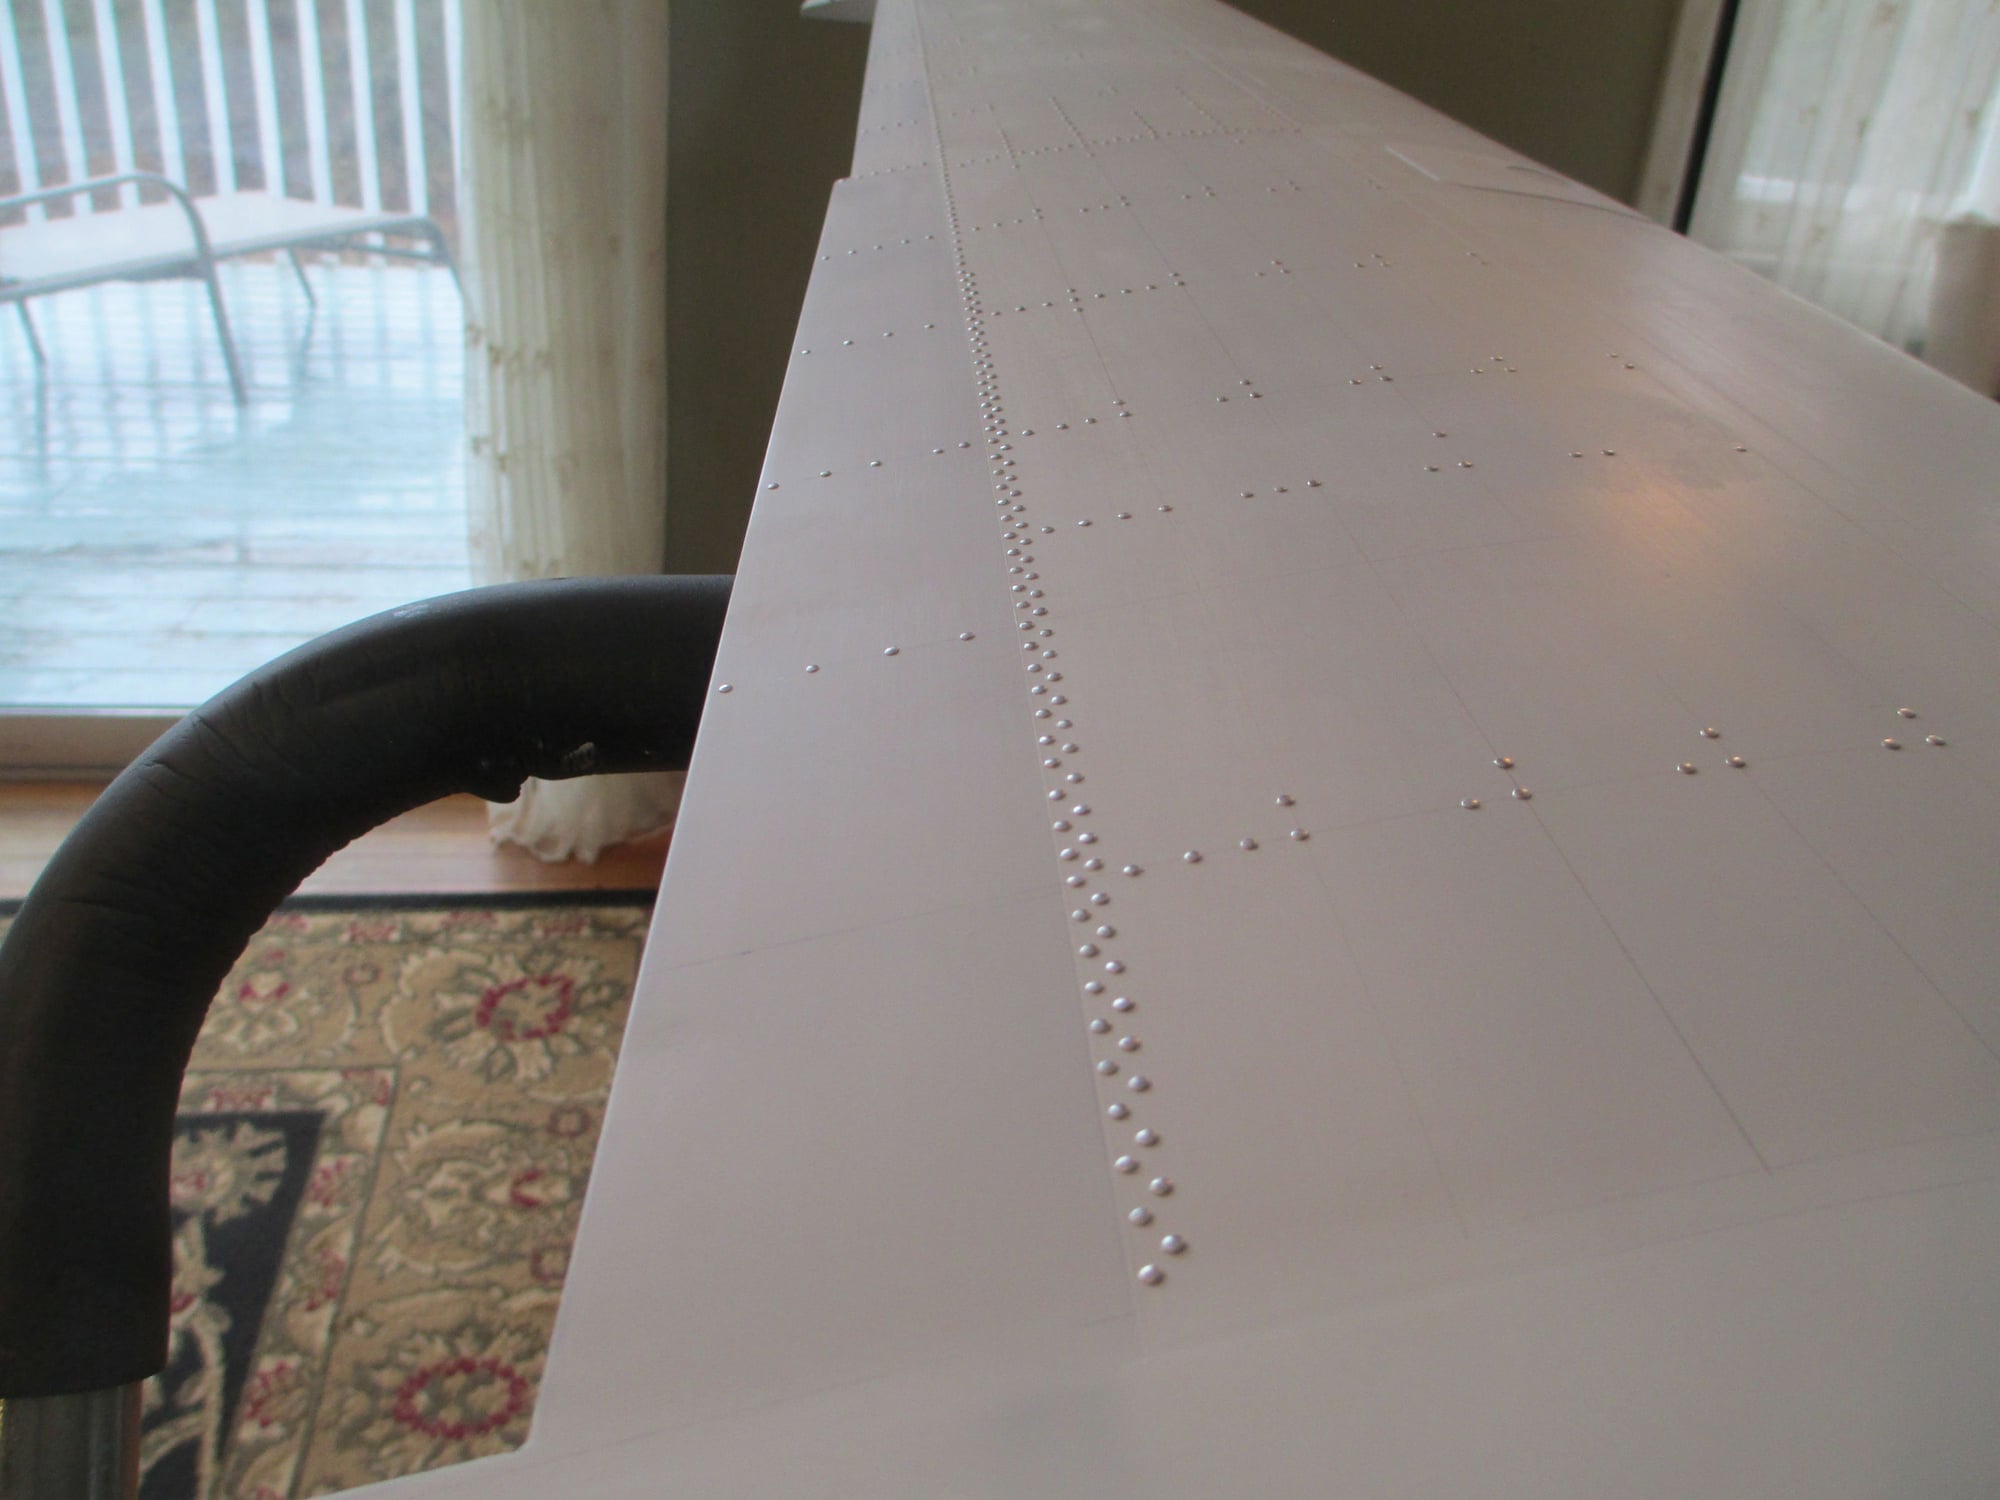
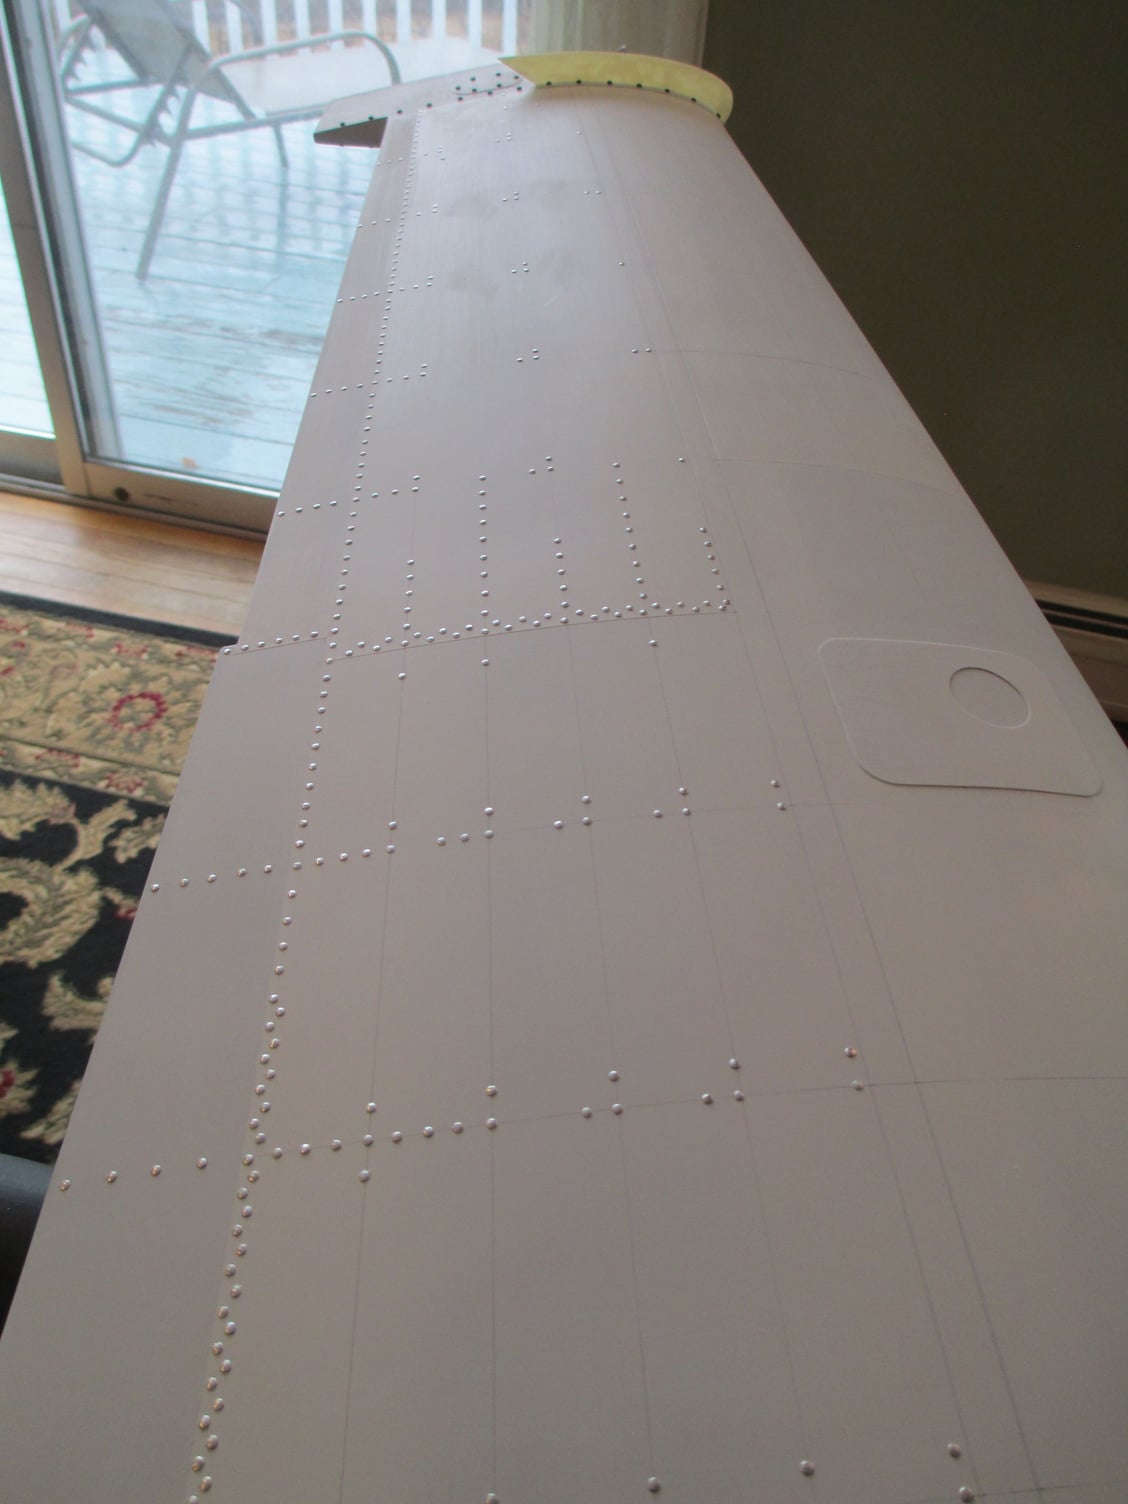
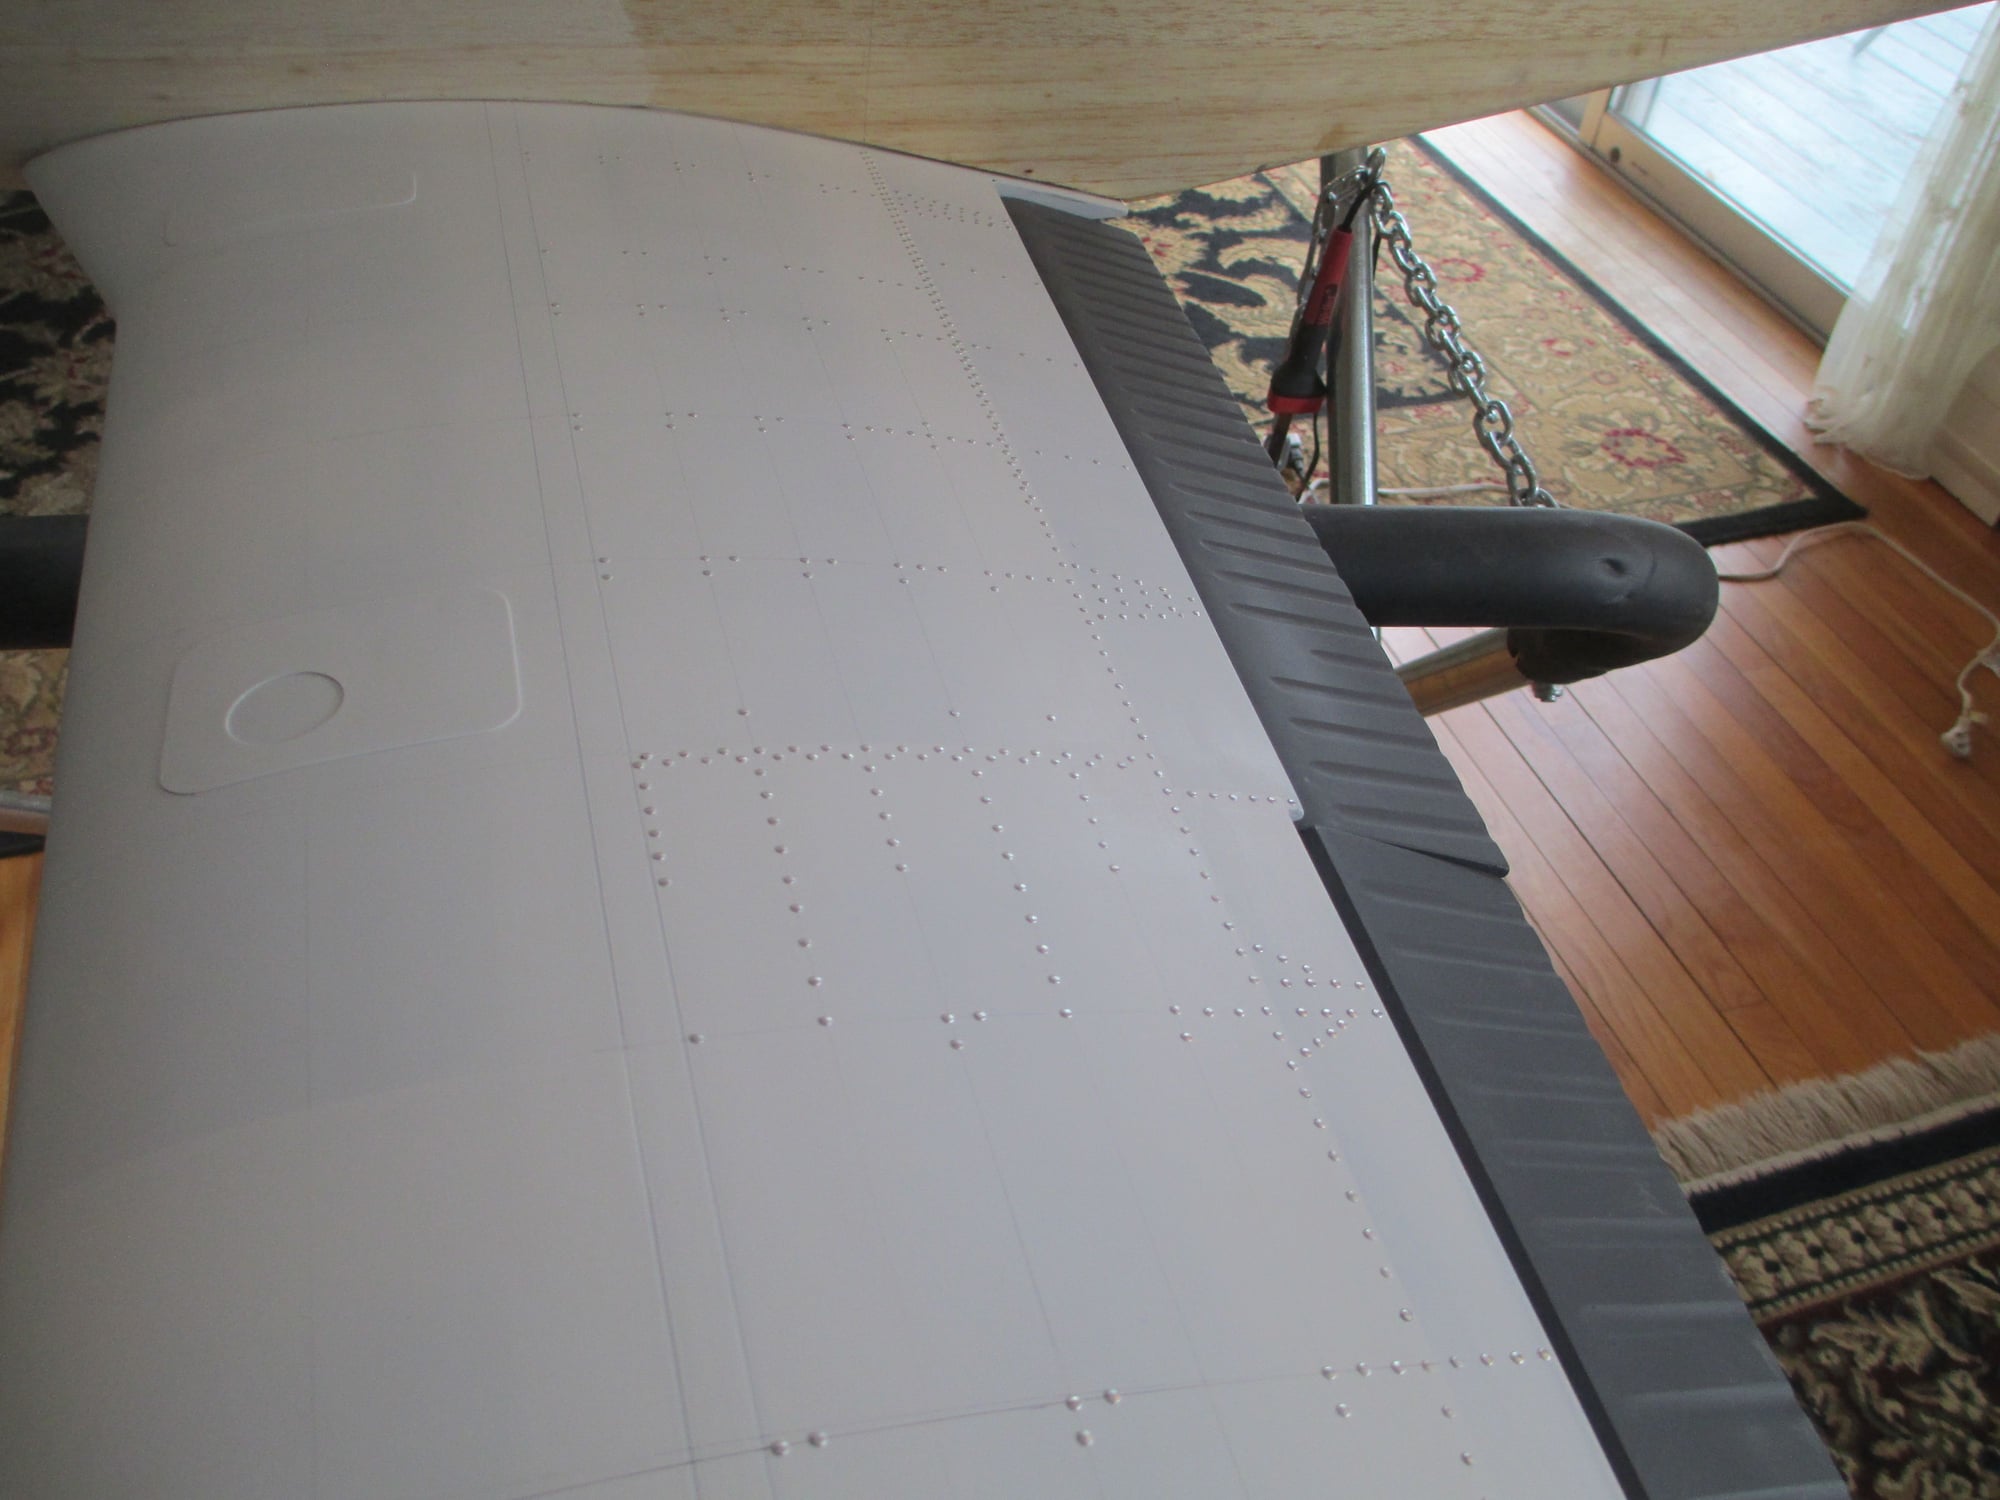
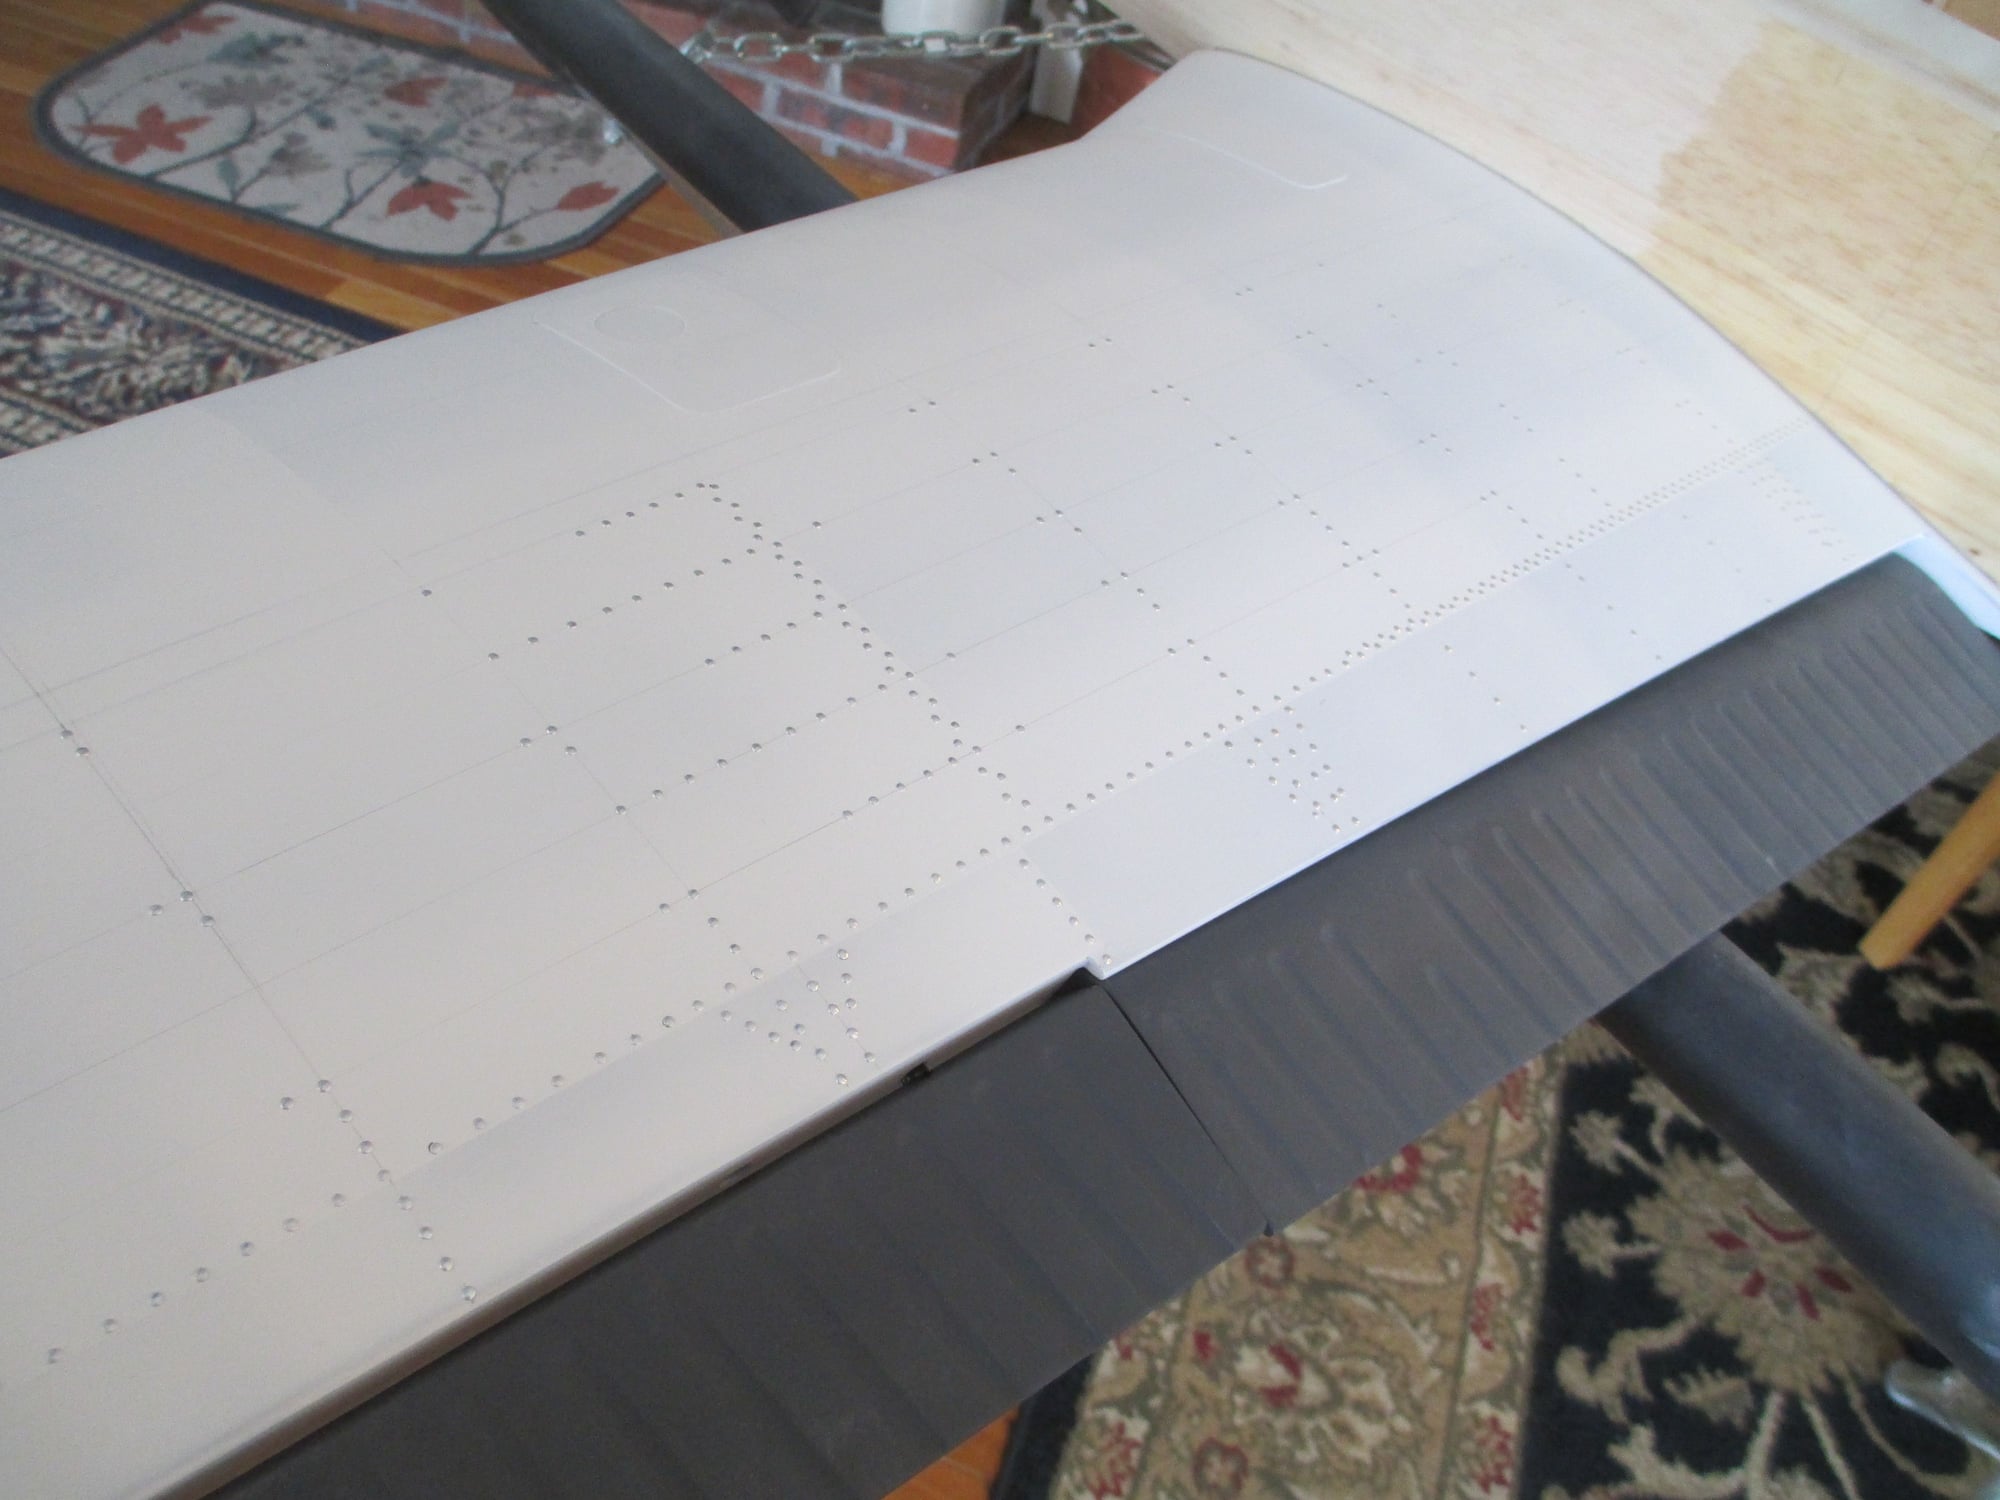
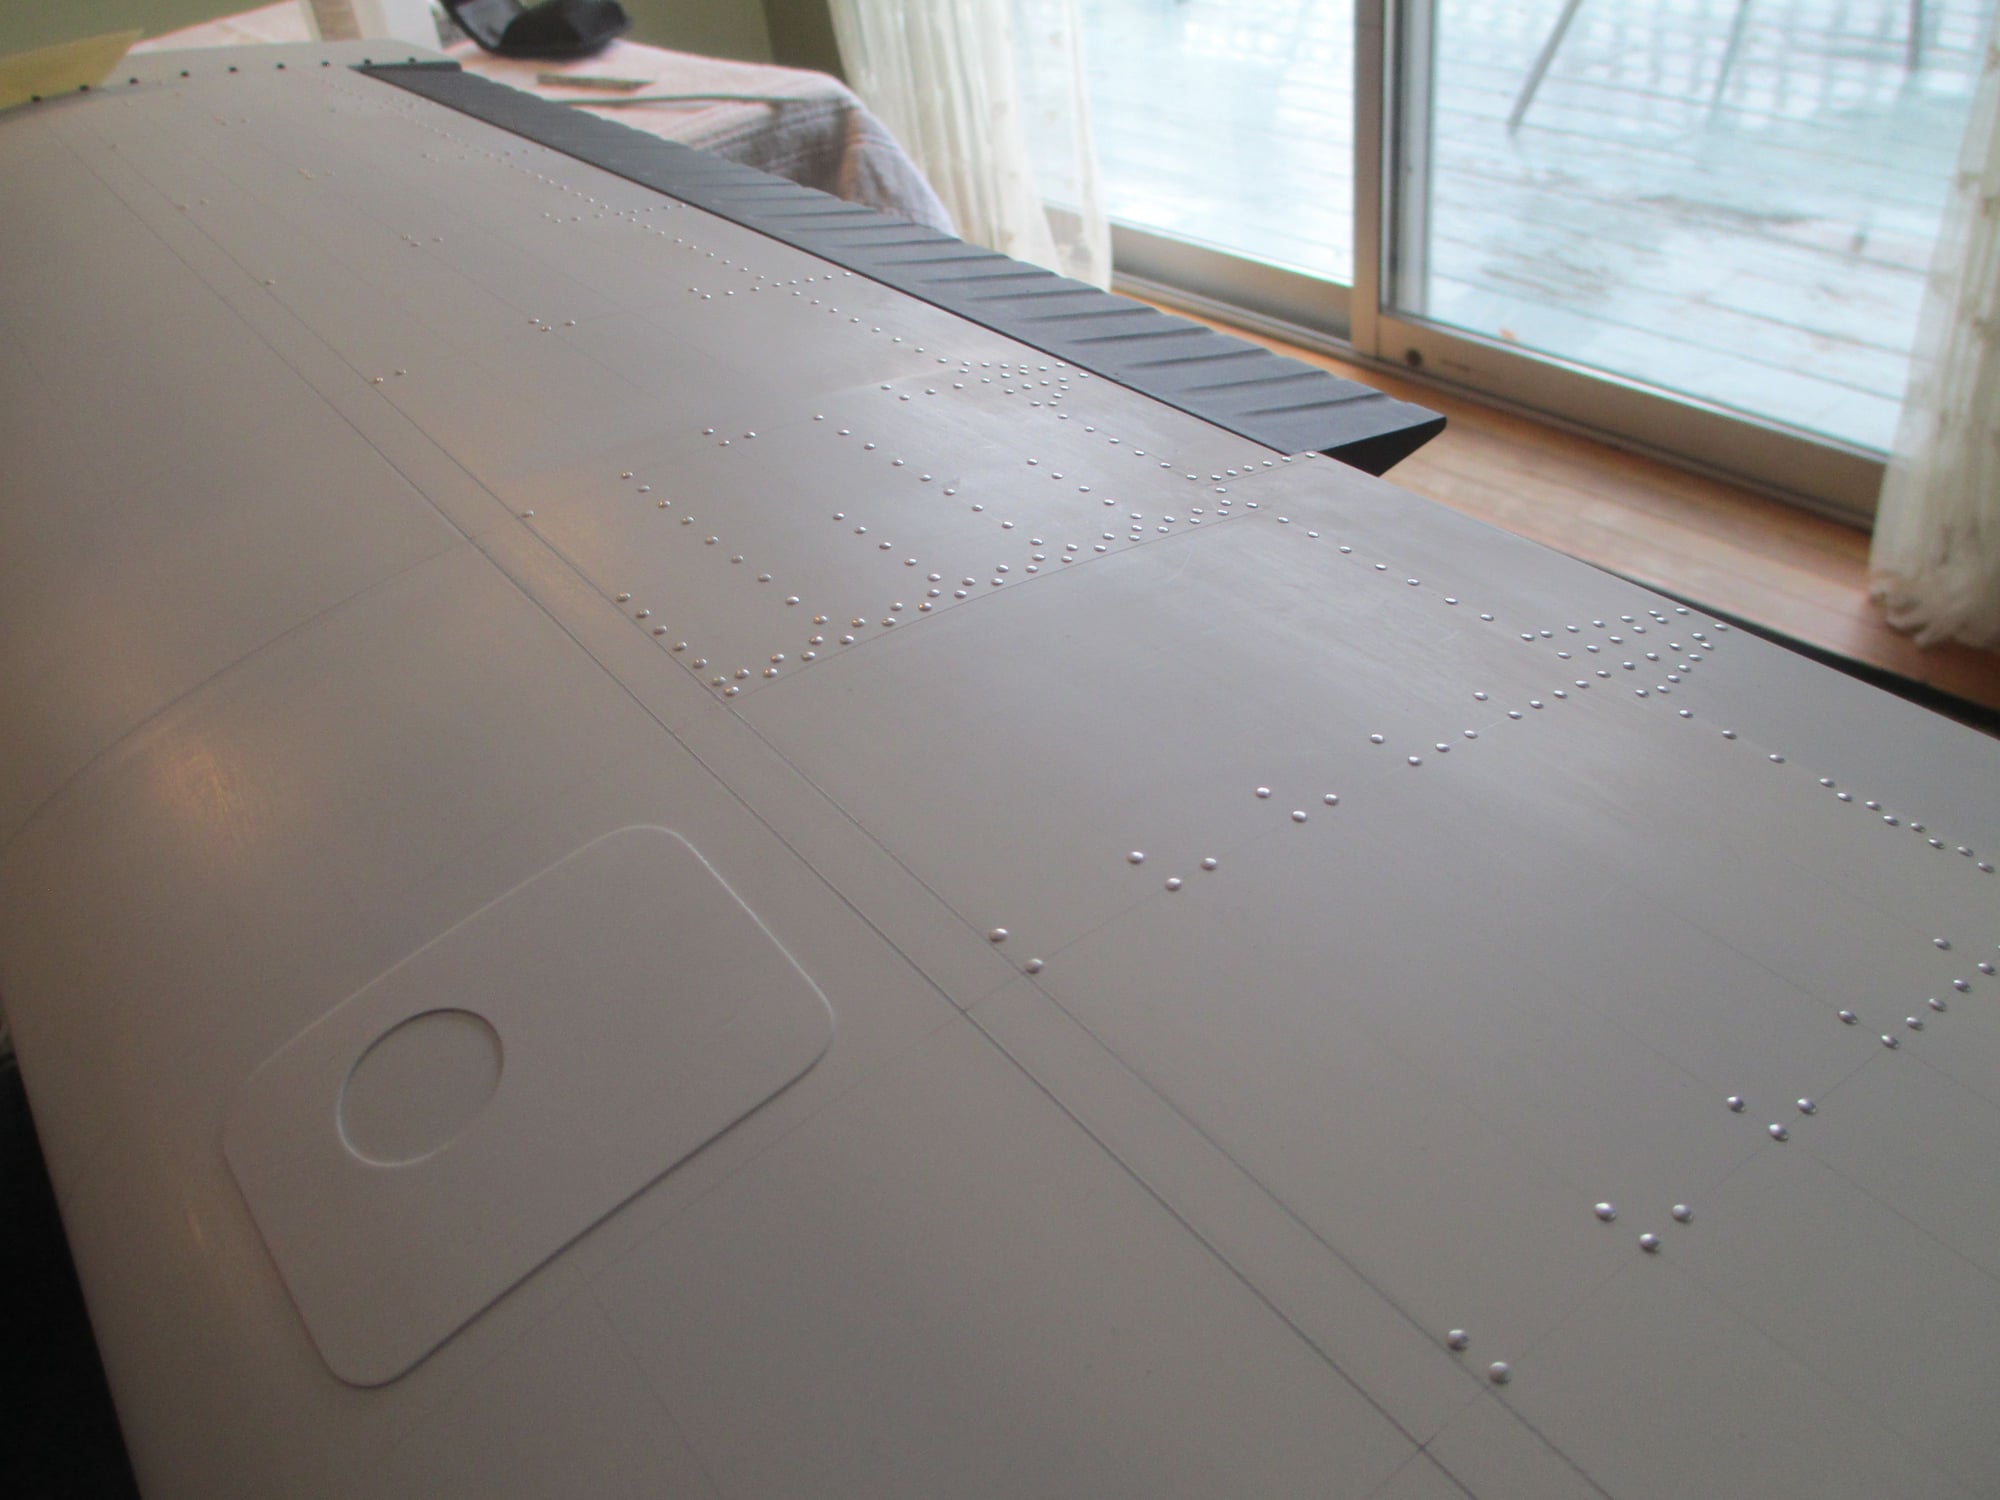
The time has come to apply the rivets. Time to add some bling to this wing!!!

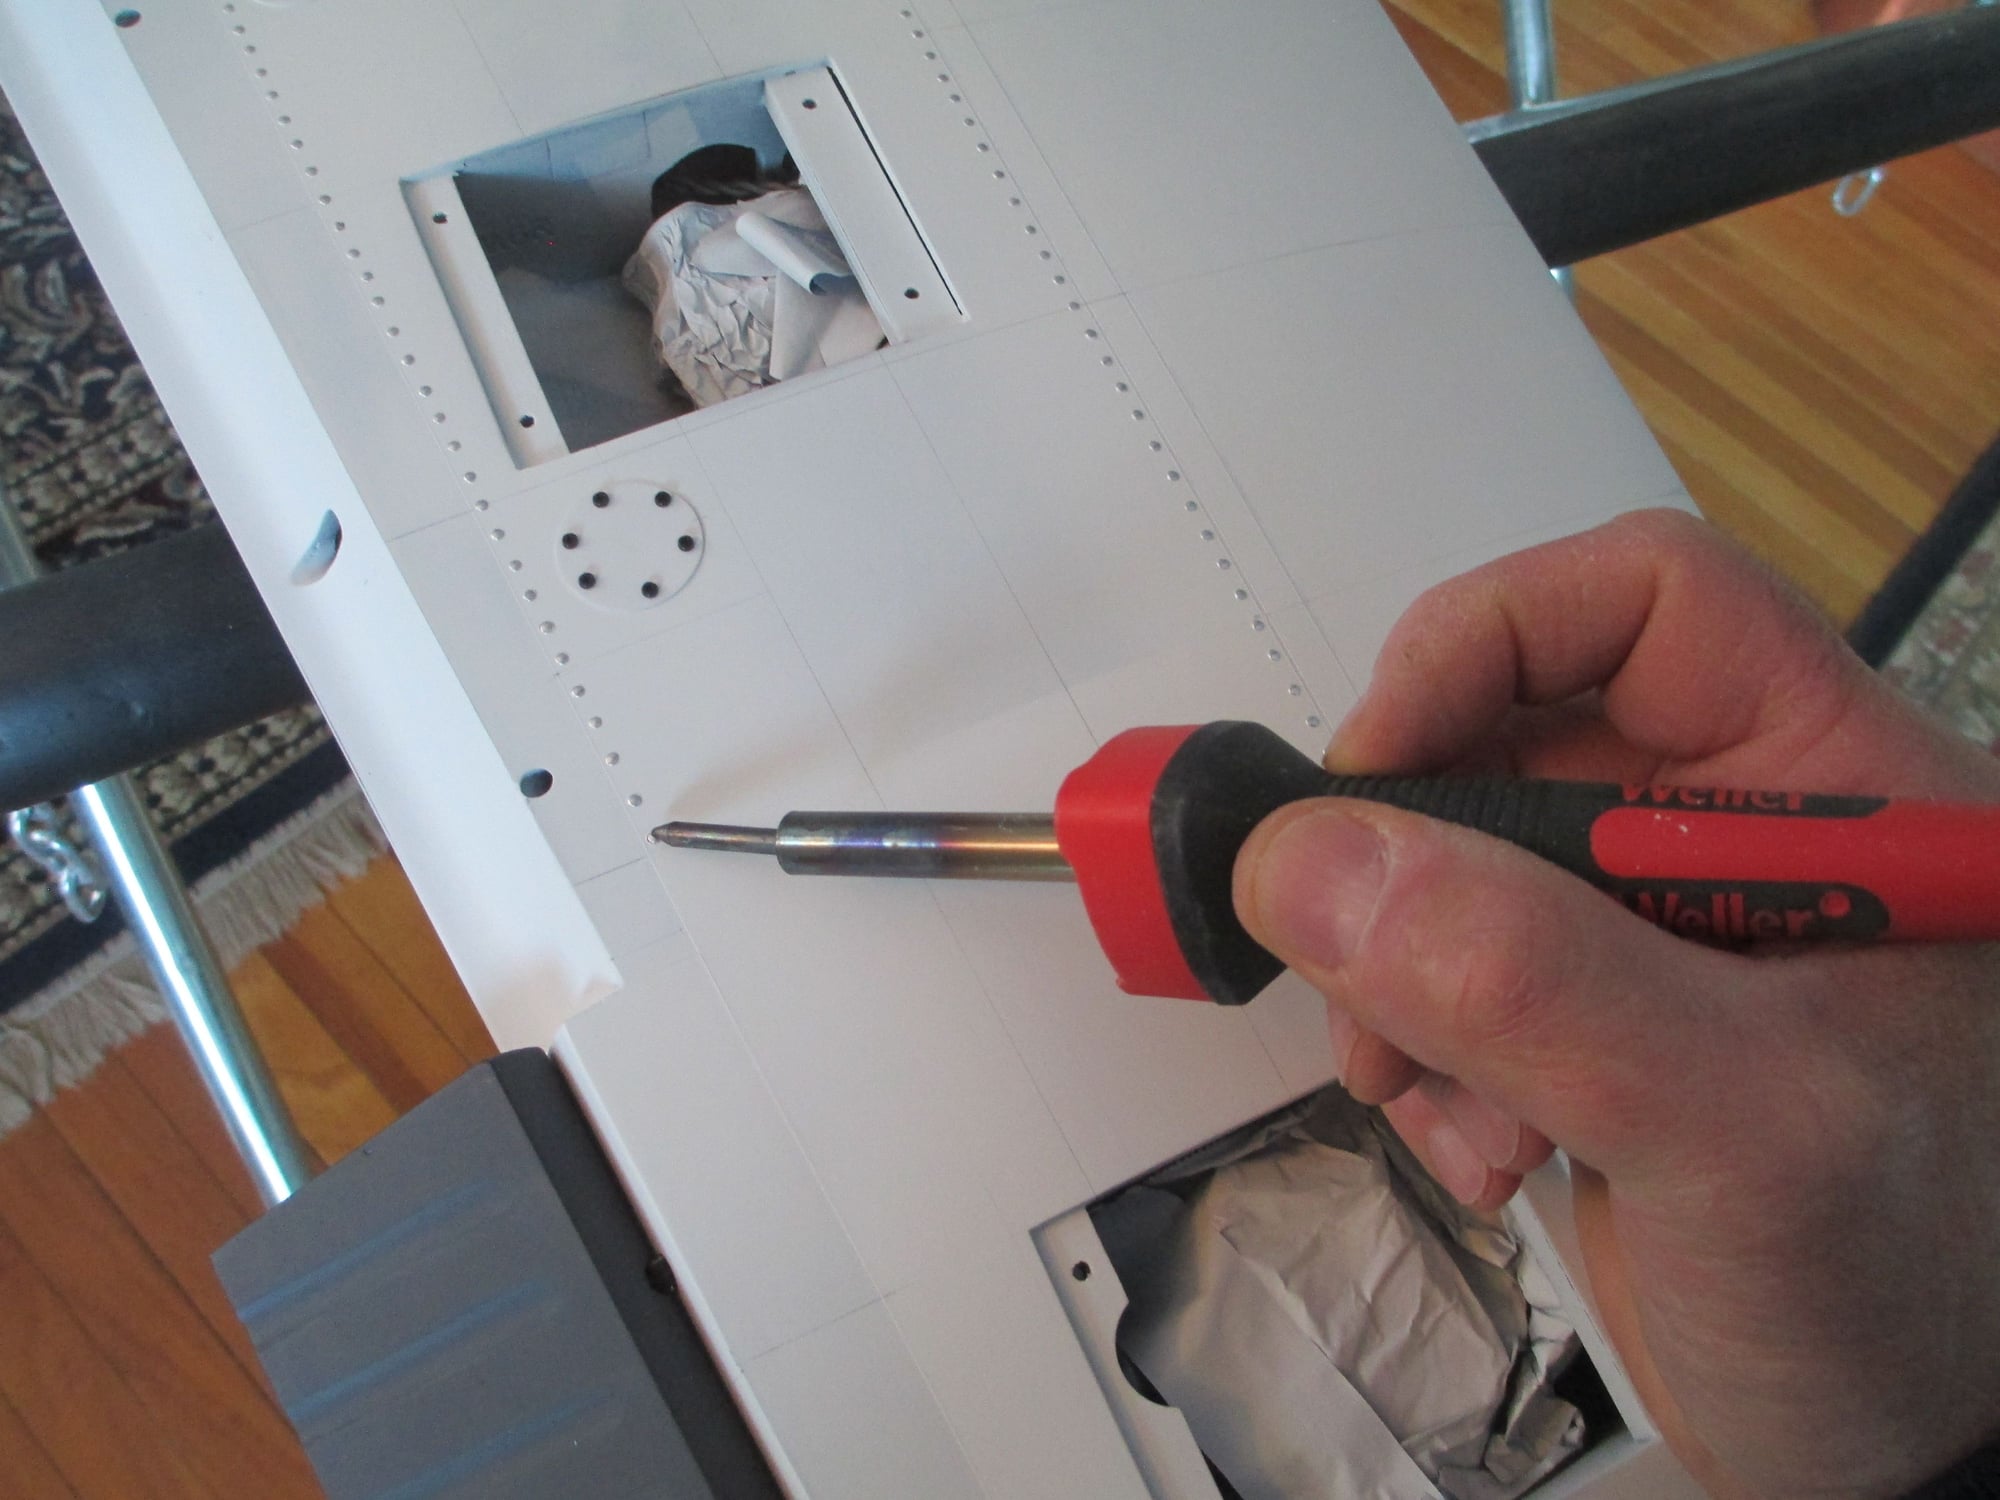
These are the tools that I use to apply the rivets. Notables are the Pencil Point Tip Soldering Iron, and Exacto Knife with #11 blade...
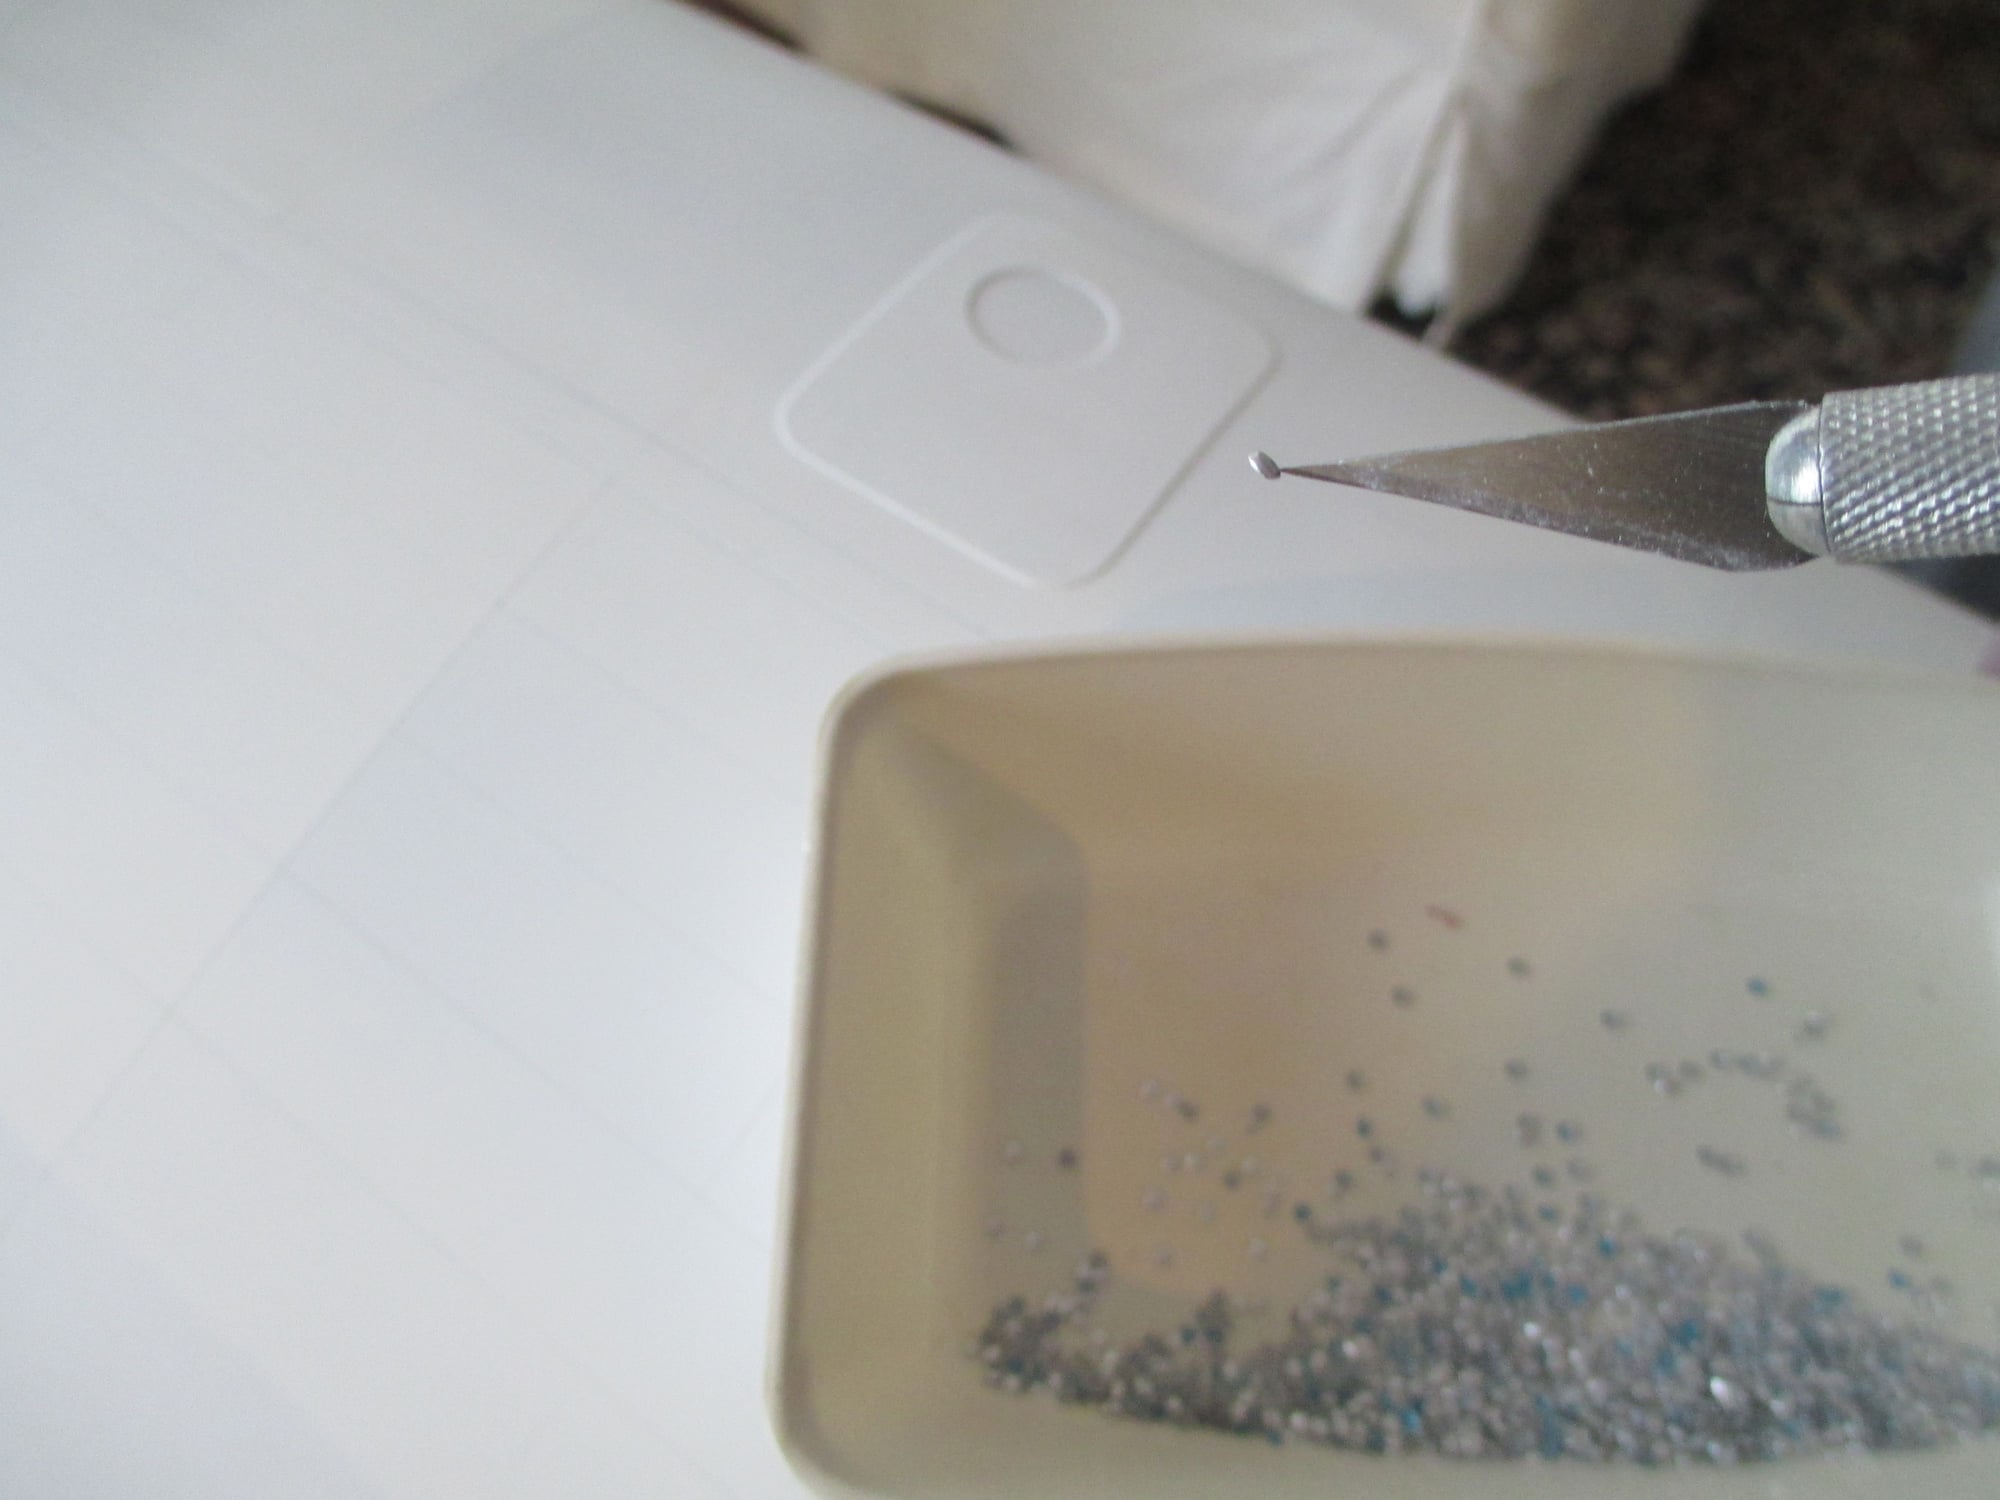
I remember many years ago when I first decided to try this method of riveting, I wondered how I was going to get each individual rivet out of the plastic dish? If my memory serves me, at that moment my knife slipped out of my hand and into the dish with rivets...low and behold, one rivet had stuck to the knifes sharp point!

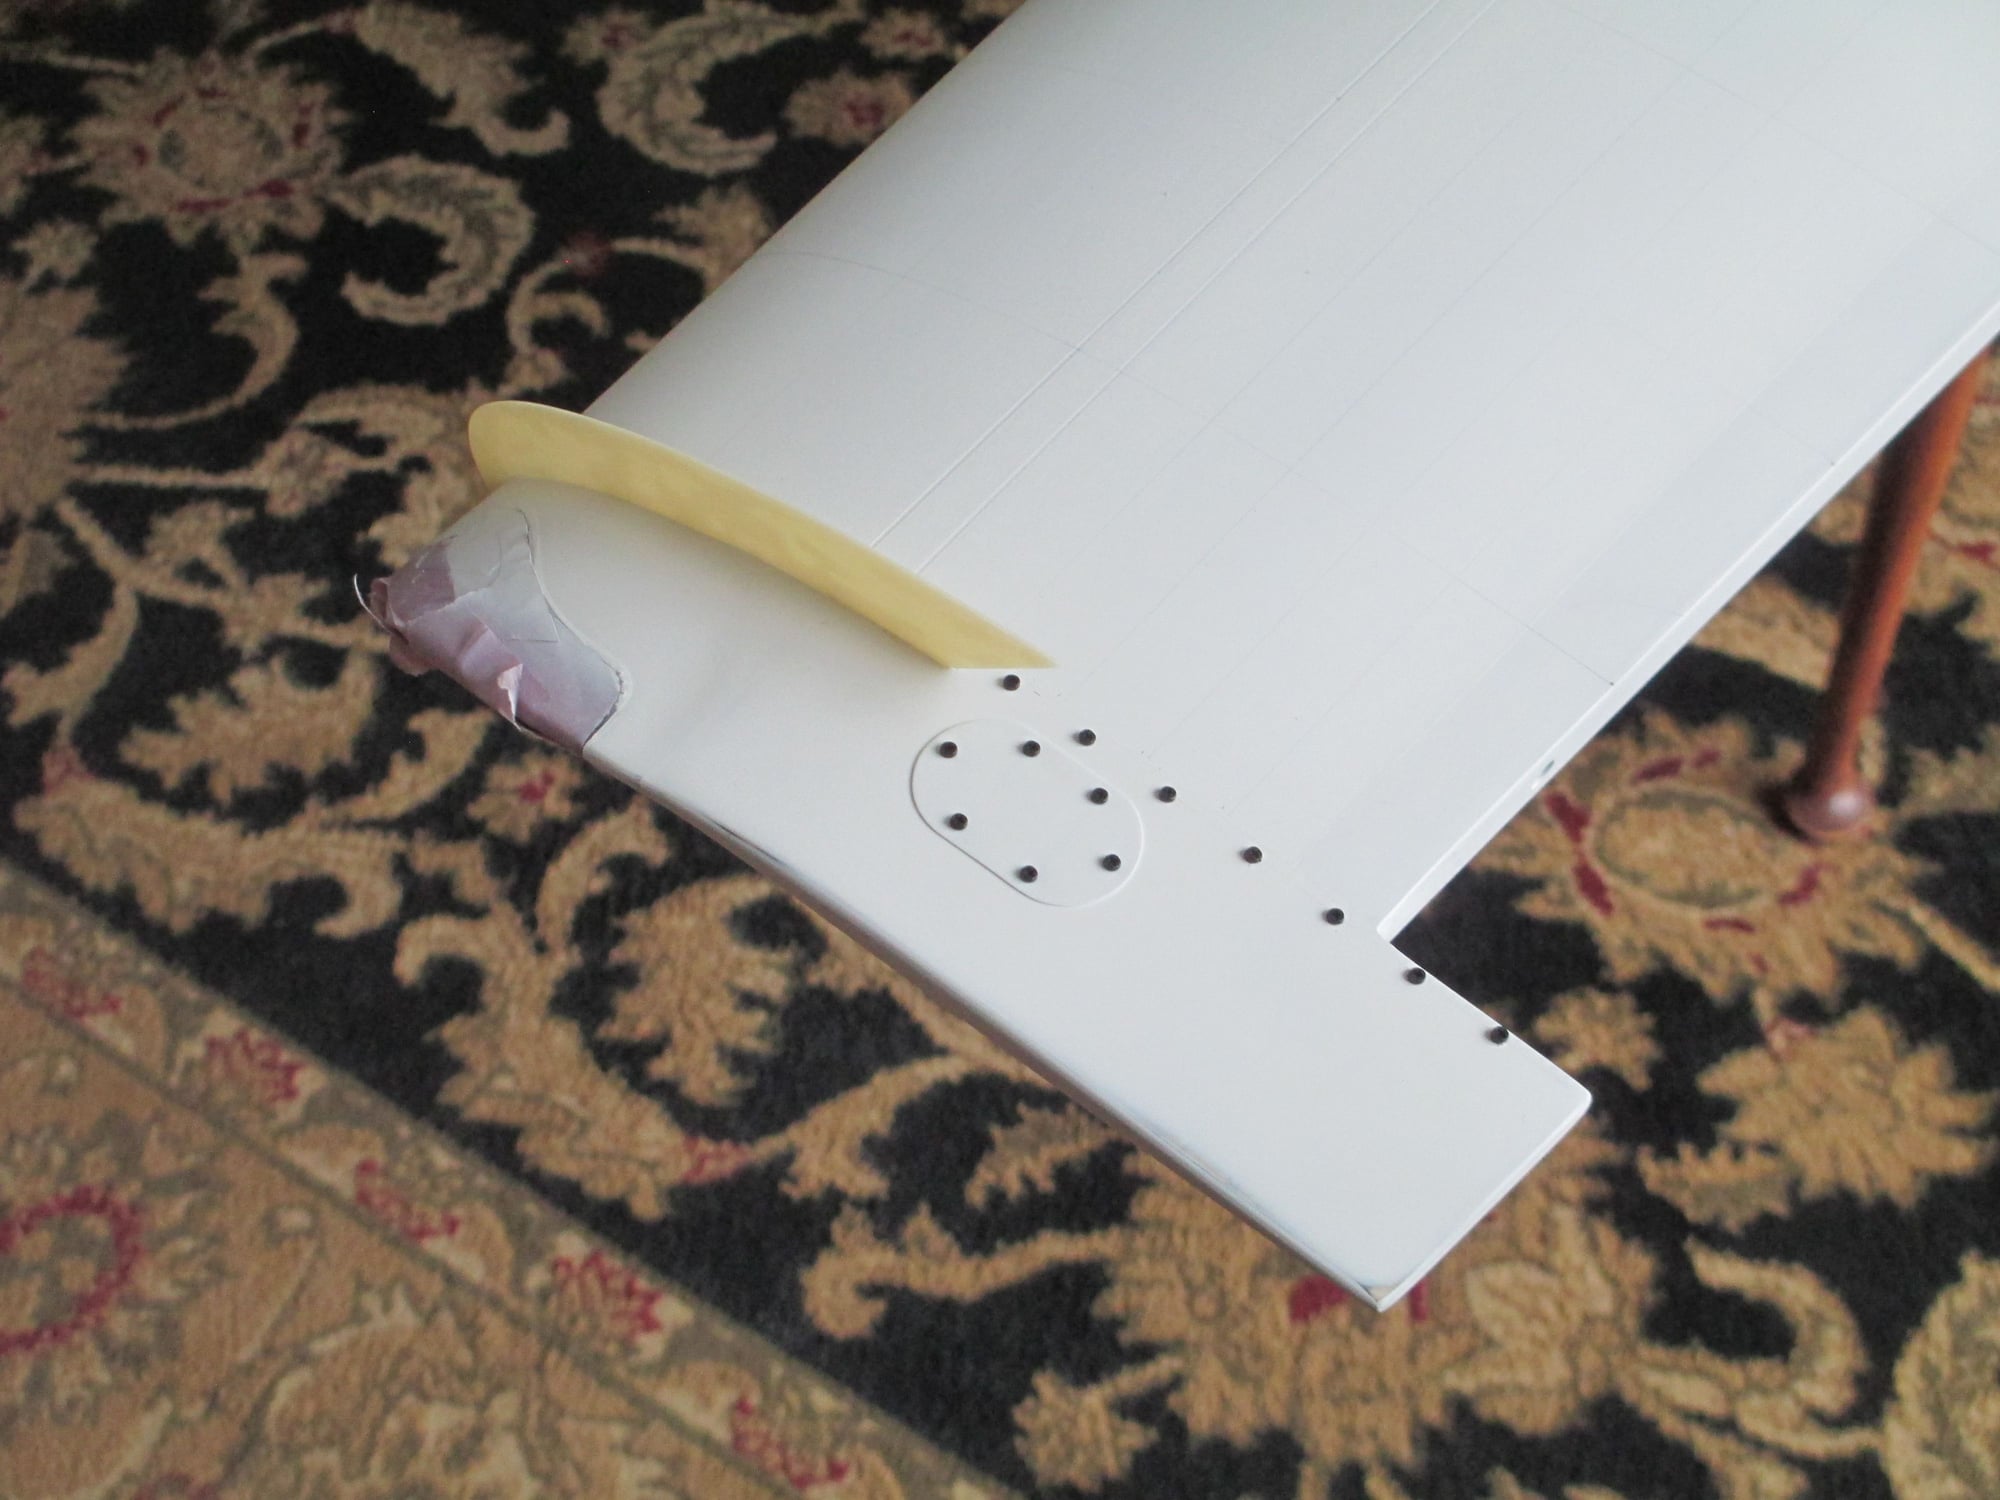
Each rivet is carefully placed on the pencil line. Gently press the tip of the soldering iron on each rivet head for one second (one thousand one). The heat from the soldering iron will be transferred through the rivet head softening the primed surface beneath the rivet. The primer will actually act as a glue and lock the rivet in place! Warning too much heat will blister the paint and ruin the surface.

These are the tools that I use to apply the rivets. Notables are the Pencil Point Tip Soldering Iron, and Exacto Knife with #11 blade...
I remember many years ago when I first decided to try this method of riveting, I wondered how I was going to get each individual rivet out of the plastic dish? If my memory serves me, at that moment my knife slipped out of my hand and into the dish with rivets...low and behold, one rivet had stuck to the knifes sharp point!
Each rivet is carefully placed on the pencil line. Gently press the tip of the soldering iron on each rivet head for one second (one thousand one). The heat from the soldering iron will be transferred through the rivet head softening the primed surface beneath the rivet. The primer will actually act as a glue and lock the rivet in place! Warning too much heat will blister the paint and ruin the surface.
The following users liked this post:
TeseractLabs (03-30-2020)
03-29-2020, 05:29 PM
#1007
The time has come to apply the rivets. Time to add some bling to this wing!!!
These are the tools that I use to apply the rivets. Notables are the Pencil Point Tip Soldering Iron, and Exacto Knife with #11 blade...
I remember many years ago when I first decided to try this method of riveting, I wondered how I was going to get each individual rivet out of the plastic dish? If my memory serves me, at that moment my knife slipped out of my hand and into the dish with rivets...low and behold, one rivet had stuck to the knifes sharp point!
Each rivet is carefully placed on the pencil line. Gently press the tip of the soldering iron on each rivet head for one second (one thousand one). The heat from the soldering iron will be transferred through the rivet head softening the primed surface beneath the rivet. The primer will actually act as a glue and lock the rivet in place! Warning too much heat will blister the paint and ruin the surface.
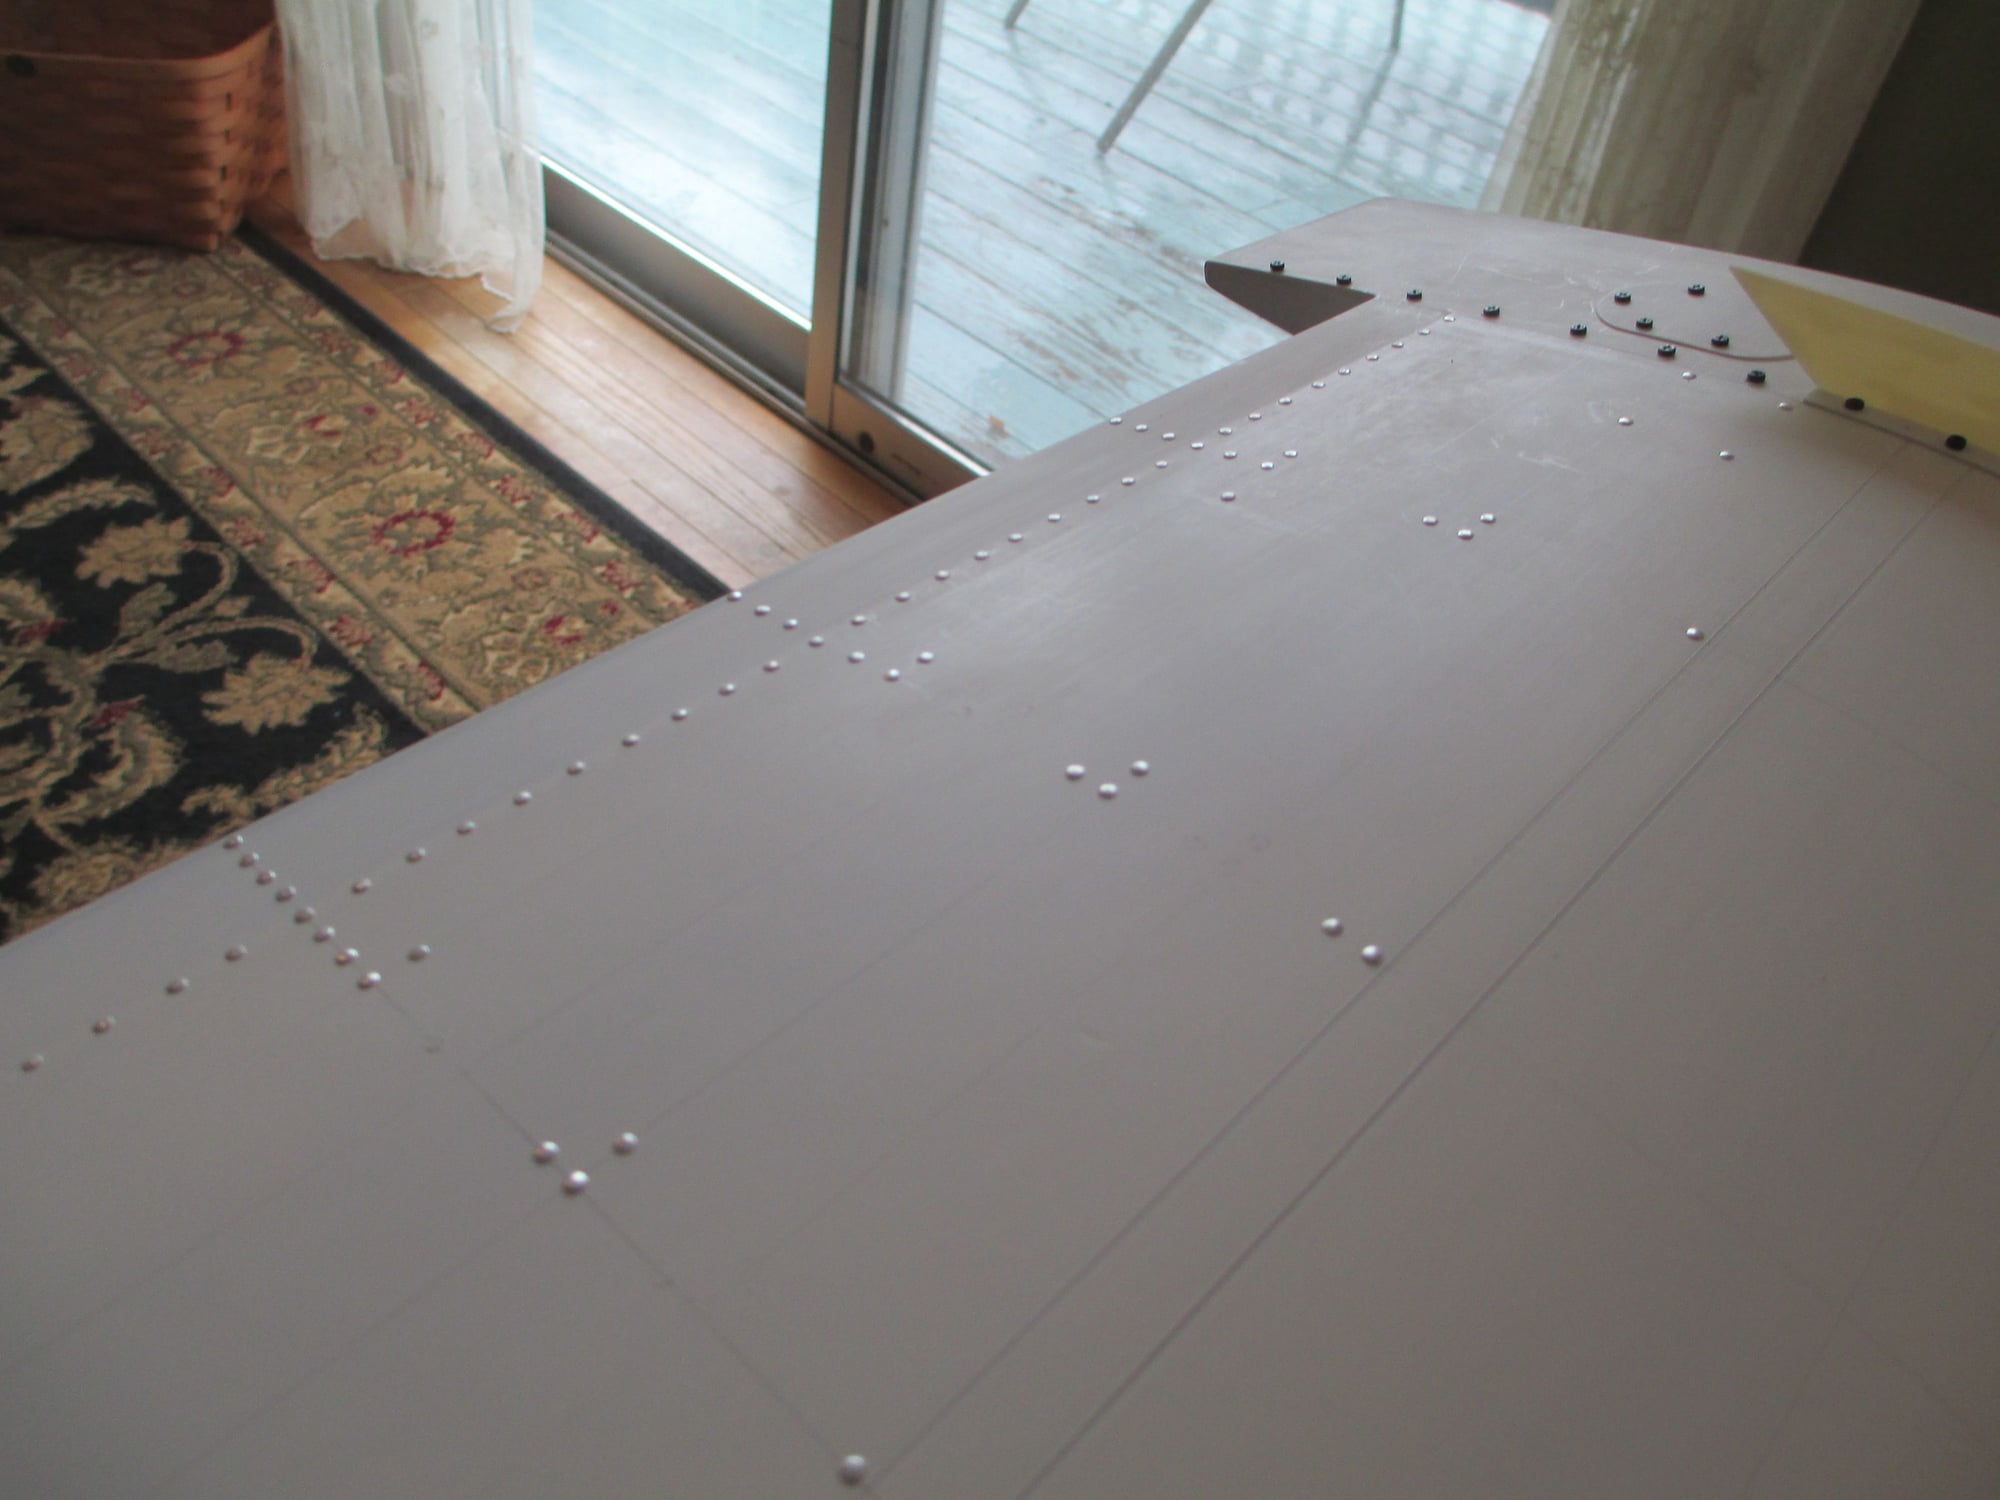
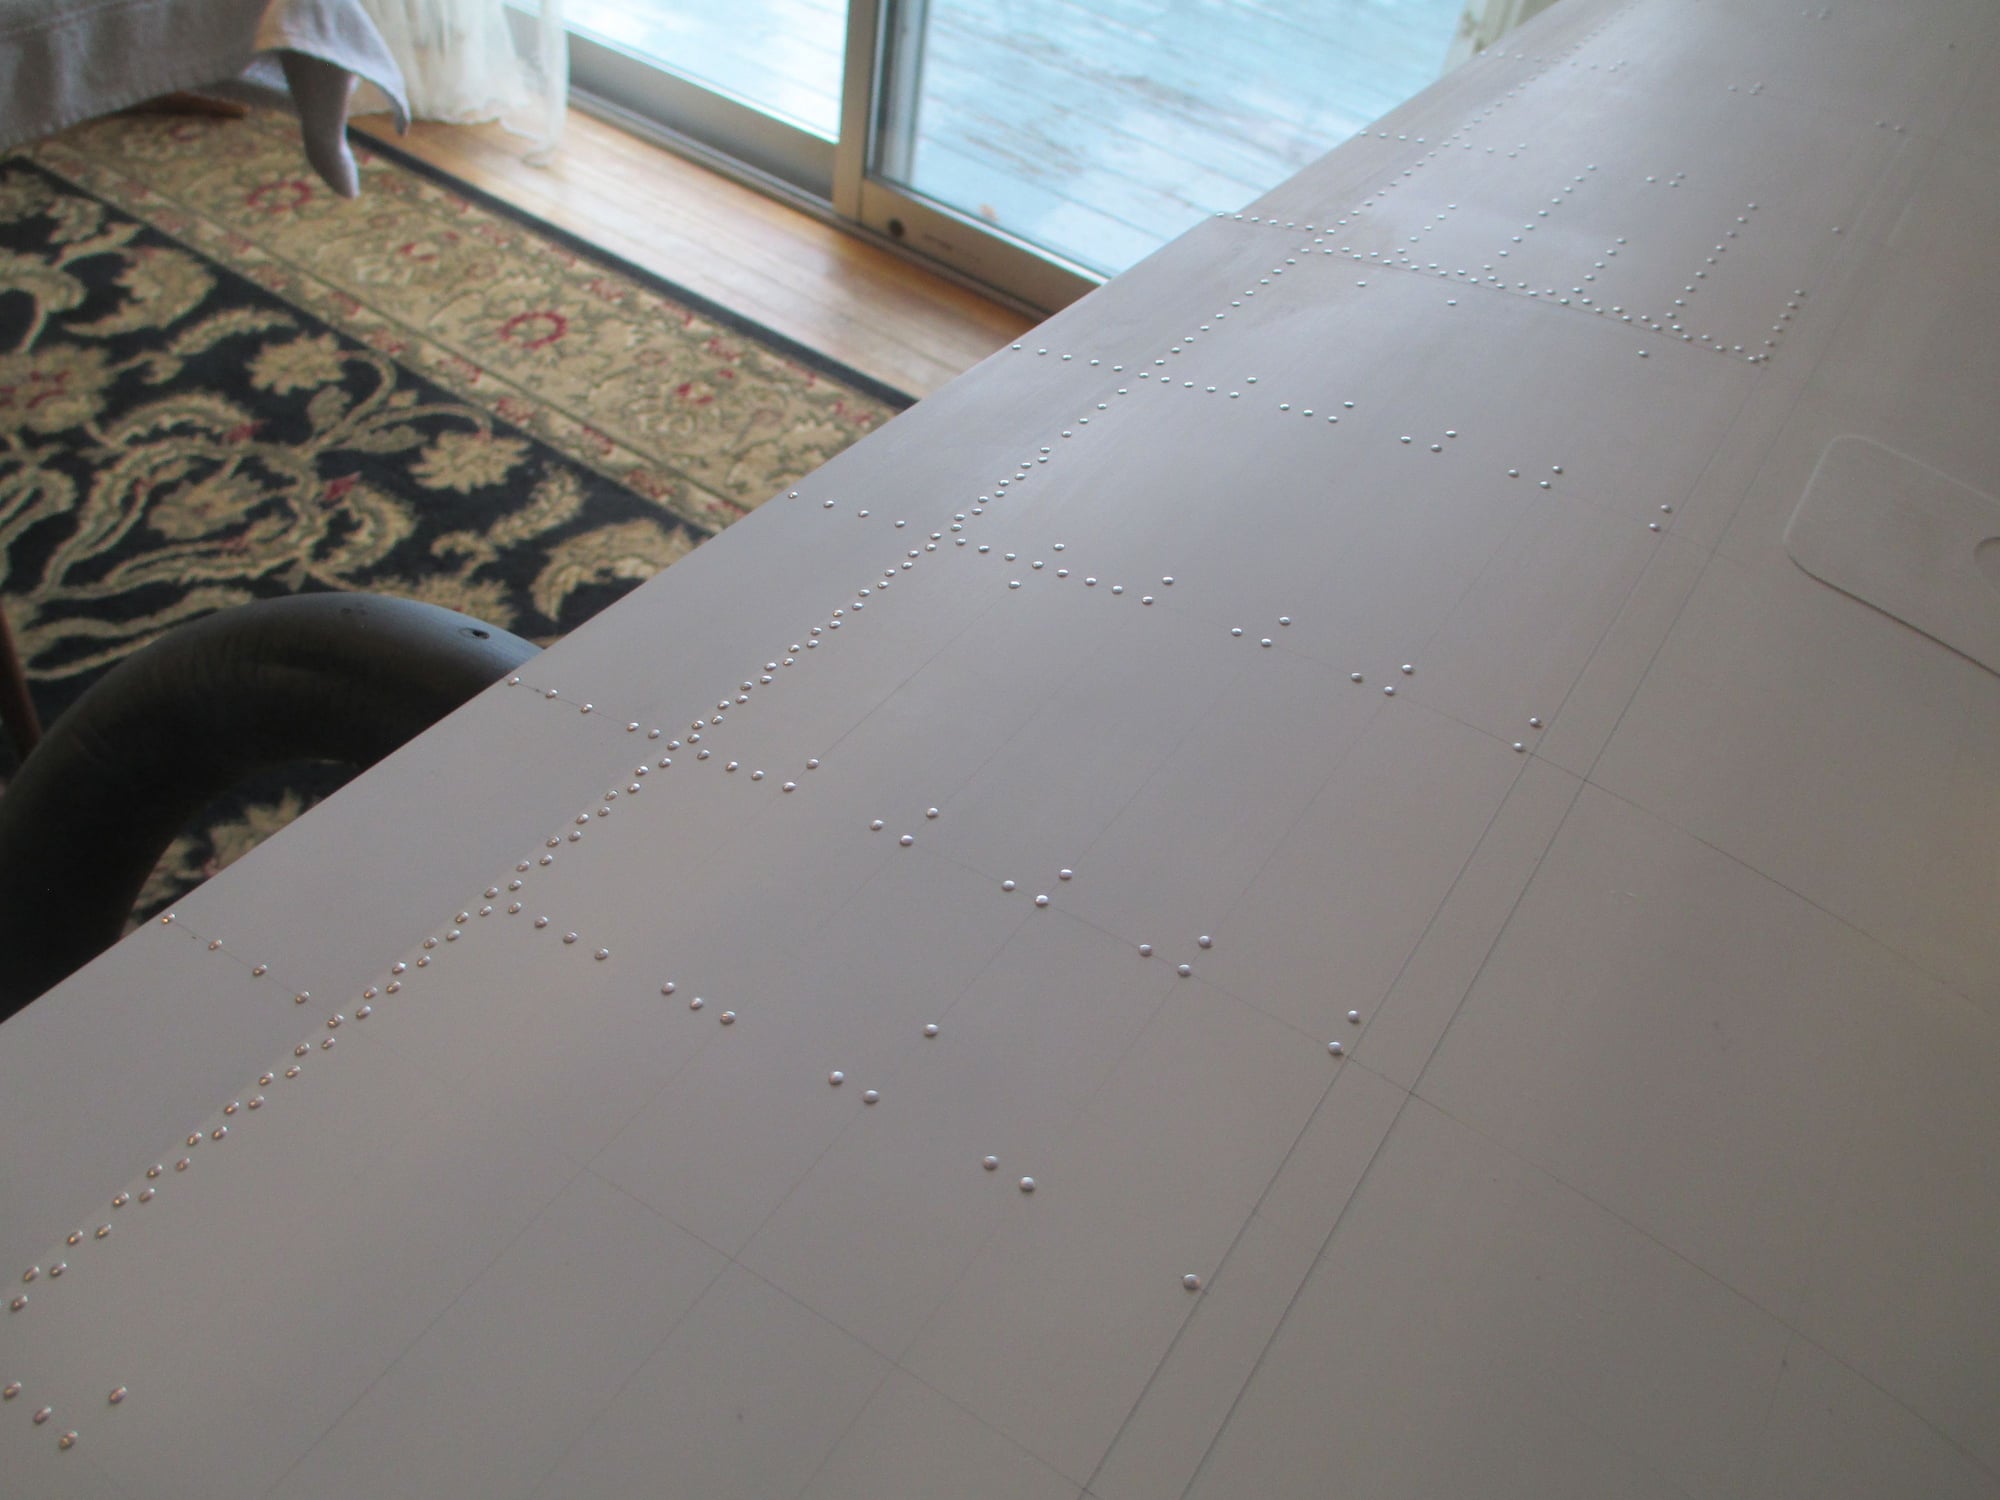
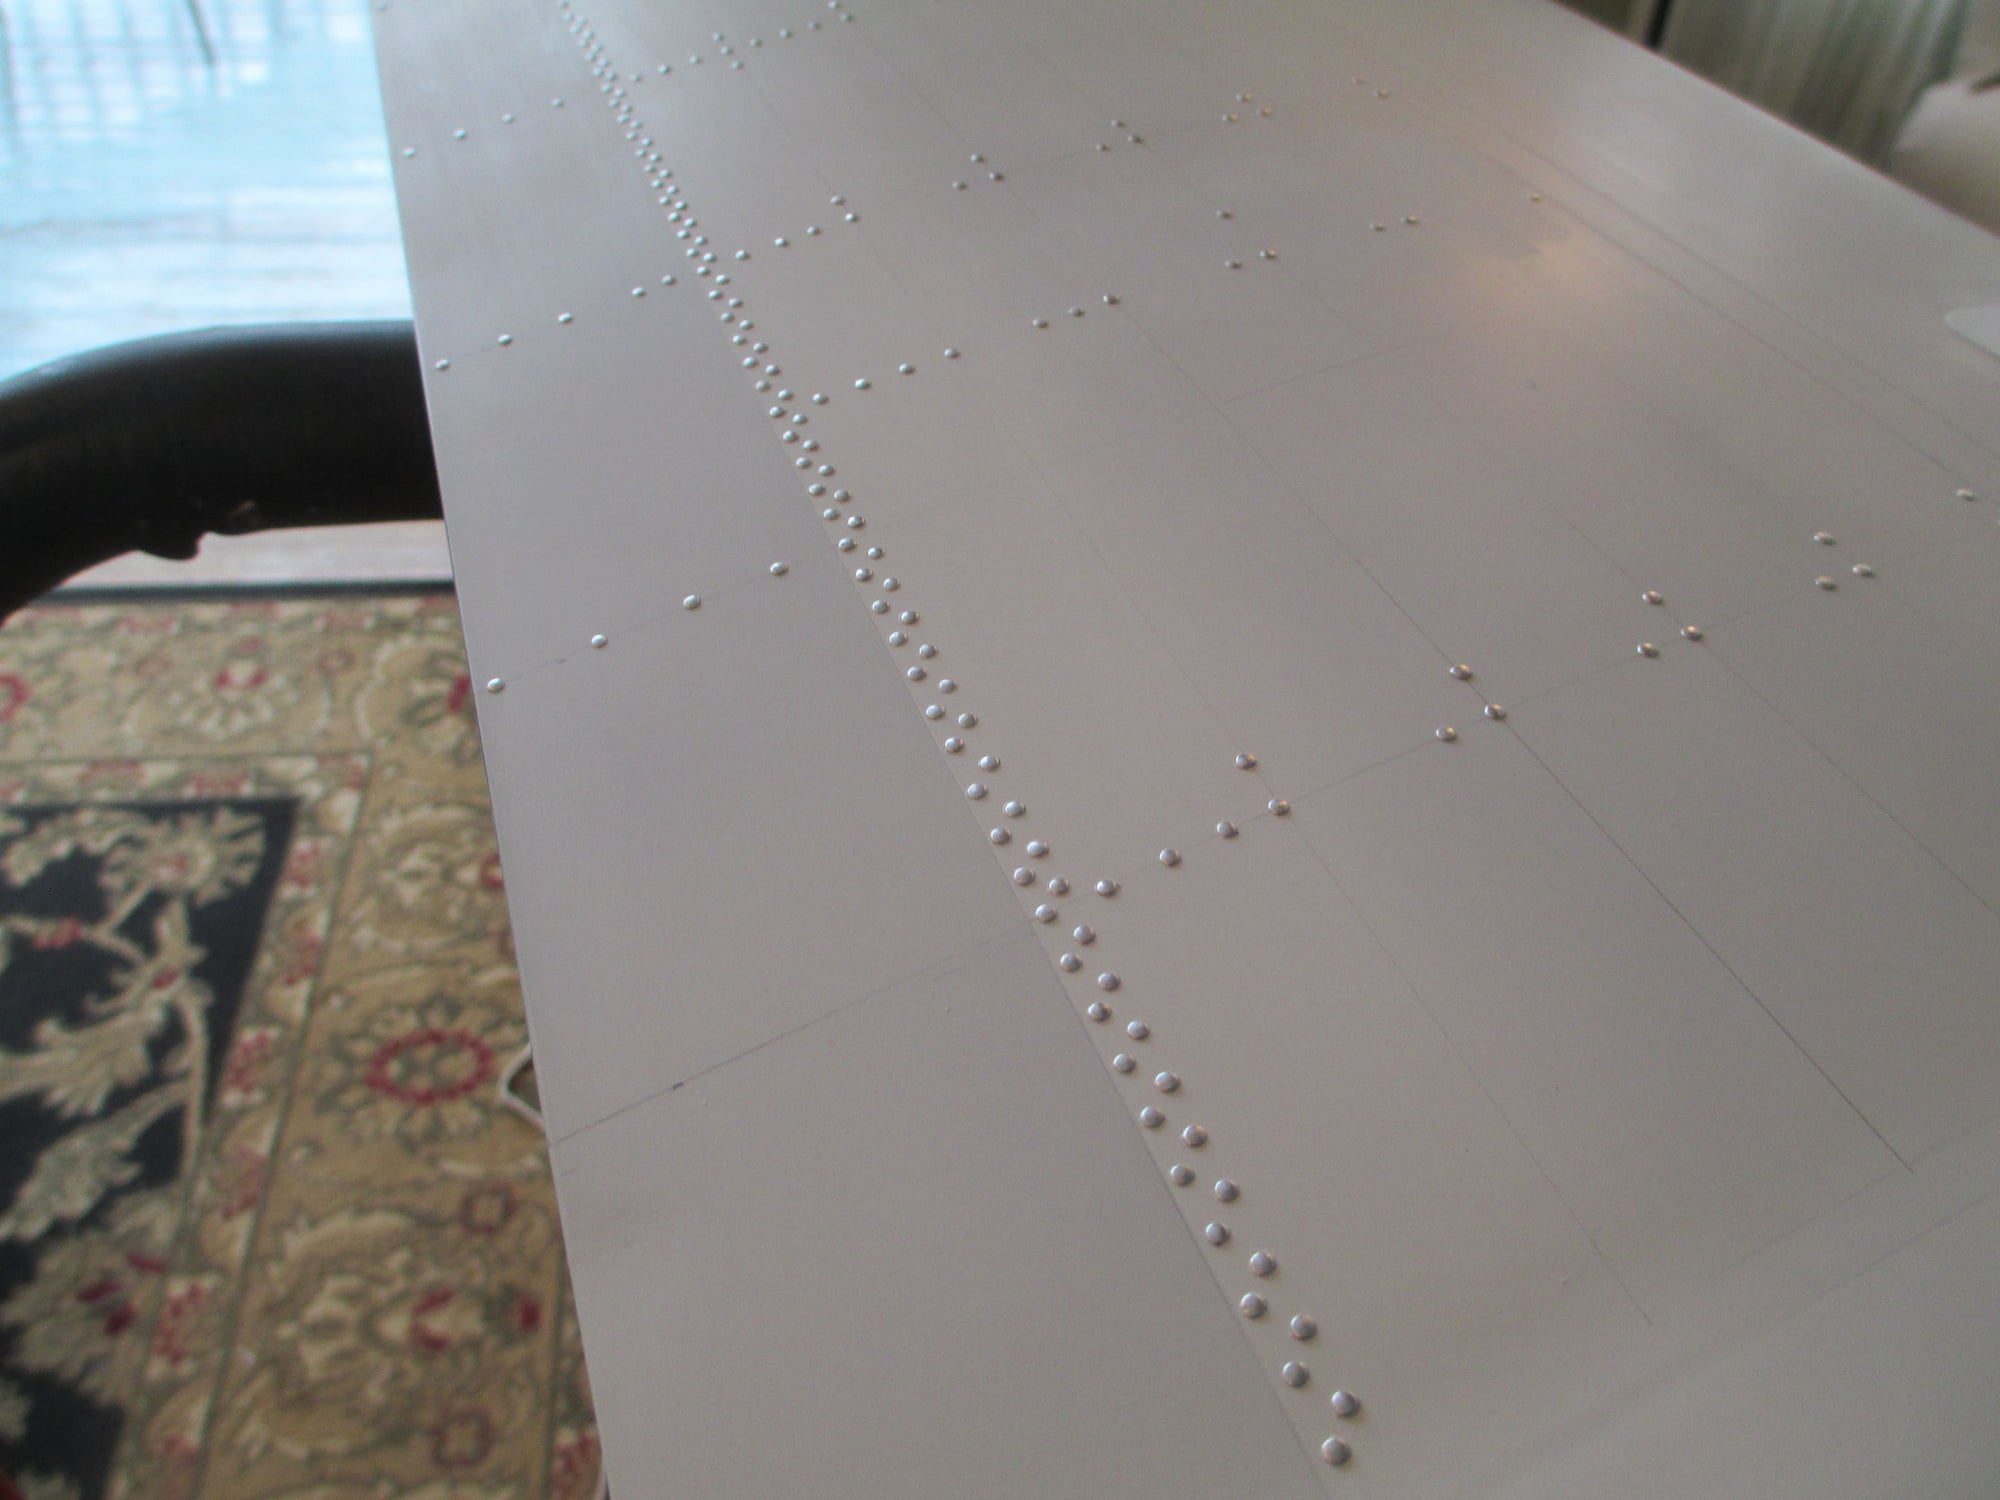
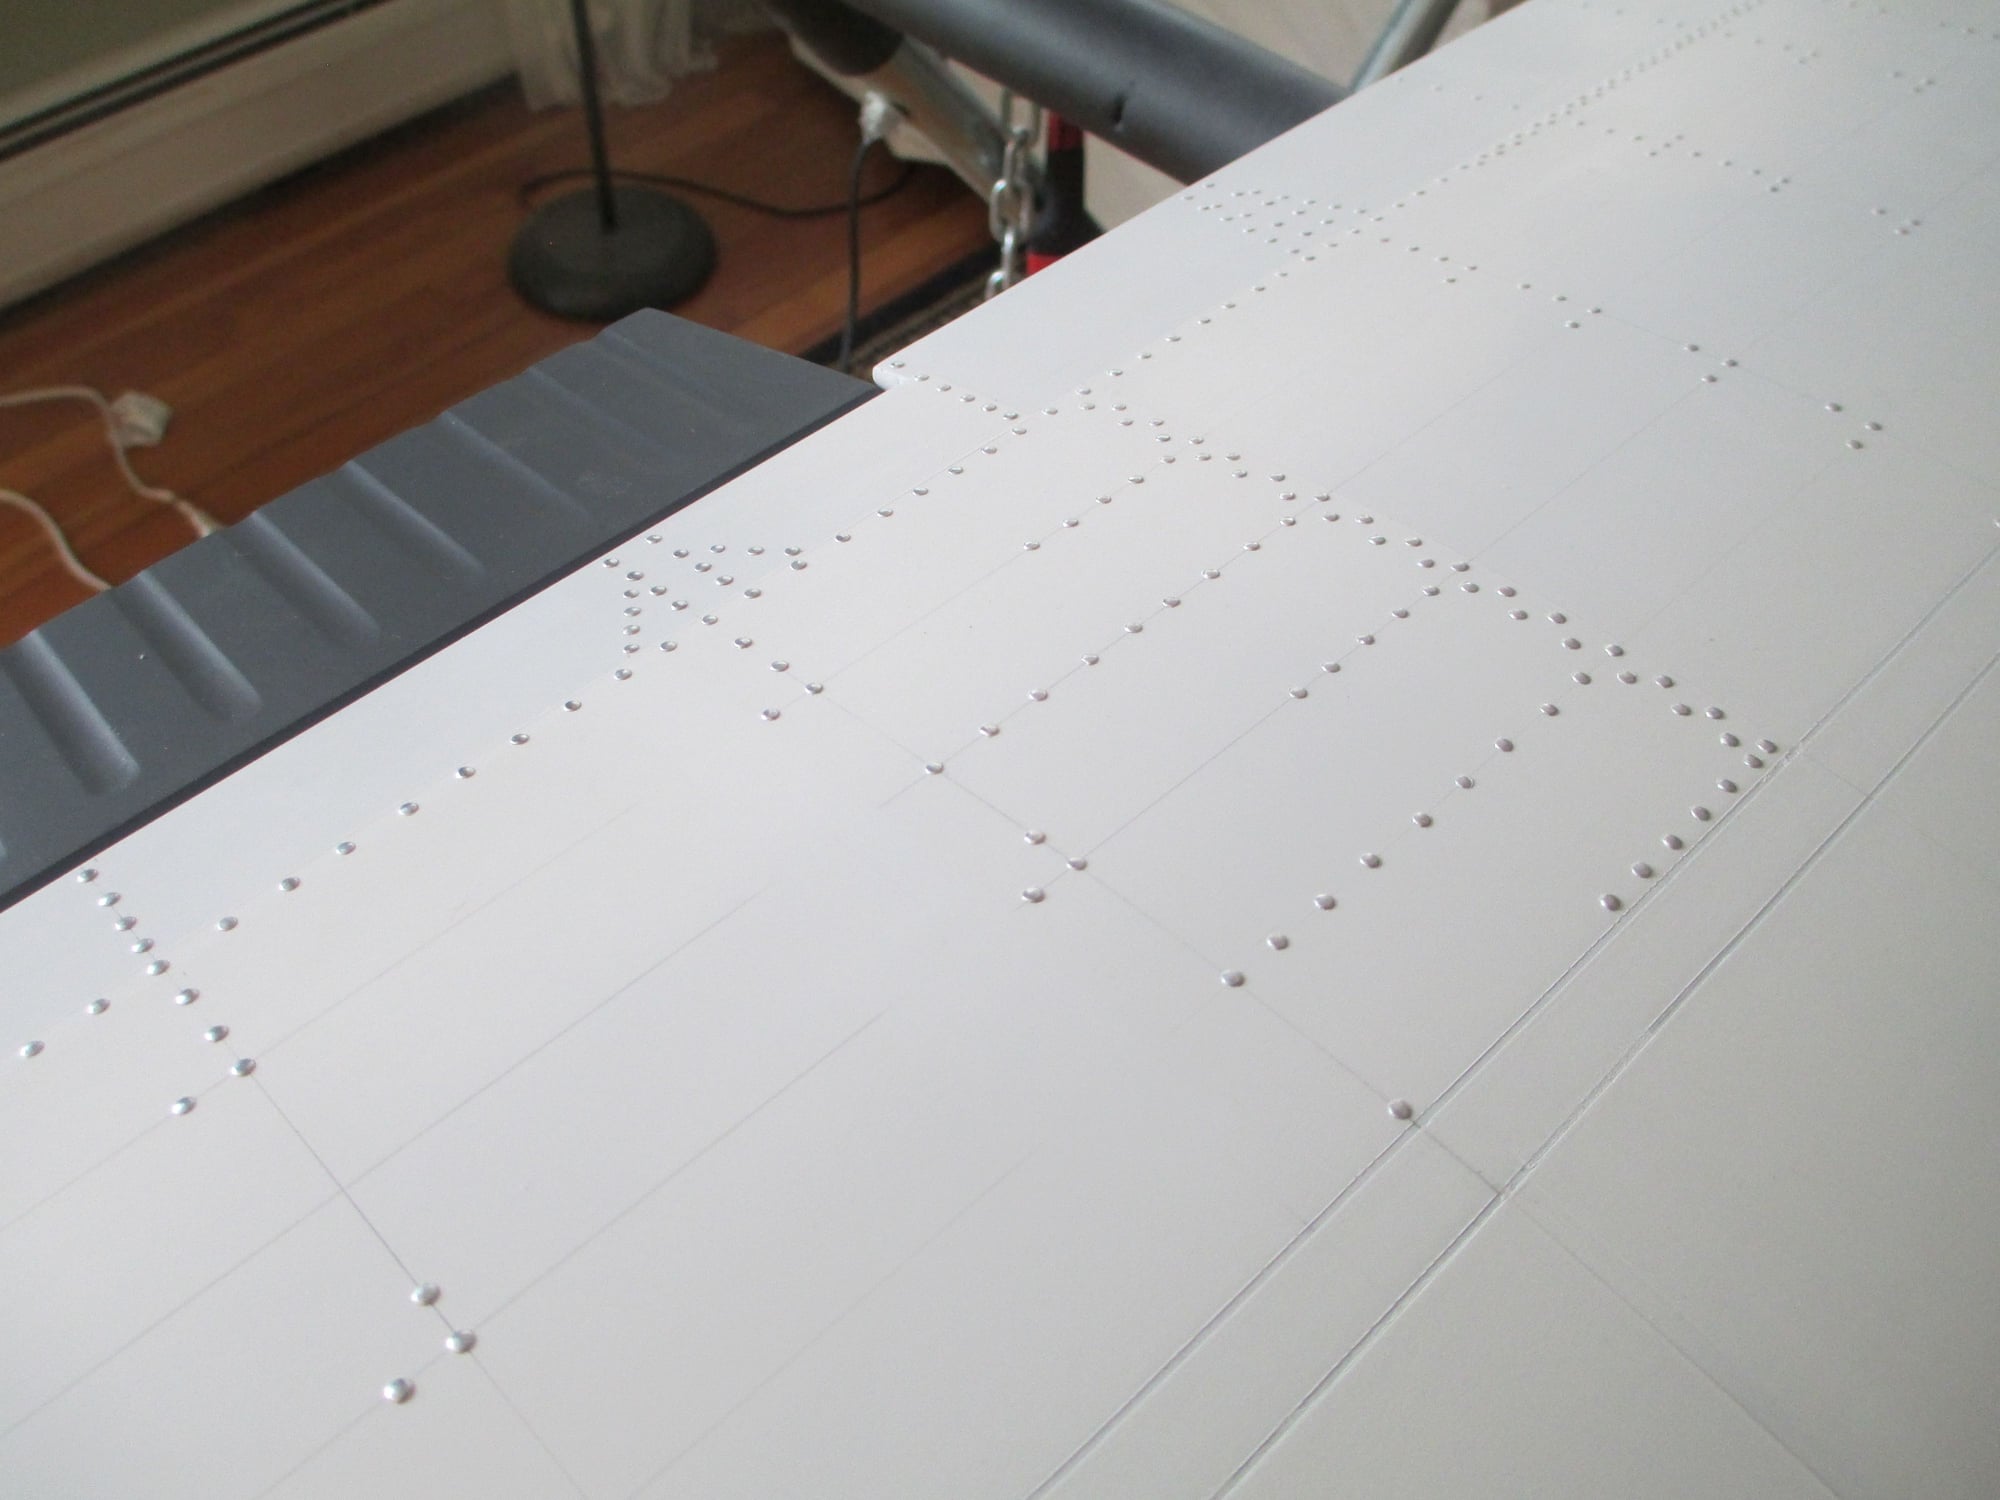
Yours are domed and look correct while the plasic film stuff looks like flat little discs and nothing like any rivets I've ever seen.
The dabs of glue method in one way looks a bit more natural than the discs, but the consistency usually isn't there and ends up looking free-handed (which it is).
If you could mass produce those things, I bet you you'd have a market for them!
DAYUM!!! ...that looks pleasing to the eye!!!

Last edited by airsteve172; 03-29-2020 at 05:55 PM.
03-29-2020, 10:21 PM
#1009
 03-30-2020, 12:53 AM
#1010
Thread Starter
BTW your last comment left me wiping coffee off the screen of my monitor...

Last edited by VincentJ; 03-30-2020 at 12:55 AM.

The following users liked this post:
Tequesta (03-30-2020)
The following users liked this post:
Tequesta (03-30-2020)
03-30-2020, 09:00 PM
#1013
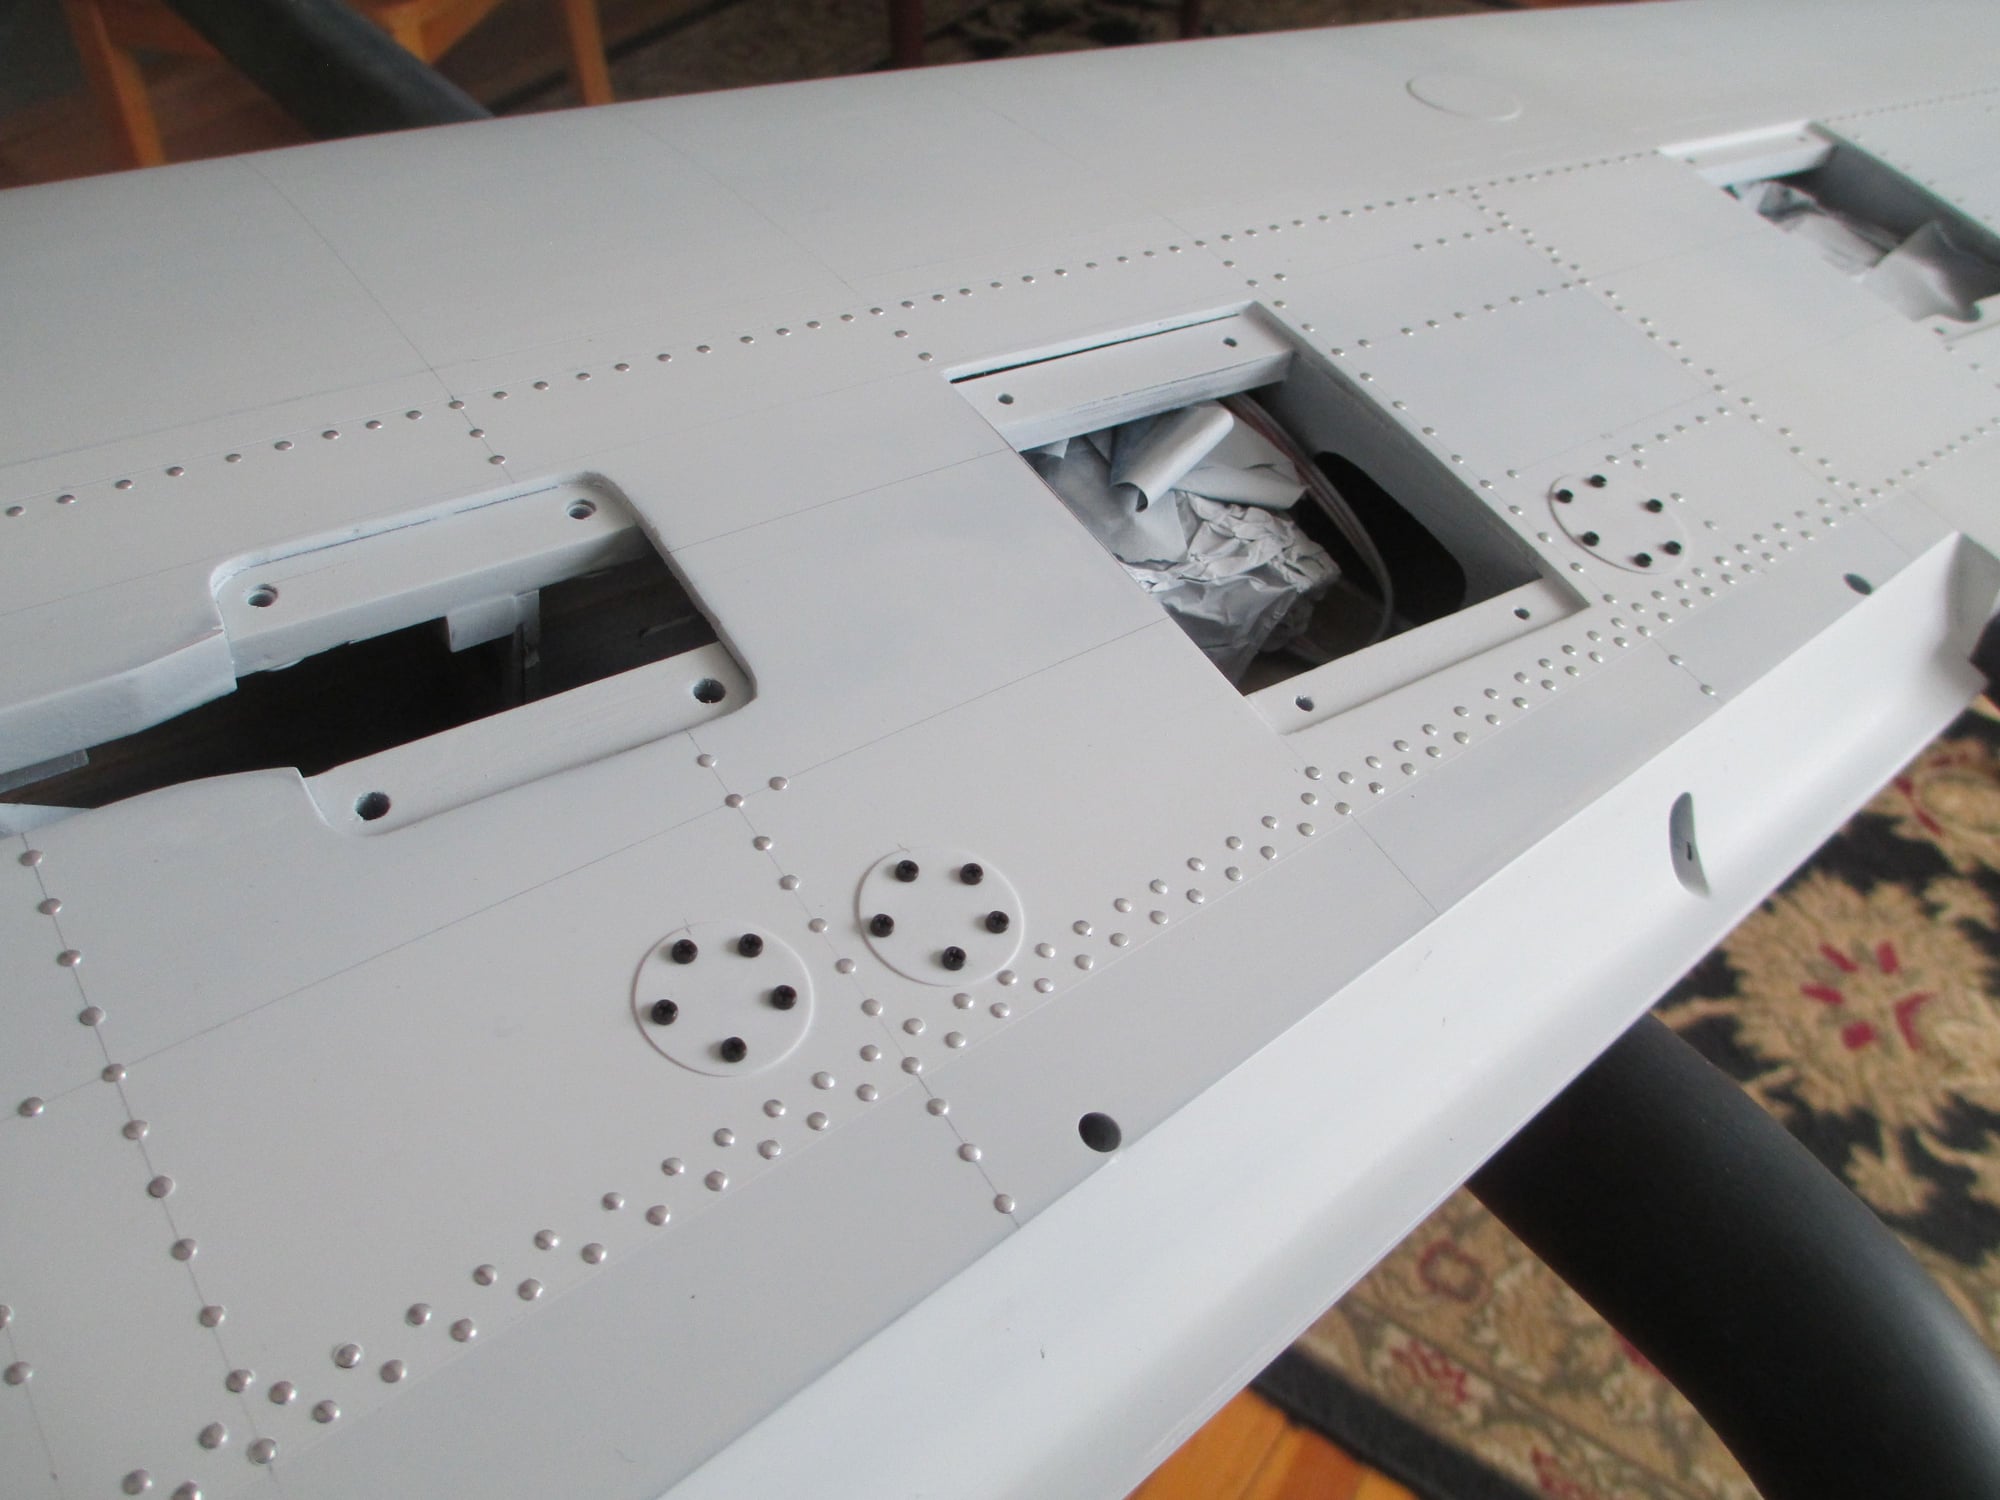
That�s an interesting riveting technique with very good looking and convincing results!
Your previous models where you have used the same riveting technique, have you flown any of them and if so, how do these �rivets� stand up to normal flying wear-and-tear?
Do you clean the model after flight any differently than you would clean any other model?
Your previous models where you have used the same riveting technique, have you flown any of them and if so, how do these �rivets� stand up to normal flying wear-and-tear?
Do you clean the model after flight any differently than you would clean any other model?
03-31-2020, 12:41 AM
#1014
Thread Starter
That’s an interesting riveting technique with very good looking and convincing results!
Your previous models where you have used the same riveting technique, have you flown any of them and if so, how do these ‘rivets’ stand up to normal flying wear-and-tear?
Do you clean the model after flight any differently than you would clean any other model?
Your previous models where you have used the same riveting technique, have you flown any of them and if so, how do these ‘rivets’ stand up to normal flying wear-and-tear?
Do you clean the model after flight any differently than you would clean any other model?
I have used them on many of my other models and have flown them. A few of them over 10 years old. Clean-up is no different, as I said they're not coming off.
Last edited by VincentJ; 03-31-2020 at 02:10 AM.


The following users liked this post:
TeseractLabs (04-01-2020)
04-01-2020, 10:27 PM
#1018
Junior Member
Vince...that riveting is insane! Would you be able to post a close-up of the dies you are using for your rivets? Do the dies cut the litho or simply knock them through. Sorry if I’m missing anything obvious here but I’m fascinated by your technique and would like to thoroughly understand how you get such uniform rivets.
04-02-2020, 02:32 PM
#1019
Thread Starter
Vince...that riveting is insane! Would you be able to post a close-up of the dies you are using for your rivets? Do the dies cut the litho or simply knock them through. Sorry if I�m missing anything obvious here but I�m fascinated by your technique and would like to thoroughly understand how you get such uniform rivets.

Both die are made from 4-40 rod, the one on the left will produce a domed rivet while the one on the right will produce a flat rivet. If you want a rivet with more or less of a dome all you have to do is file the end to the shape that you want.
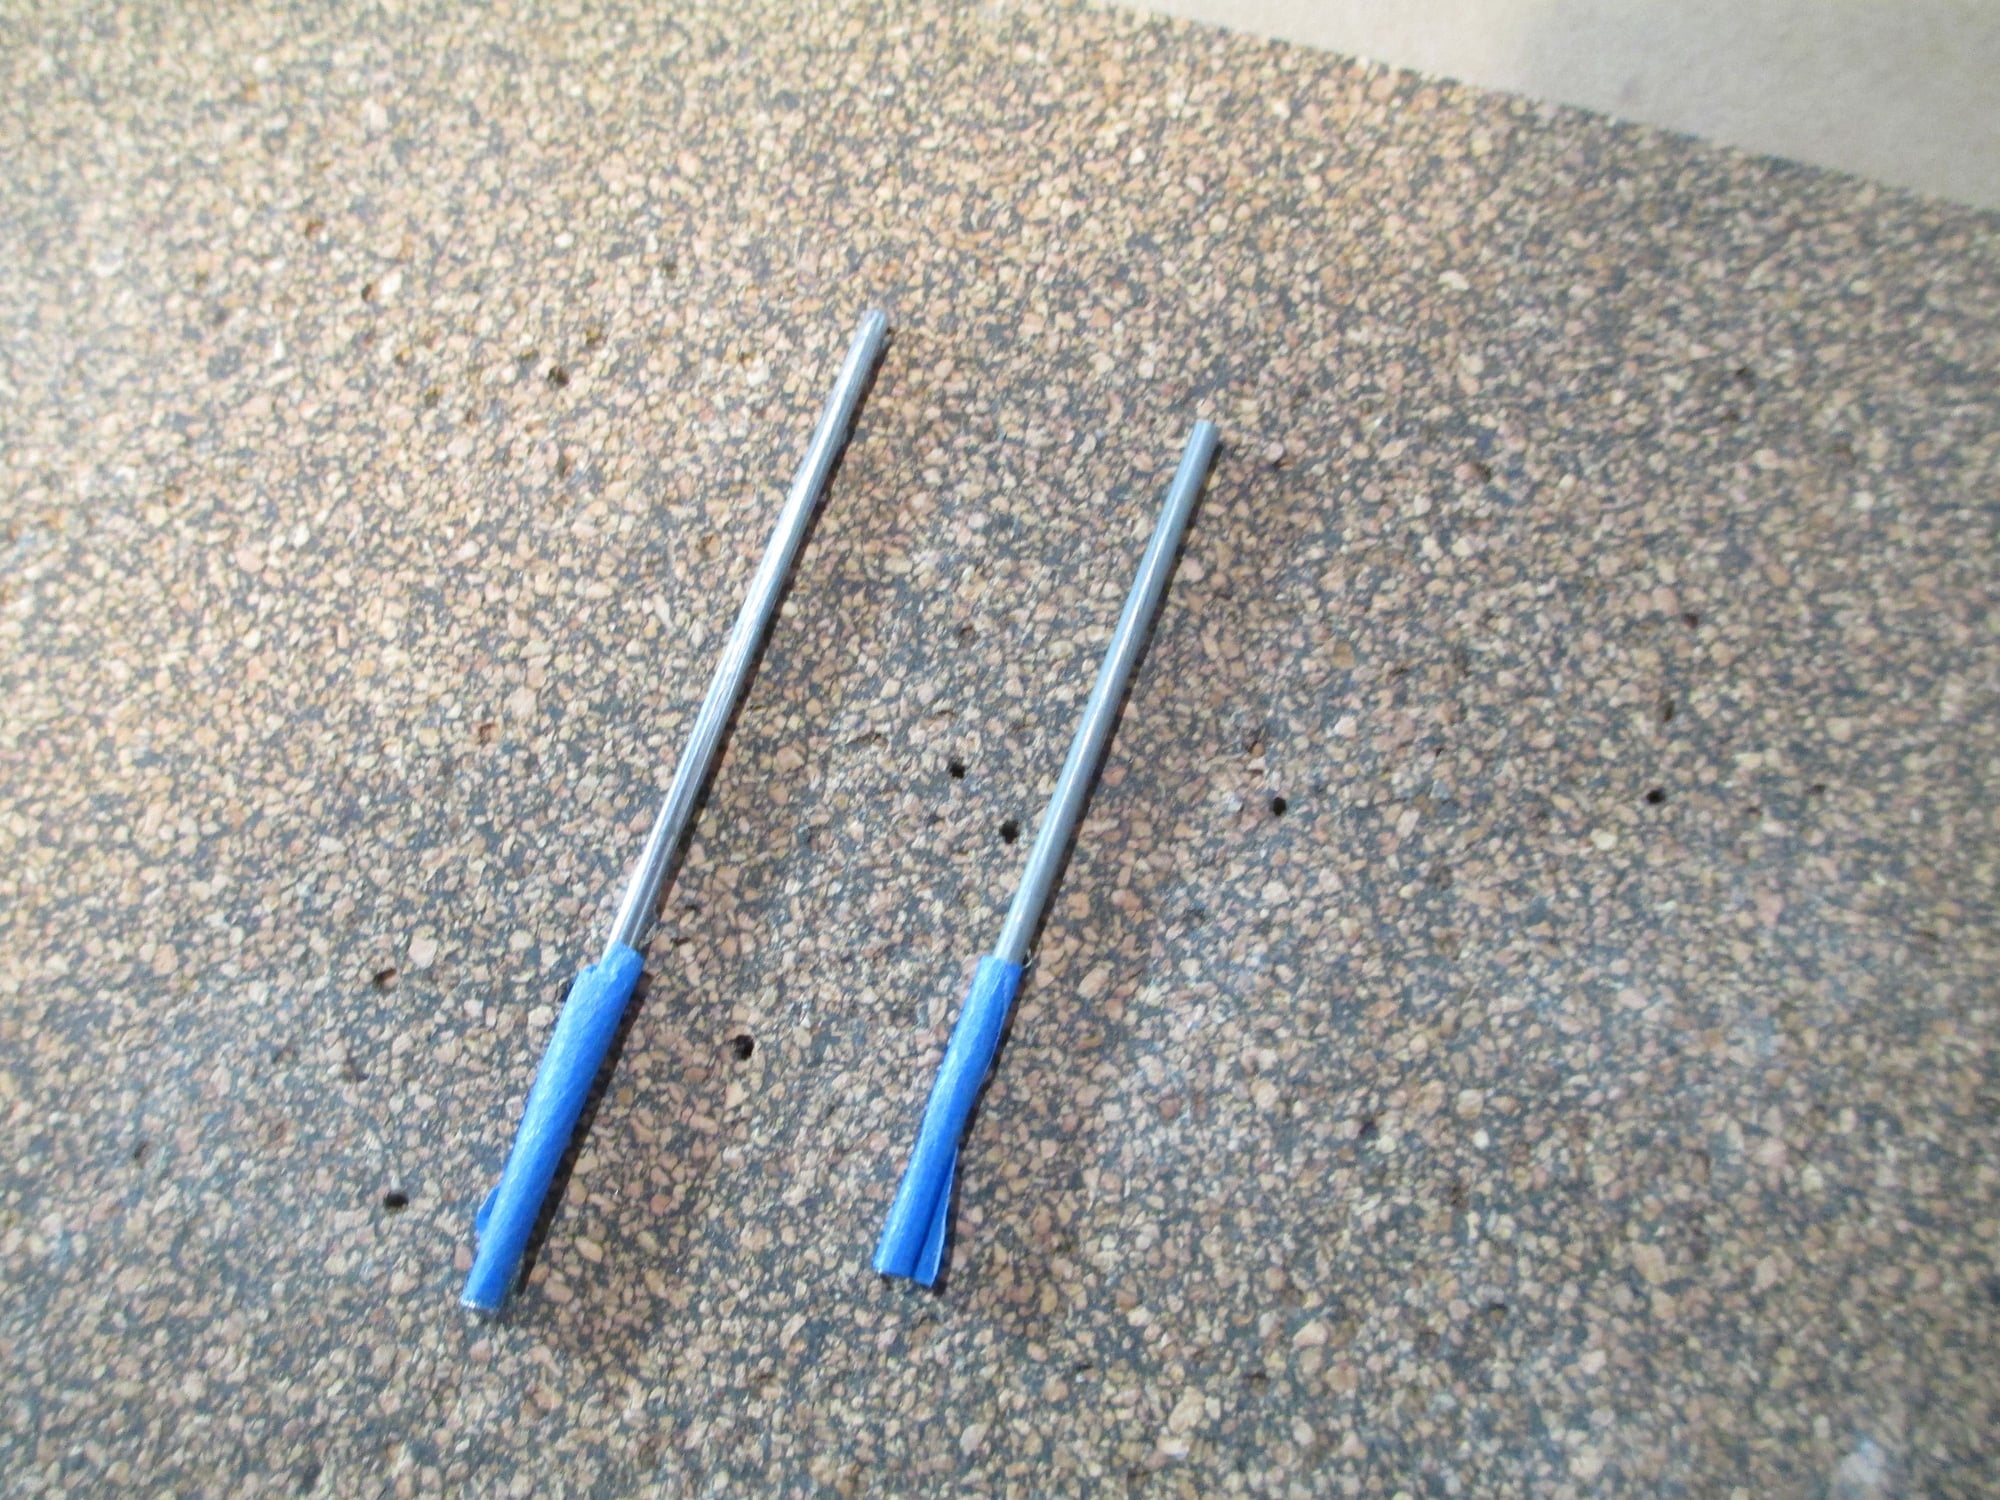
Both die are a few inches long, I placed tape on one end to remind me that's the side to hit with the hammer...
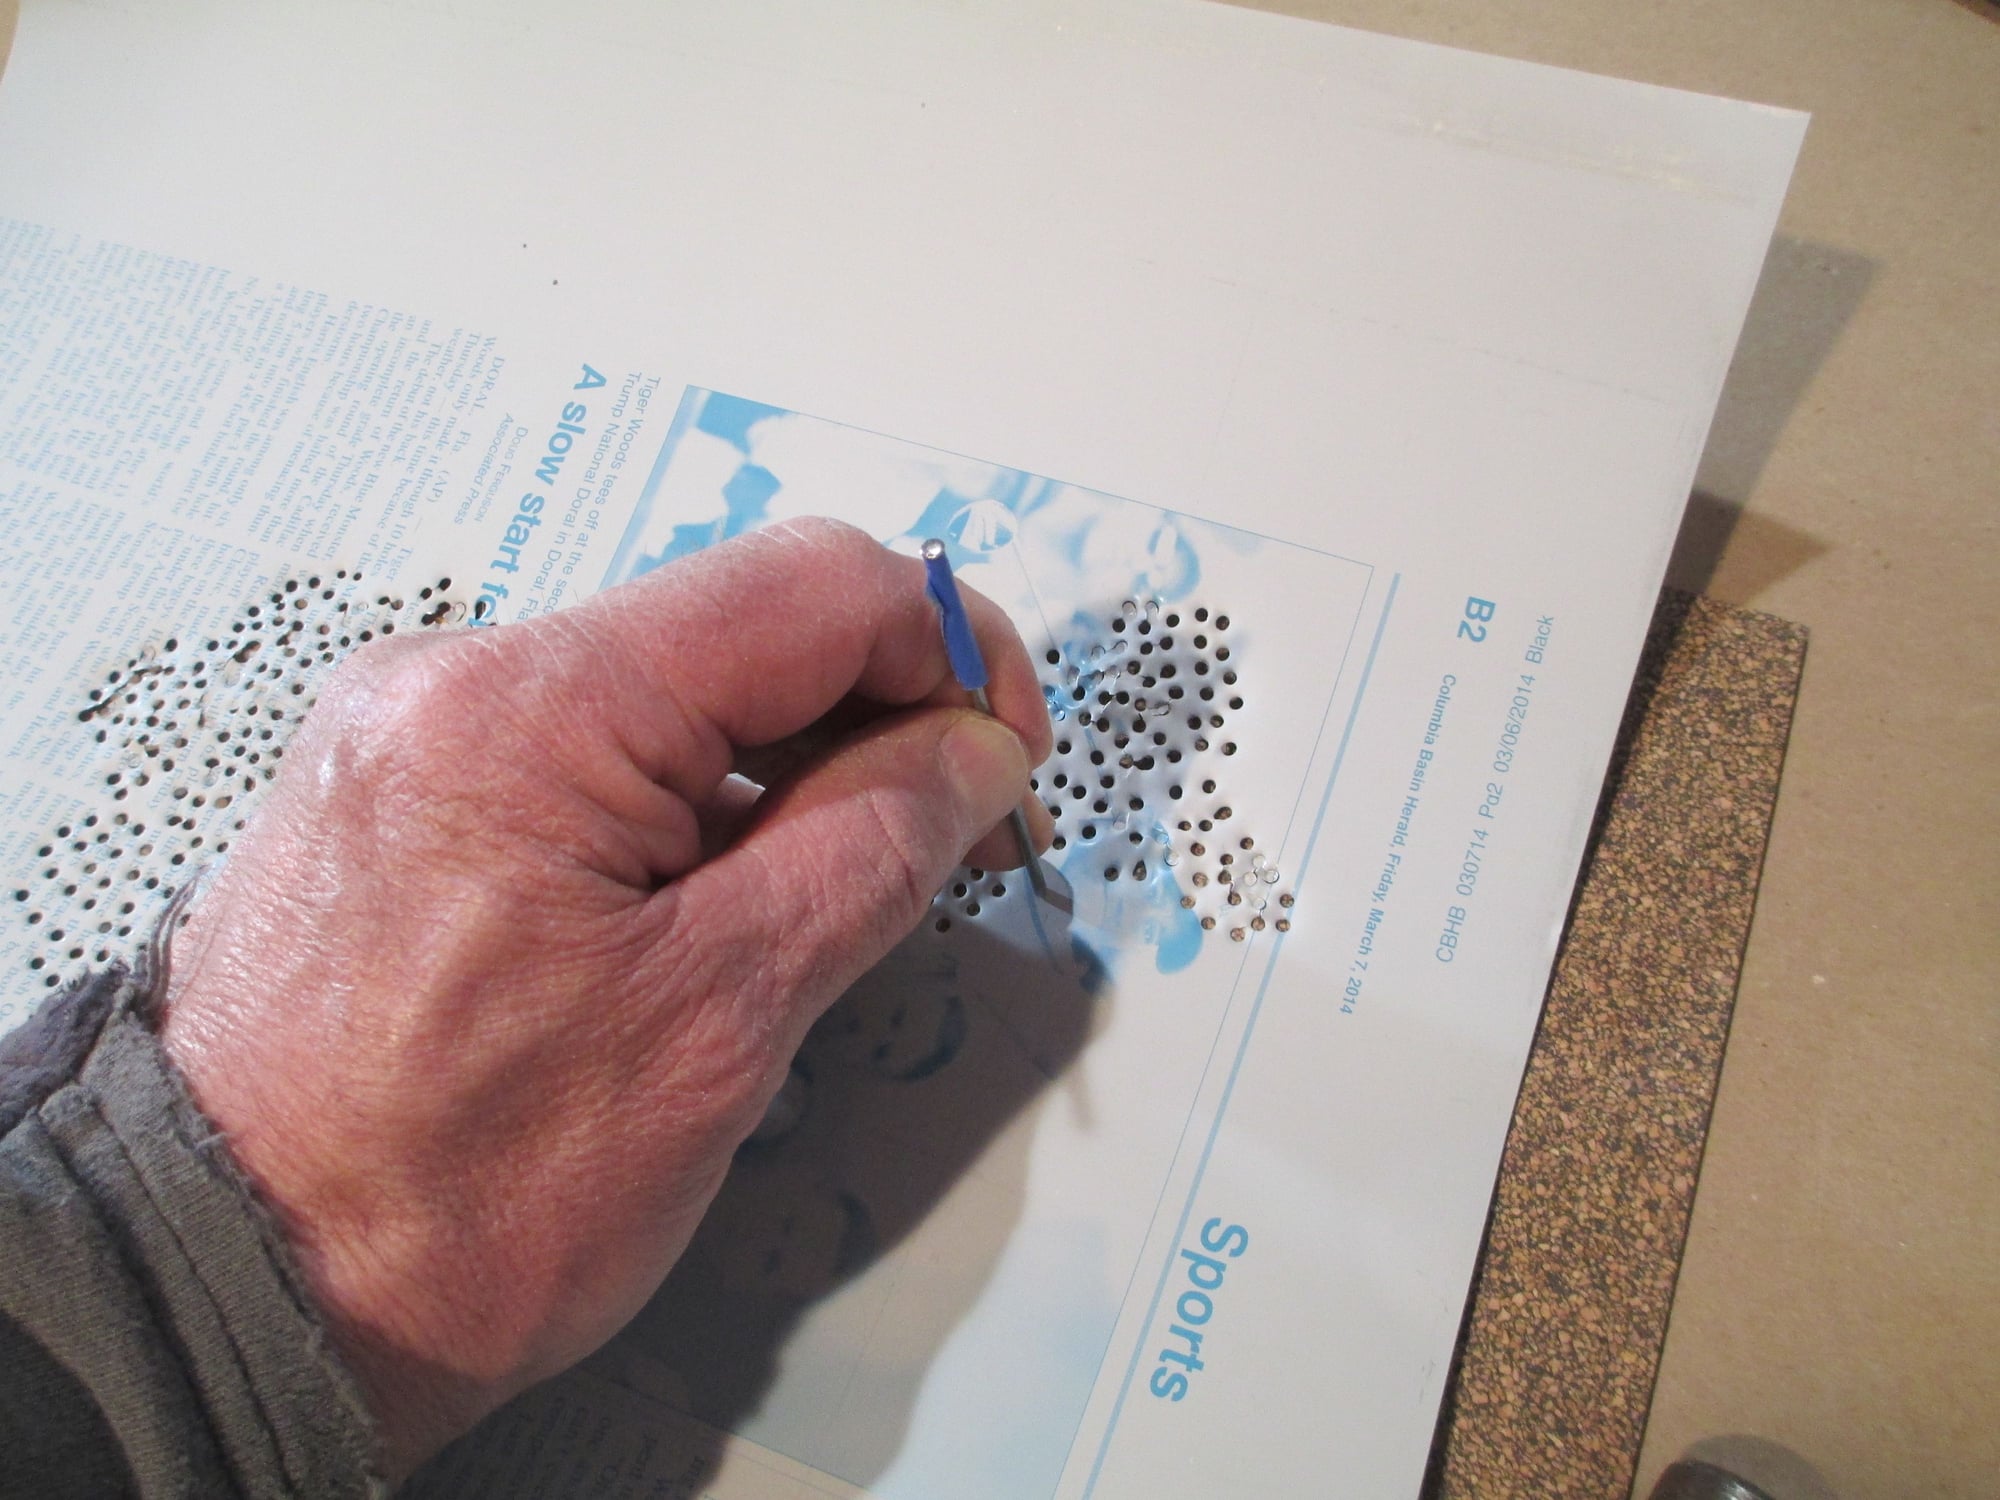
Note the cork behind the litho plate. You can produce rivets from empty soda or beer cans as well.
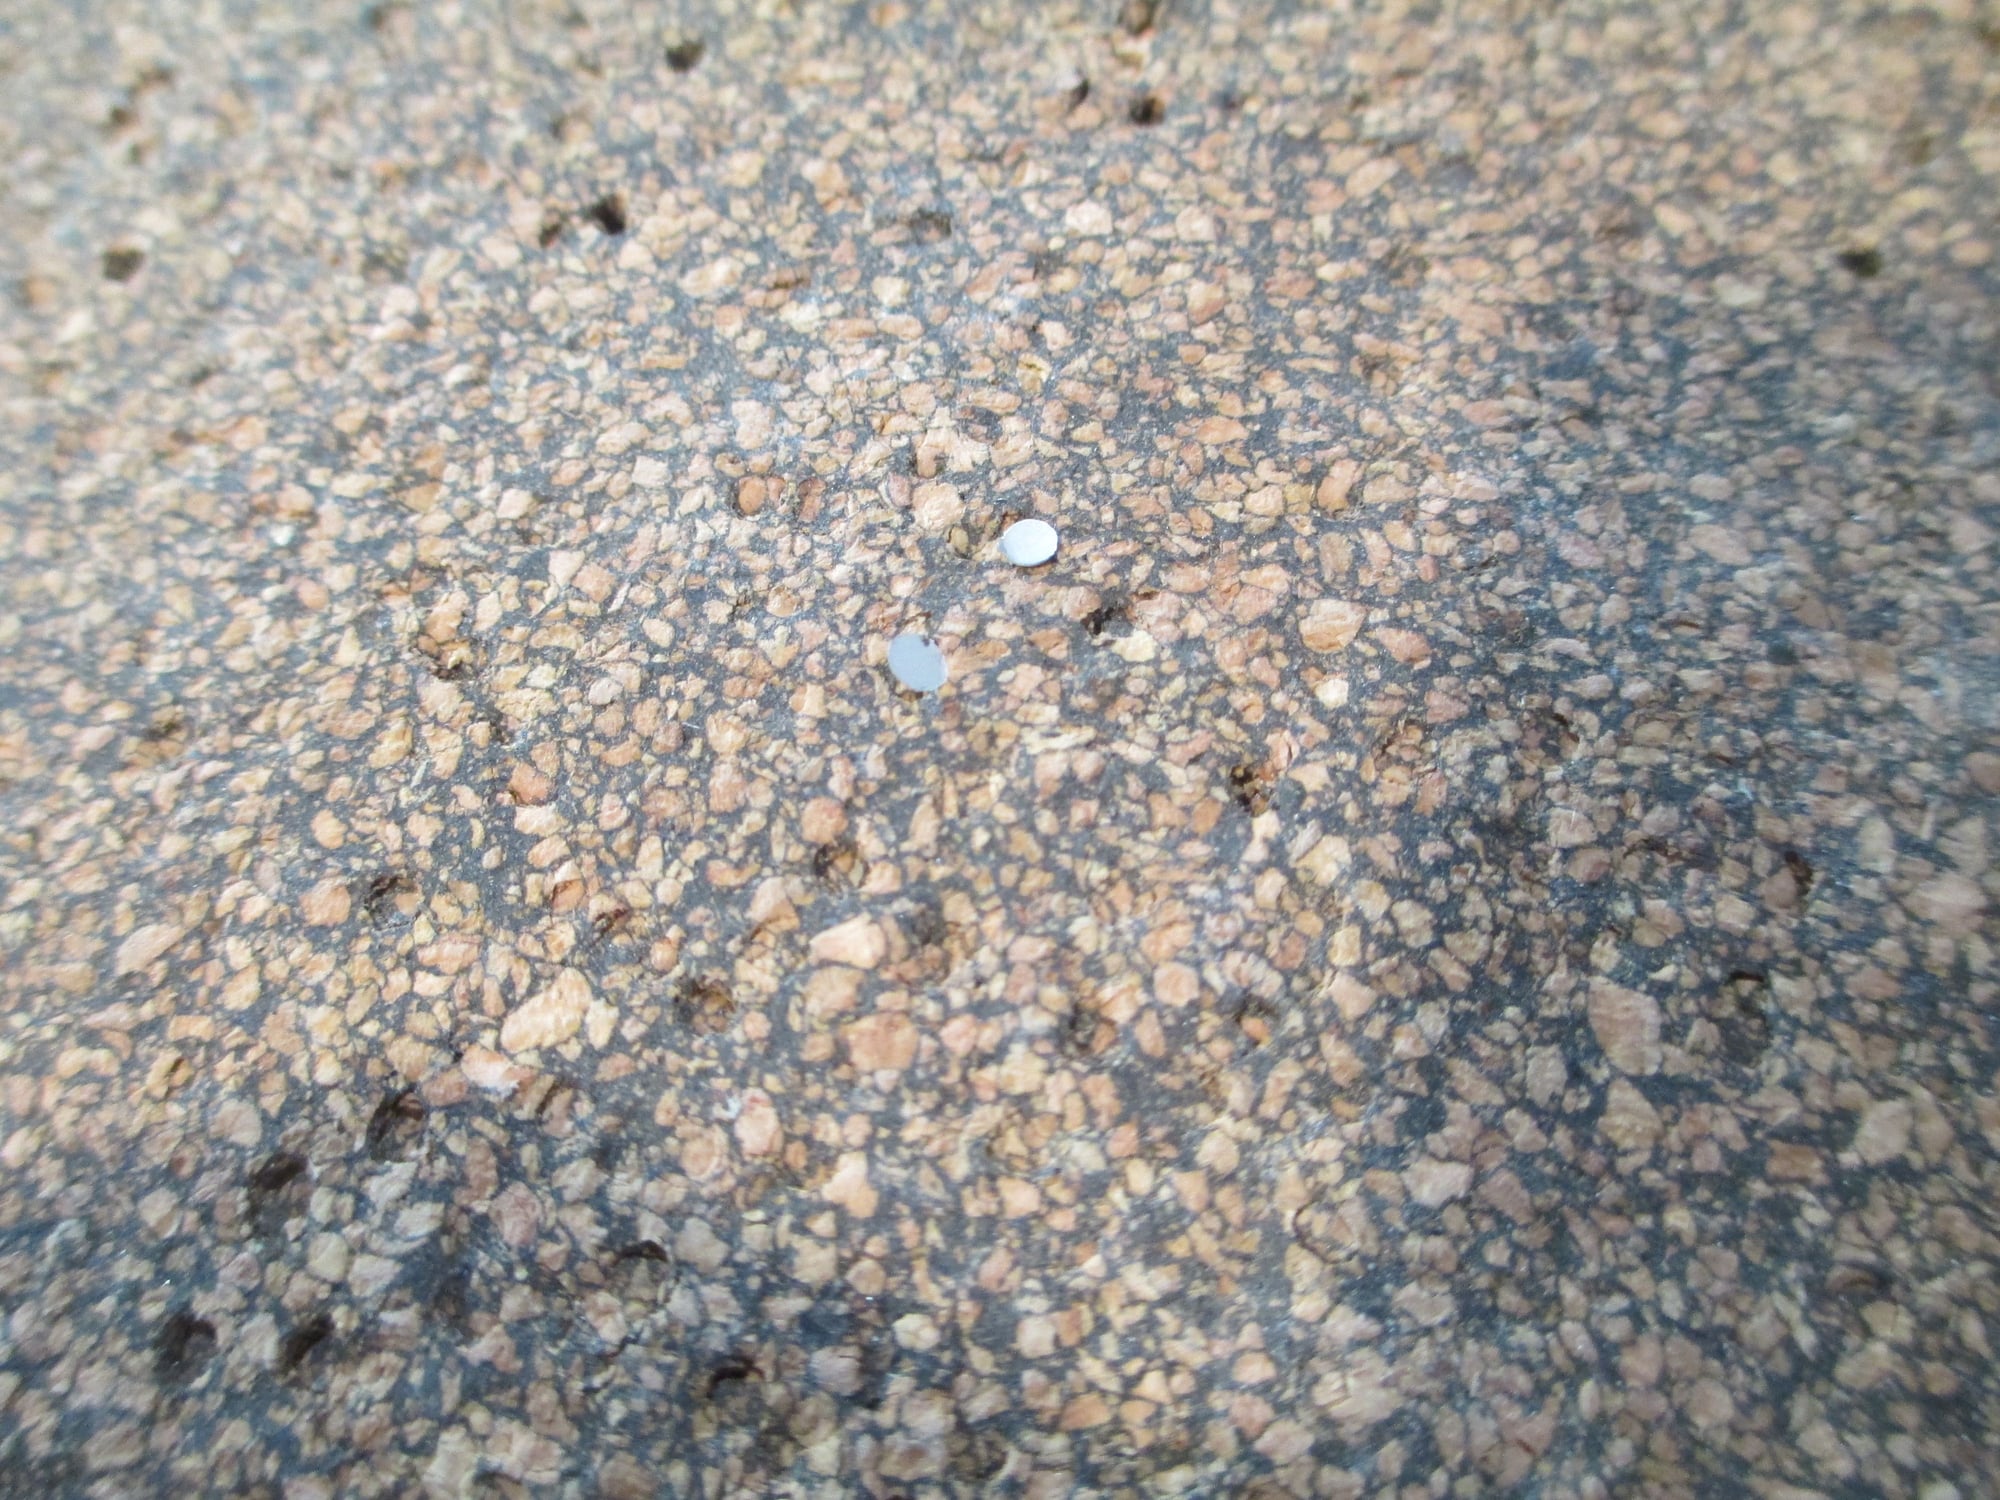
I knocked out two rivets, one flat , the other domed.
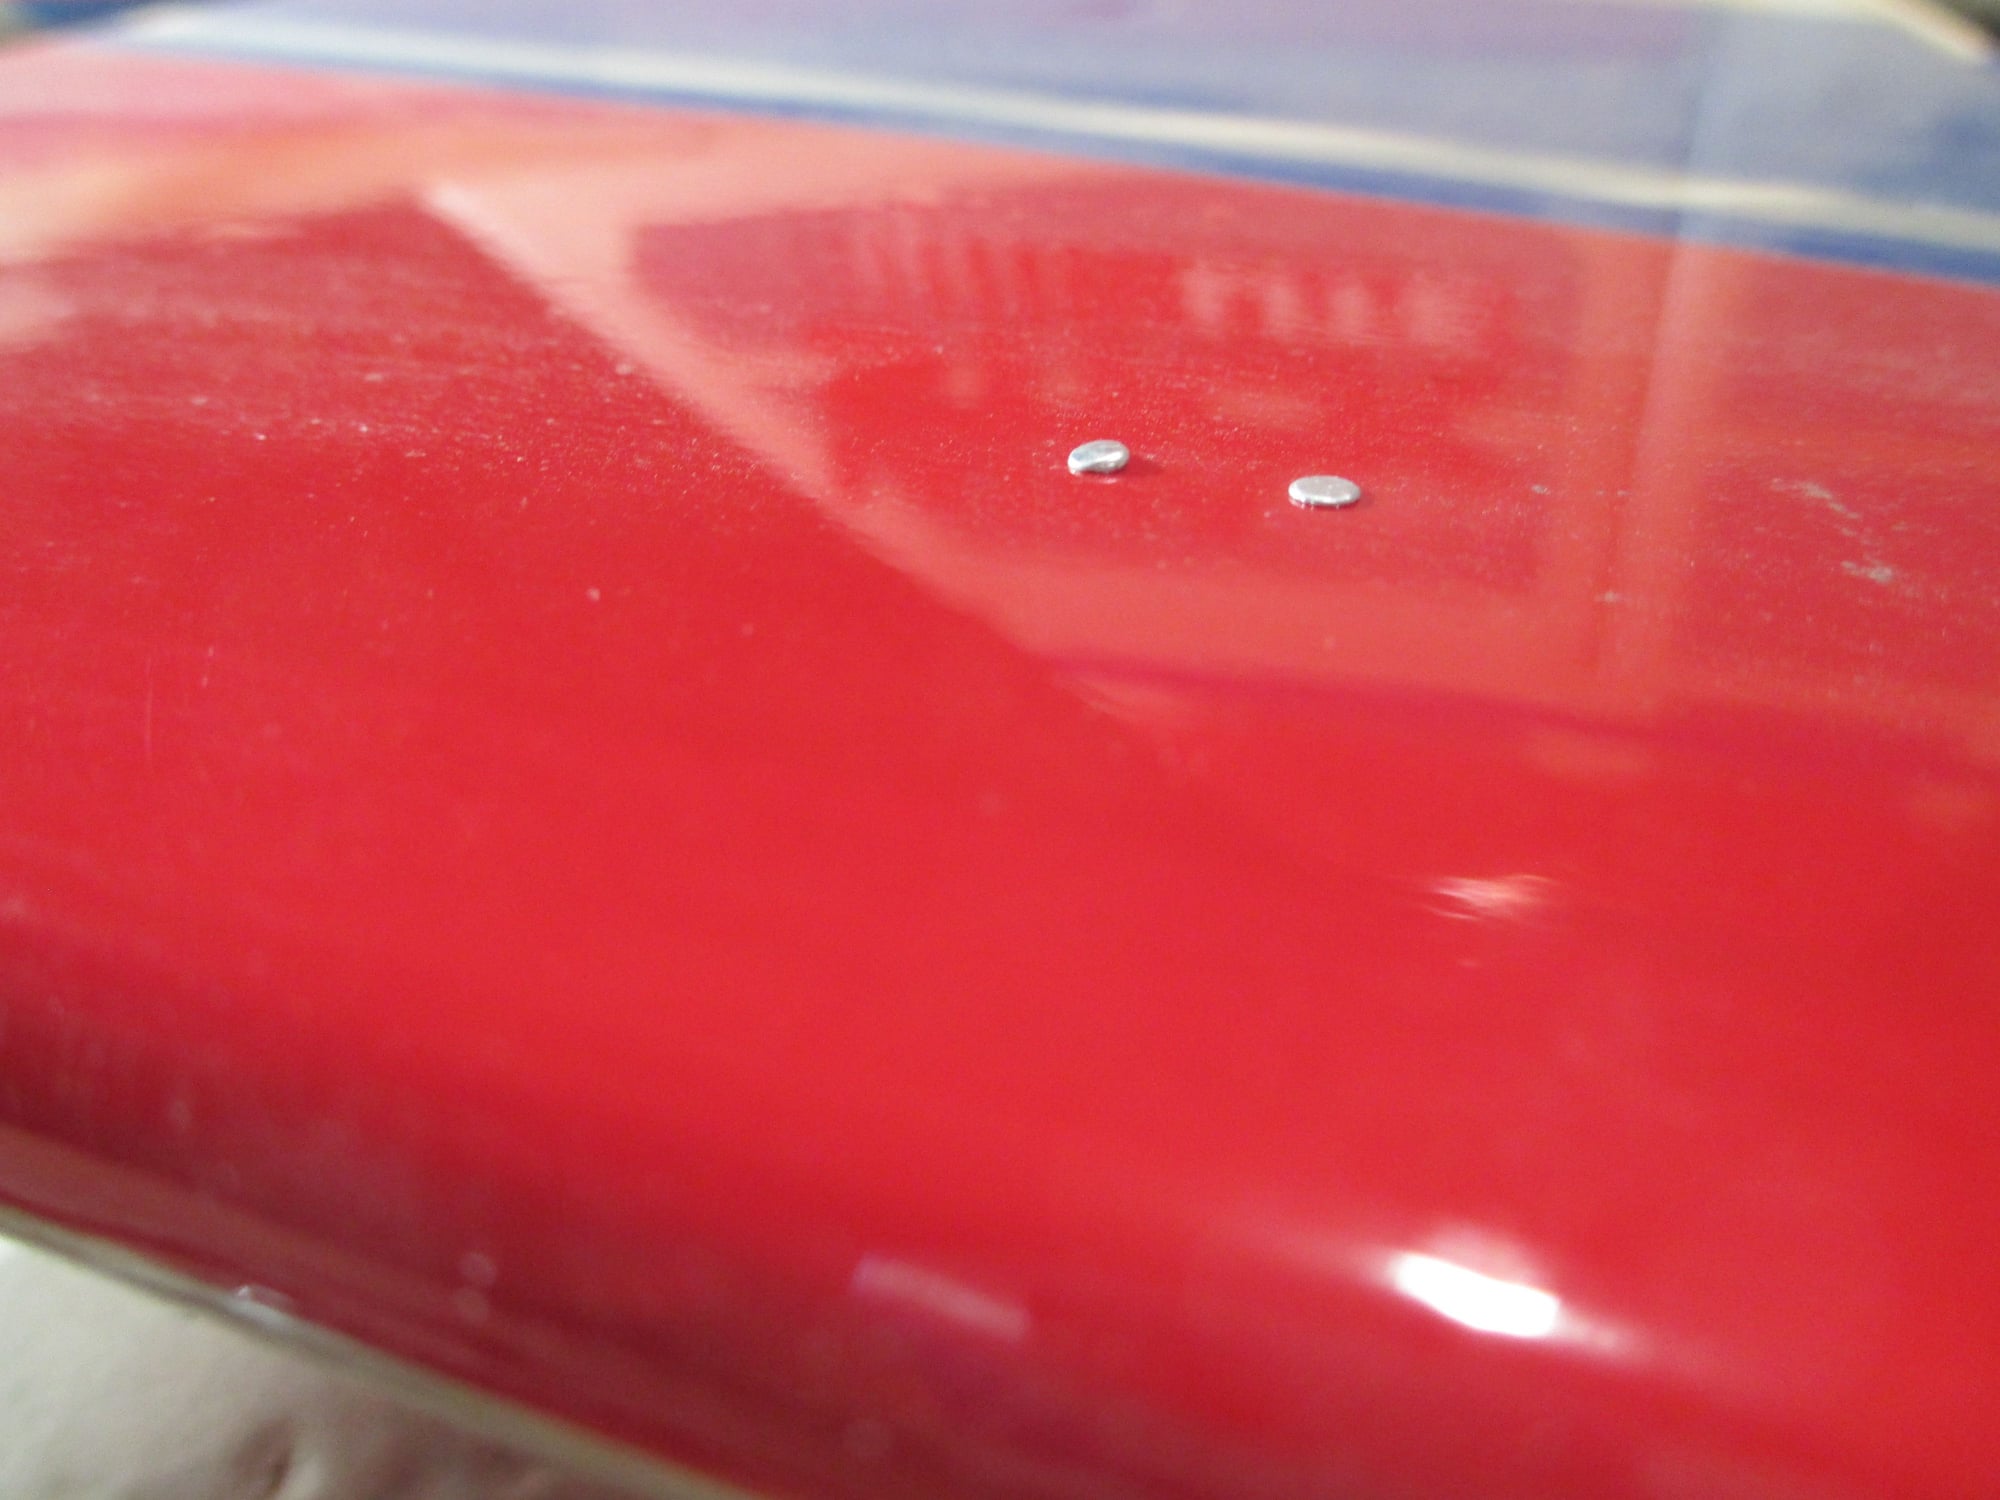
A subtle detail that will give you a totally different look.
04-03-2020, 05:05 AM
#1023
04-03-2020, 05:11 AM
#1025
Will give this technique a try when I get around to building my TF Cessna 182.