


E Z Arf Models

 08-14-2016, 08:32 PM
#352

Join Date: Jun 2007
Location: Moorpark, CA
Posts: 50
Likes: 0
Received 0 Likes
on
0 Posts
A general EZ question. Most of the EZ arfs as I recall used a single elevator servo with the forked pushrod (wood dowel with a metal rod at one end and two metal rods out to the elevator). I am putting together a Chipmunk like this and the setup is not at all stiff. You can grab either elevator and flop it around. At the very least, I think I will have to put a wood plate somewhere along the pushrod to keep it from flexing sideways with a load on the elevator. Whole setup seems cheesy. What do you guys do when a Y-type pushrod arrrangement is called for? Not much room to work with either on the EZ arfs, so redesigning it is out of the question. Anyone tried switching over to gold-n-rods or the like? Thanks.
 08-15-2016, 02:21 AM
#354

Yeap, me too, I used the arrow shaft and upgraded to 4-40 rods on the 60 size planes,,
link---- http://www3.towerhobbies.com/cgi-bin...&P=SM&I=LXB901,,
Good luck
link---- http://www3.towerhobbies.com/cgi-bin...&P=SM&I=LXB901,,
Good luck
Last edited by scale only 4 me; 08-15-2016 at 02:27 AM.
08-15-2016, 07:02 AM
#355
Join Date: Jun 2007
Location: Moorpark, CA
Posts: 50
Likes: 0
Received 0 Likes
on
0 Posts
So would the fiberglass shafts and 4-40 rods in the y-fork arrangement be stiff enough on it's own, or would that need some intermediate support along the shaft? With the y-fork, it seems like on some models if you push on one elevator half, the other one moves opposite because the long shaft is getting pushed sideways. Or could it be that I am overestimating how stiff the setup needs to be on a 40 size plane?
Oh, and what about just running two elevator servos? Would that add too much weight?
Oh, and what about just running two elevator servos? Would that add too much weight?
Last edited by go_hercules; 08-15-2016 at 07:18 AM. Reason: added info
08-15-2016, 04:23 PM
#356
A general EZ question. Most of the EZ arfs as I recall used a single elevator servo with the forked pushrod (wood dowel with a metal rod at one end and two metal rods out to the elevator). I am putting together a Chipmunk like this and the setup is not at all stiff. You can grab either elevator and flop it around. At the very least, I think I will have to put a wood plate somewhere along the pushrod to keep it from flexing sideways with a load on the elevator. Whole setup seems cheesy.
08-15-2016, 08:55 PM
#357
Join Date: Jun 2007
Location: Moorpark, CA
Posts: 50
Likes: 0
Received 0 Likes
on
0 Posts
I like the idea of extending the rod beyond the Y. I will see if I can squeeze that in. It's really tight on these EZ arfs. The other thing that bothers me (because I'm picky) is that when you run the pushrods out to the elevator halves, they push the control horn at an angle to the hinge line which induces a twist in the rod and control horn. I know most people just live with it but I was thinking of maybe putting a ball joint or something there.
08-16-2016, 02:24 AM
#358
So would the fiberglass shafts and 4-40 rods in the y-fork arrangement be stiff enough on it's own, or would that need some intermediate support along the shaft? With the y-fork, it seems like on some models if you push on one elevator half, the other one moves opposite because the long shaft is getting pushed sideways. Or could it be that I am overestimating how stiff the setup needs to be on a 40 size plane?
Oh, and what about just running two elevator servos? Would that add too much weight?
Oh, and what about just running two elevator servos? Would that add too much weight?
Place the servo sideways if you're really concerned about the minuscule differential the servo arm rotation would cause,, they always flew just fine for me,
Yeap,
The hardest part was snaking the rods through the slots, I would use the outer tube from nyrod as a guide, slide that in from the tail forward, slip it over the threads, then pull that all out as I pushed the push rod back,,, that worked well
good luck
Last edited by scale only 4 me; 08-16-2016 at 02:28 AM.
08-16-2016, 02:32 AM
#359
I like the idea of extending the rod beyond the Y. I will see if I can squeeze that in. It's really tight on these EZ arfs. The other thing that bothers me (because I'm picky) is that when you run the pushrods out to the elevator halves, they push the control horn at an angle to the hinge line which induces a twist in the rod and control horn. I know most people just live with it but I was thinking of maybe putting a ball joint or something there.
This is a long proven method used on much higher performance planes that the Chippy, you'll be fine
good luck
08-19-2016, 12:04 PM
#360
Junior Member
Join Date: Aug 2015
Posts: 1
Likes: 0
Received 0 Likes
on
0 Posts
Hello,
A while ago I bought a brand new EZ Zero(new in box), and a used, but almost new EZ P51B (1992) without motor.
I want to convert the P51 to electro, but I do not know the cg because I do not have the manual . I hope that someone can help me with the CG?
sorry for my bad English .
greetings
Coen
A while ago I bought a brand new EZ Zero(new in box), and a used, but almost new EZ P51B (1992) without motor.
I want to convert the P51 to electro, but I do not know the cg because I do not have the manual . I hope that someone can help me with the CG?
sorry for my bad English .
greetings
Coen
Last edited by Coen_l; 08-19-2016 at 12:13 PM.
11-25-2016, 03:11 PM
#362
Join Date: Jun 2007
Location: Moorpark, CA
Posts: 50
Likes: 0
Received 0 Likes
on
0 Posts
Hi, does anyone have a new or used 40 size EZ Super Chipmunk? The reason I ask is that I have a Hobbico Super Chipmunk that looks identical to the EZ - same construction, maybe produced by EZ. Anyway, I have no manual to locate the CG. I think the EZ ARF's have a mark on the fuse just above the wing saddle for the CG. The Hobbico version does not have that mark. If anyone could measure this mark from the leading edge then I could use that to balance my Chipmunk. I would sure appreciate any help.
11-25-2016, 08:38 PM
#363

My Feedback: (4)
Join Date: Jan 2002
Location: Westhampton Beach,
NY
Posts: 860
Likes: 0
Received 0 Likes
on
0 Posts
Amazing there such a lack of info about that plan on the web!
Id setup a search for eBay for that model and one pops up (which they do, last one was October 24th) email the seller for the info from the manual before they sell it.
http://www.ebay.com/itm/NEW-Chipmunk...YAAOSwLnBX6LR3
Looks like it didn't sell then, maybe he still has it??
Good luck!
Bill S.
Id setup a search for eBay for that model and one pops up (which they do, last one was October 24th) email the seller for the info from the manual before they sell it.
http://www.ebay.com/itm/NEW-Chipmunk...YAAOSwLnBX6LR3
Looks like it didn't sell then, maybe he still has it??
Good luck!
Bill S.
11-25-2016, 08:52 PM
#364
Join Date: Jun 2007
Location: Moorpark, CA
Posts: 50
Likes: 0
Received 0 Likes
on
0 Posts
Hey, thanks for that info. I will send him a message and see if he can help me. In case not, I would still be interested in hearing from anyone else about the EZ Chipmunk. Thanks.
11-26-2016, 05:54 AM
#365
My Feedback: (23)
Plus one on the arrow shaft with 4-40 rods. The supplied wooden dowel set up on all the larger EZ models was not sufficient. I replaced the linkage with carbon fibre arrowshaft on my 120 size Chipmunk right out of the box. You might even notice more precise aerobatics and less snapping out of a roll with a stiffer elevator linkage..
paul
paul
01-22-2017, 09:36 PM
#366
My Feedback: (65)
Join Date: May 2002
Location: Tulare,
CA
Posts: 176
Likes: 0
Received 0 Likes
on
0 Posts
Resurrecting another one. Found it at a swap meet. Had been finished but never flown but was moved around so much over the years it needed a lot of work. The OS .28 in it was used so I pulled it apart and thoroughly went through it......runs absolutely great! I replaced all the original radio equipment with lighter and smaller servos to lighten it up a bit. Needs more cosmetic TLC but I don't want to invest any more time in it until I've put a hand full of flights on it.

Last edited by 52jaws; 11-01-2017 at 04:26 PM.
02-09-2017, 11:17 PM
#368
My Feedback: (65)
Join Date: May 2002
Location: Tulare,
CA
Posts: 176
Likes: 0
Received 0 Likes
on
0 Posts
I've heard it said that when something is very rare one will tend to phrase..."It's rare as hens teeth".
Well I got pretty close.....a very rare find indeed I've been blessed to find!
Well I got pretty close.....a very rare find indeed I've been blessed to find!
02-10-2017, 08:52 AM
#370
My Feedback: (65)
Join Date: May 2002
Location: Tulare,
CA
Posts: 176
Likes: 0
Received 0 Likes
on
0 Posts
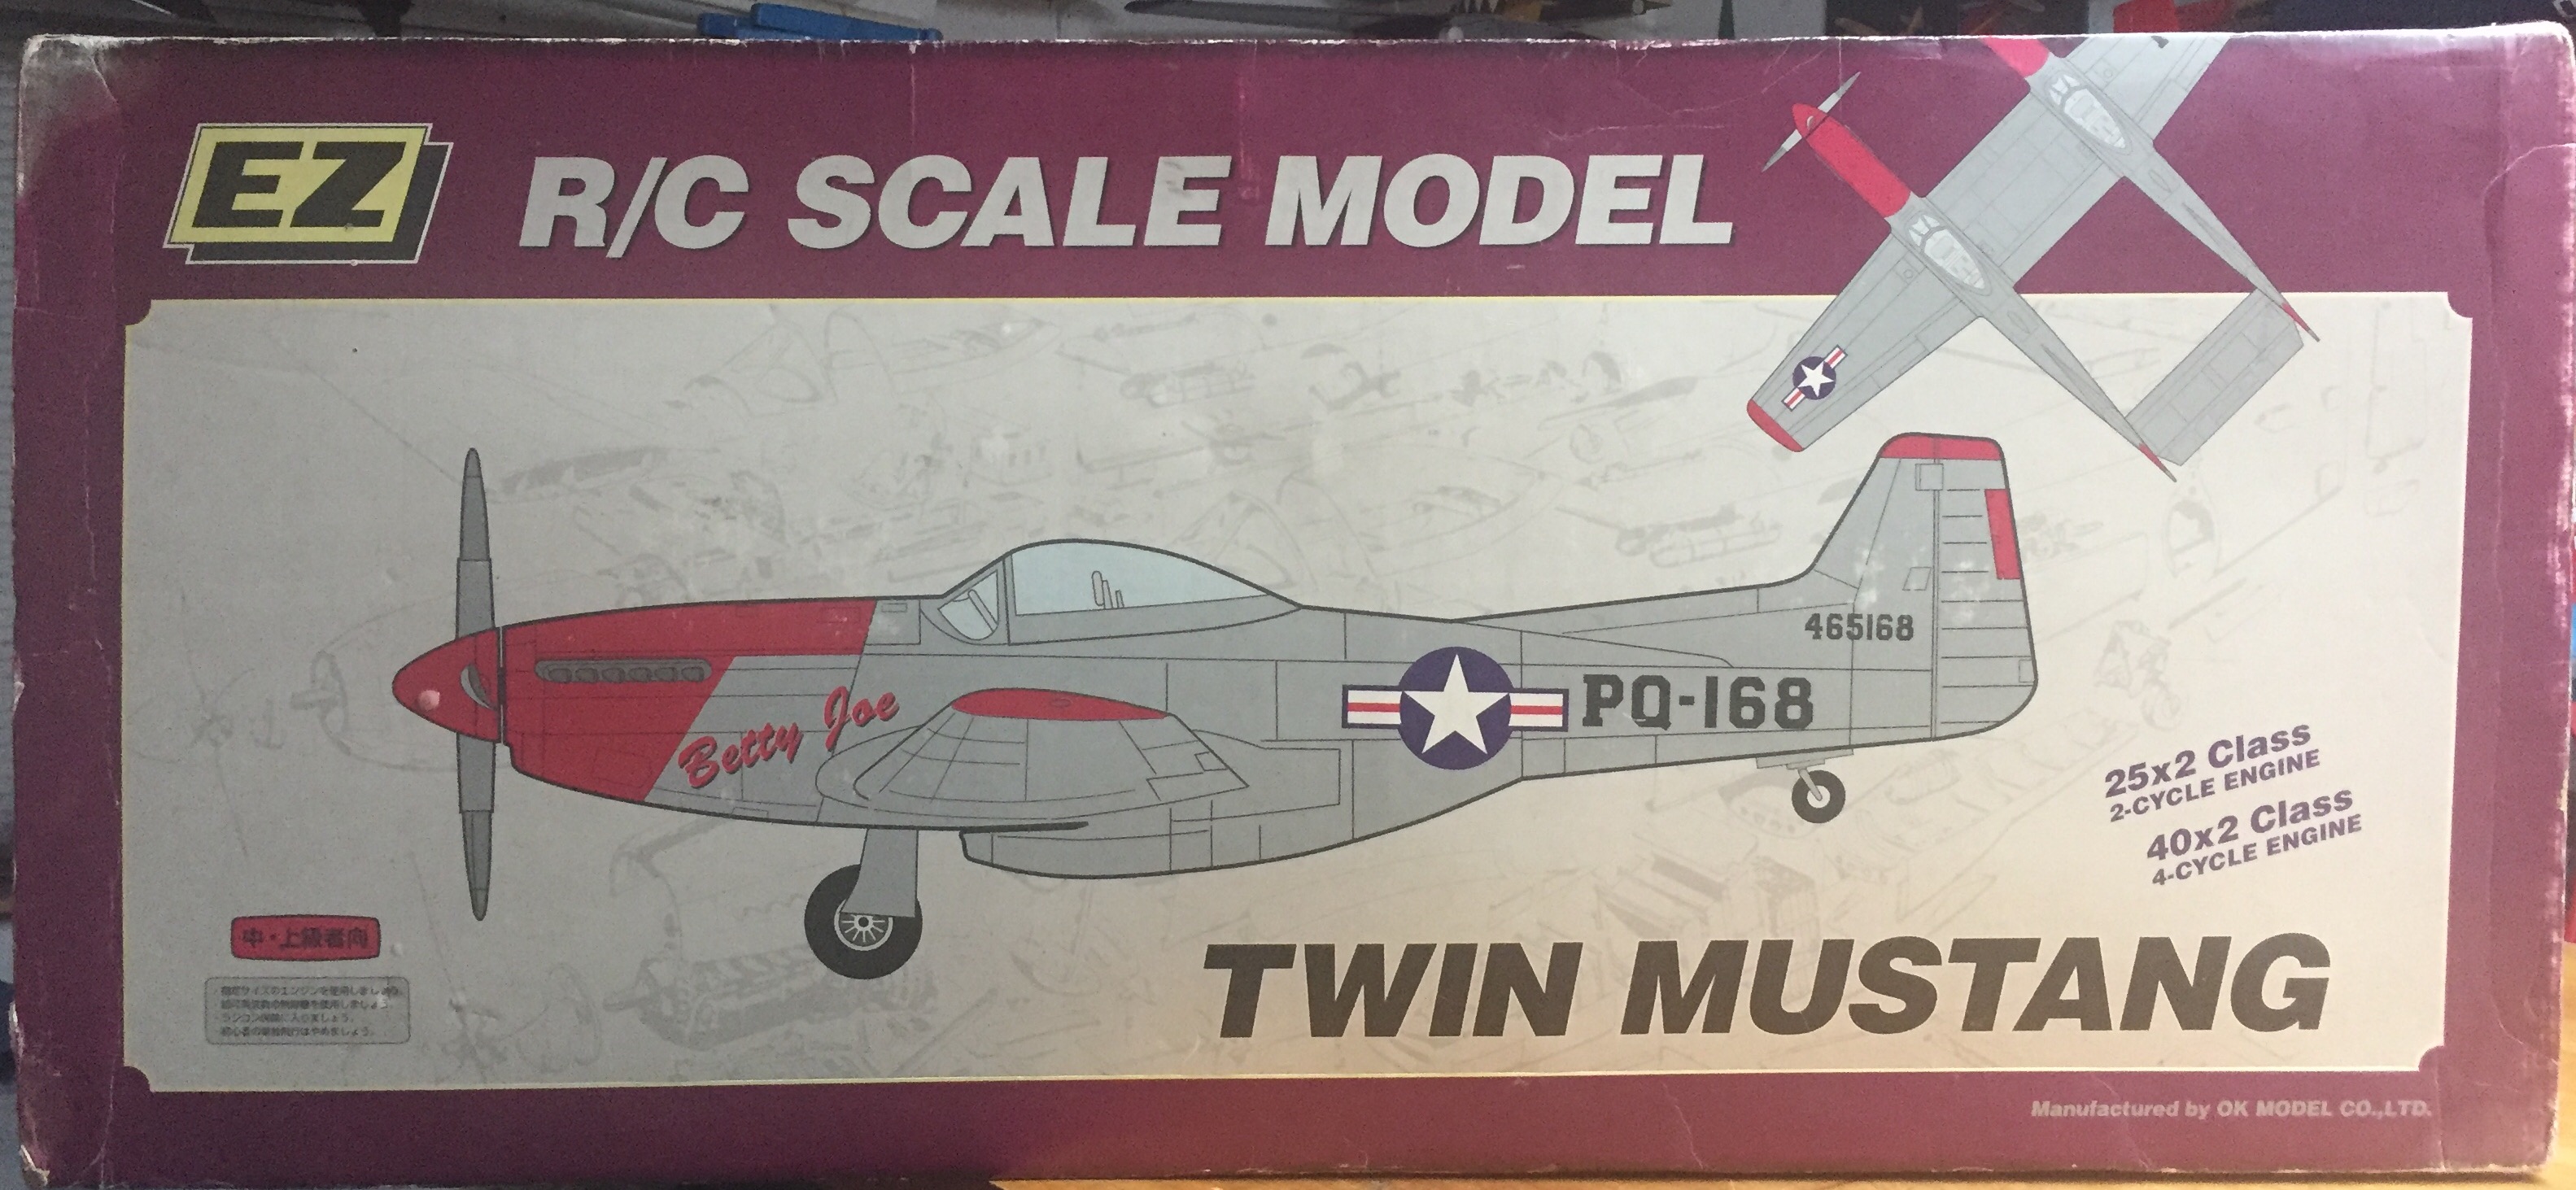
It was never one that was distributed in the U.S.
Sportsman Aviation made several models that weren't. Some were re-branded through Hobbico, Great Planes, Lyon Models and even Royal. Slight changes were made to some. For example the Hobbico Ultimate that was distributed years ago was brought in in the red, silver and blue scheme. In Europe is was under the E/Z brand and was the blue with yellow stripe "Bluehawk" sheme. Another one that is interesting is the Hobbico Diabolo versus the E/Z version. Absolutely identical with the exception that on the Hobbico version the horizontal and vertical stabs are aproximately 1" longer in overall width/height. I know this because I have both and have layed one on top of the other. At the root or base where these would be epoxied to the fuse the dimensions are the same .
Im assuming at Hobbico they said.....Yeah, we'll take "X" number of kits but we want these a little longer etc.
Smart marketing not to re-invent the wheel rather improve a touch.
04-13-2017, 11:00 AM
#371
Junior Member
Join Date: Apr 2017
Posts: 1
Likes: 0
Received 0 Likes
on
0 Posts
05-08-2017, 09:16 PM
#373
My Feedback: (65)
Join Date: May 2002
Location: Tulare,
CA
Posts: 176
Likes: 0
Received 0 Likes
on
0 Posts
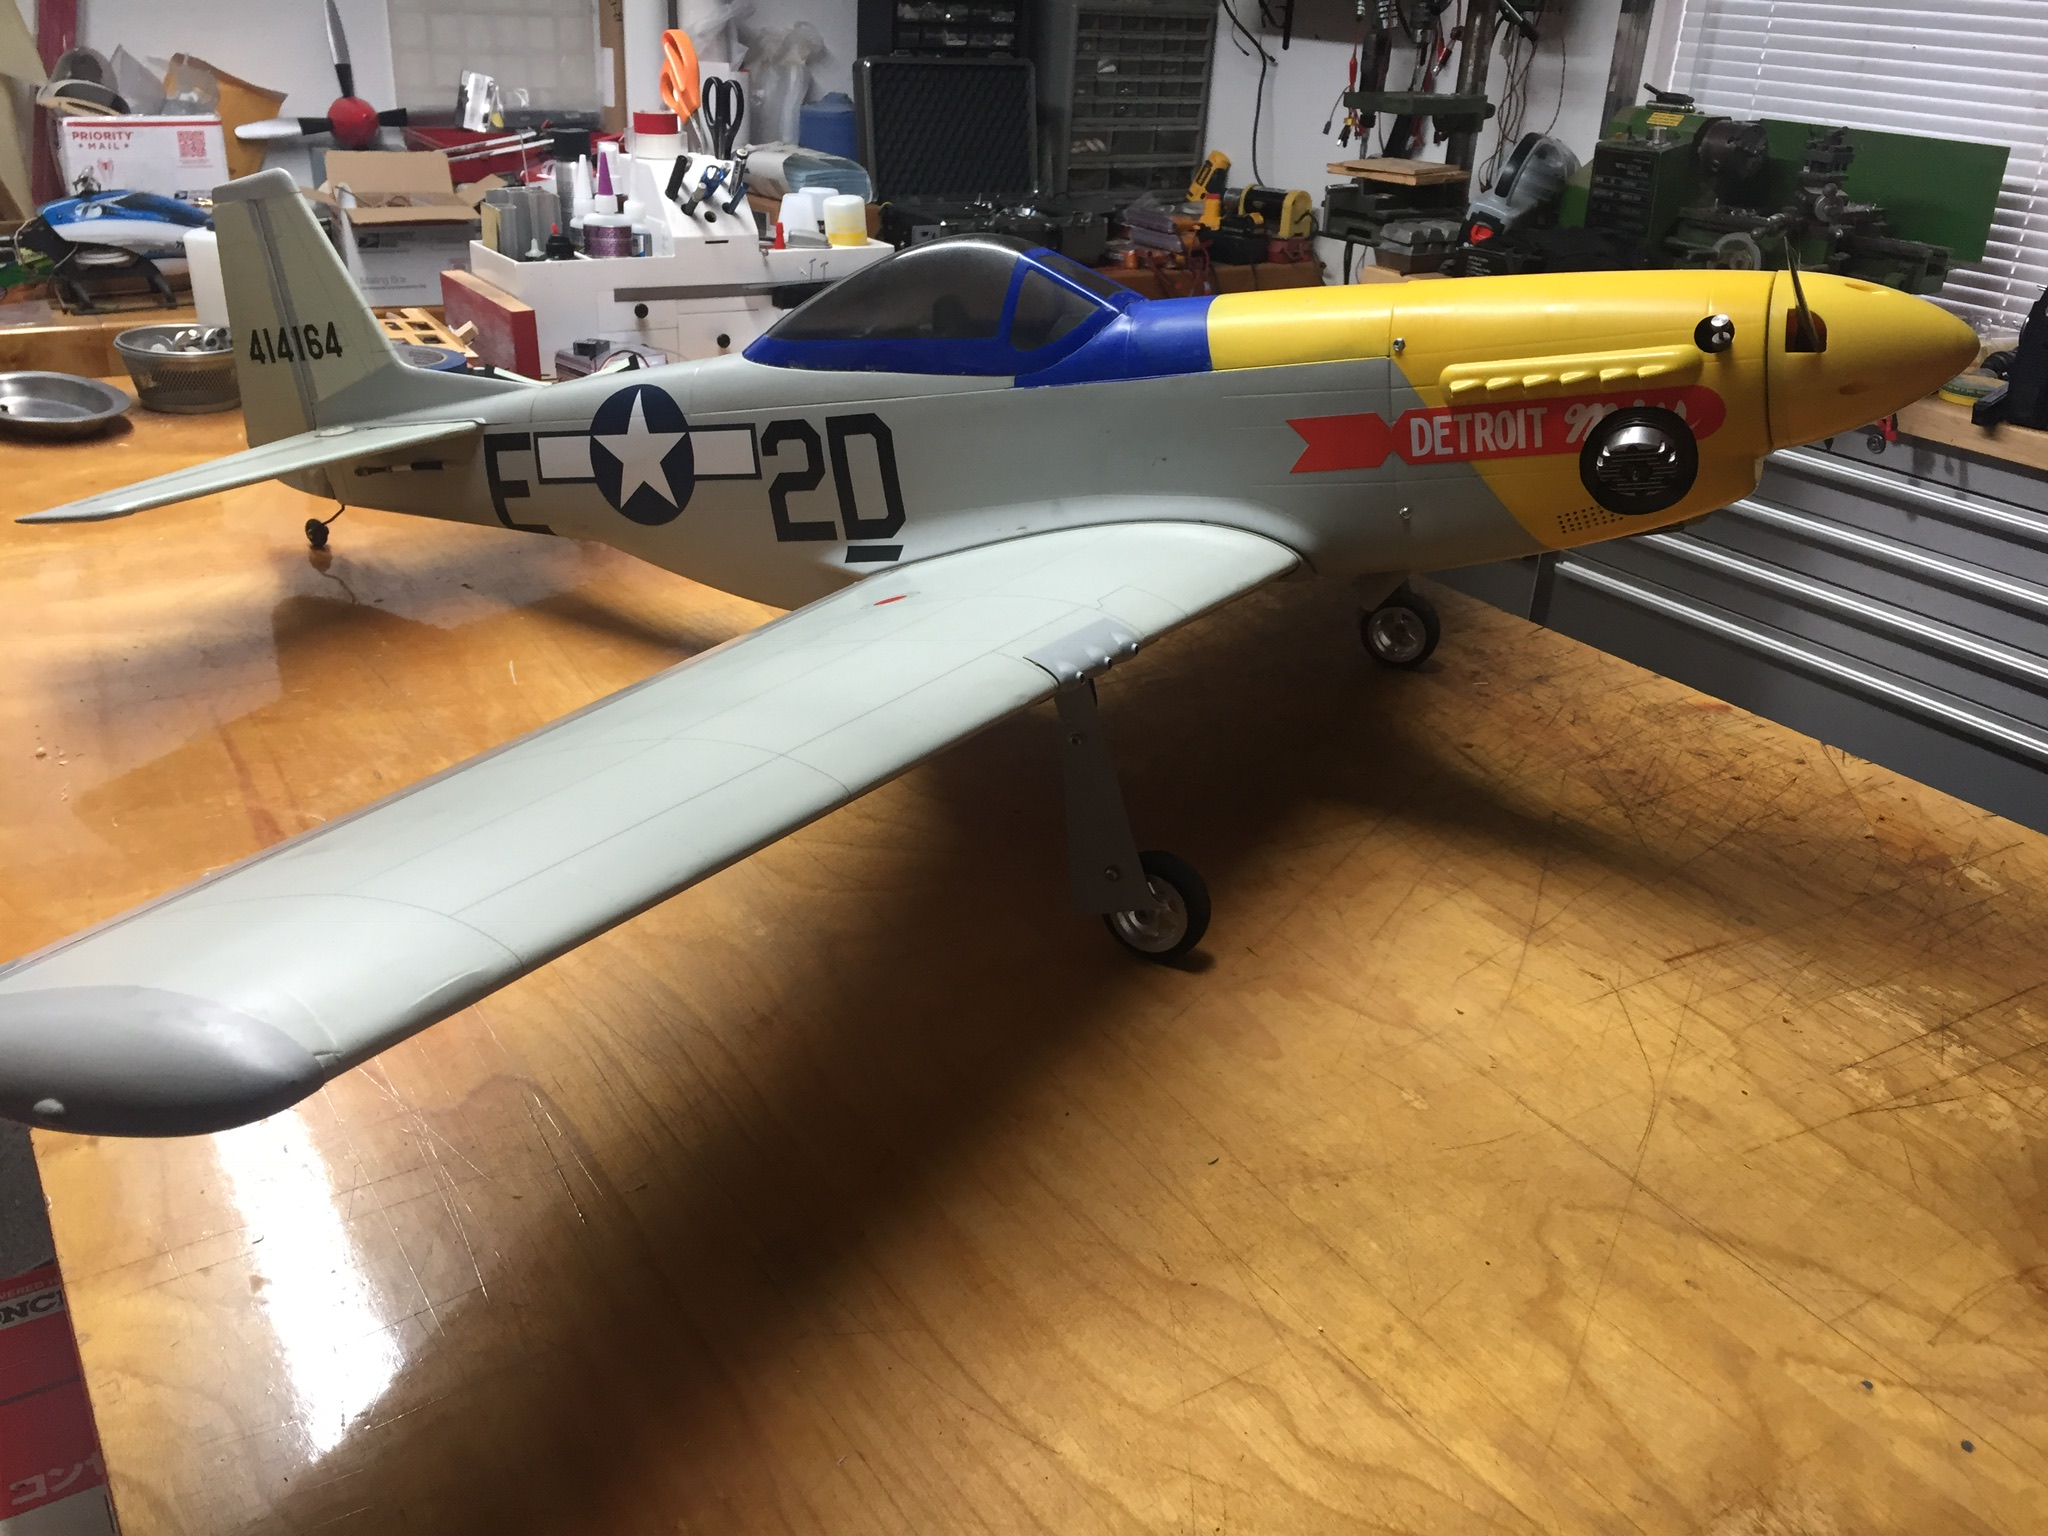
I have in fact pulled fuses apart to repair but keep in mind this using a sacrificial fuse to cannibalize the parts from. I'll be posting a couple pics of a Mustang that I did this to. I bought it at a swap meet for $40. Previous owner had modified it for electric and in doing so modified the firewall with a large opening to facilitate an electric conversion. He did a good job but I fly glo so I carefully removed it but just painstakingly cutting it away with a dremel. As I got close to the foam I then resorted to the razor knife and small saw. Removing the good firewall from a wrecked air frame was easy since the sides are blown out. so its easier to "chip" away the damaged stuffed heading into the firewall. I then dry fit it the other and when happy.....epoxy. The nice thing with E/Z is that all formers and parts are "keyed" so fairly easy. I also changed the former just behind the firewall and was just as simple as lightly prying it back and forth until the glue finally popped so-to-speak. the glue that E/Z used has been referred to as "hot glue". Let me tell you it is not. It "looks" like it and even has a slight softness to it but is in fact an epoxy based product. So most formers are easy to replace with some coercing and flexing and a lot of patience!
Now as for the seam you have to be very careful. If it has been fuel soaked or in the sun it is most likely brittle and doesn't stand a chance of survival. If it is not then your next challenge is the foam and not damaging it.
I have only been successful once at this and I did it with a heat gun slowly working the temperature up to soften the glue but not warp the plastic or melt the foam. I've never tried doing it cold although I have a feeling the glue could be "popped' loose as well with some very careful strategy. I thought about once bending an exact-o blade similar to the tool a car windshield repair guy uses to break the seal with....some what of a hooked blade.
Now the creases unfortunately will never go away. Again here I have managed to bring a little bit of a crease out with slight and slow heat but never come up with a solid method. Unfortunately the creases got the edge on me for now and I think that's just one repair that will always be elusive......just not meant to be.
E/Z knew what they were doing back in the day......designed life span so then you could just get another. These models were never meant to be repaired nor especially abused in the way you can a traditional balsa and film plane. They all flew well when set up properly but they had flaws there as well in the typical foreign translation to English barrier. CGs were printed wrong and instructions on a lot the models should be sequenced differently but hey.......that's the hobby....learn and modify as you go.
Hope that was some help
Paul
05-09-2017, 05:00 AM
#374
Join Date: May 2006
Location: liberty,
UT
Posts: 18
Likes: 0
Received 0 Likes
on
0 Posts
Thanks Paul,
My close friend figured out several matching monocote trim sheats and cut the creases out fixed the underlying crunches and then epoxied in meat tray foam and then covered that(matched surface level) with the trim sheets.... You honestly couldn't tell until you got real close. I may go that route.
My close friend figured out several matching monocote trim sheats and cut the creases out fixed the underlying crunches and then epoxied in meat tray foam and then covered that(matched surface level) with the trim sheets.... You honestly couldn't tell until you got real close. I may go that route.
06-21-2017, 10:12 AM
#375
Junior Member
Join Date: May 2017
Posts: 6
Likes: 0
Received 0 Likes
on
0 Posts
I had two of these way back in the early 90s and flew the piss out of them. Found this one locally. The seller had this stashed away in a closet. Everything was still sealed in plastic bags. I still have the old Magnum .25ABC I ran with the old ones, still in like new shape and runs well.